Introduction
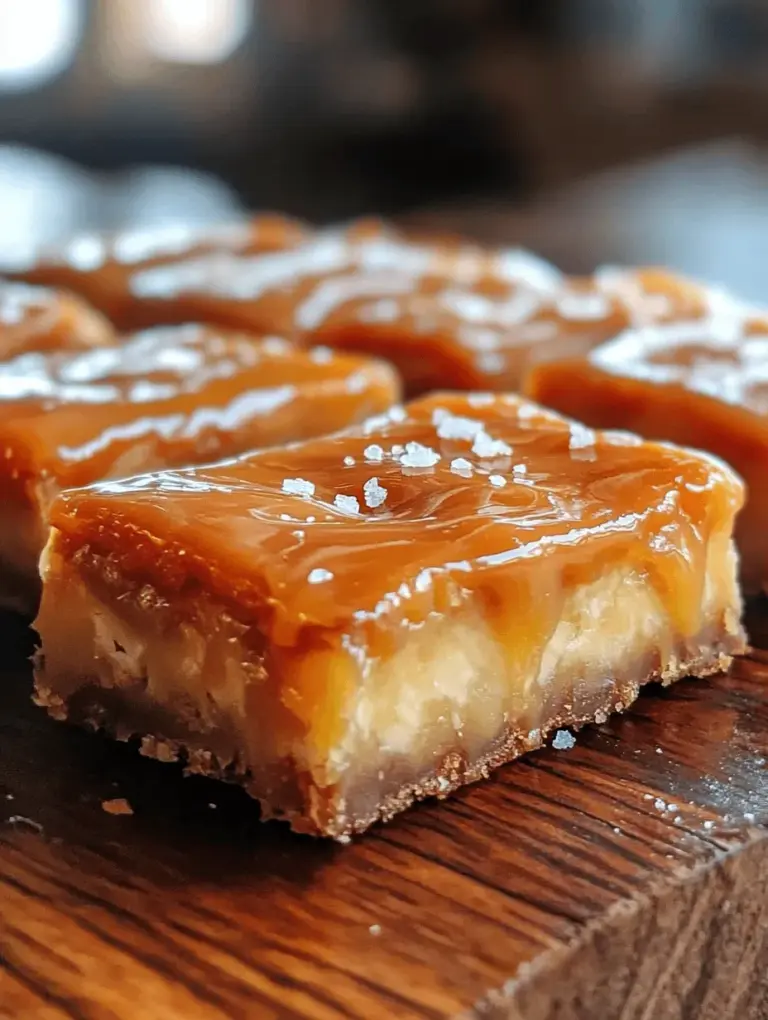
Imagine sinking your teeth into a gooey, buttery bar that perfectly balances the rich sweetness of caramel with a delightful hint of sea salt. Salted caramel butter bars are the epitome of dessert indulgence, offering a harmonious blend of flavors that caters to both sweet and salty cravings. This decadent treat has taken the dessert world by storm, becoming a staple at family gatherings, potlucks, and cozy nights at home. Whether served warm with a scoop of vanilla ice cream or enjoyed cold with a cup of coffee, these bars are sure to please every palate.
The rise of salted caramel in the culinary scene has redefined traditional desserts, making this flavor combination a favorite among dessert lovers. The addition of sea salt elevates the sweetness of caramel, creating a taste sensation that leaves a lasting impression. If you’ve been searching for a recipe that perfectly marries these flavors while being easy to prepare, look no further. In this article, we will guide you through the process of making salted caramel butter bars, ensuring you can create this delightful dessert with ease and confidence.
The Allure of Salted Caramel
Salted caramel has an intriguing history that traces back to France, where chefs first began experimenting with the combination of sugar and salt. The concept quickly gained traction, becoming a beloved flavor profile that transcended borders and cultural boundaries. The culinary world embraced salted caramel, incorporating it into everything from chocolates and cakes to sauces and ice creams, showcasing its versatility and appeal.
At the heart of this flavor combination lies the delicate balance between sweet and salty. The sweetness of caramel, created by cooking sugar until it melts and turns a rich golden brown, is formidable on its own. However, the introduction of sea salt transforms the experience entirely. Sea salt enhances the complexity of flavors, bringing out the deep, buttery notes of caramel while also providing a satisfying crunch. This interplay of flavors has captivated dessert enthusiasts everywhere, making salted caramel a sought-after ingredient in modern baking.
Whether you’re a seasoned baker or a novice in the kitchen, the allure of salted caramel butter bars is undeniable. The simplicity of the recipe allows you to focus on the balance of flavors, while the end result is a show-stopping dessert that will have everyone asking for seconds.
Essential Ingredients for Salted Caramel Butter Bars
To achieve the perfect salted caramel butter bars, it’s essential to use high-quality ingredients that work harmoniously together. Below is a comprehensive list of ingredients, along with insights into their roles in the recipe.
– Unsalted Butter: The backbone of this recipe, softened unsalted butter is crucial for achieving the desired texture. Using unsalted butter allows for more control over the salt content, ensuring that the final product isn’t overly salty. Additionally, butter contributes to the richness and flavor of the bars, making them irresistibly decadent.
– Sugars: This recipe calls for both granulated and brown sugars. Granulated sugar provides sweetness and helps create a slightly crisp texture, while brown sugar adds moisture and a hint of caramel flavor due to its molasses content. The combination of the two sugars results in a perfectly balanced sweetness and a chewy texture that makes these bars so delightful.
– Eggs: Eggs play a vital role in binding the ingredients together, enriching the batter with their protein and fat content. They contribute to the structure of the bars, helping them rise and hold their shape while baking. For the best results, ensure your eggs are at room temperature before mixing them into the batter.
– Vanilla Extract: A splash of pure vanilla extract enhances the overall flavor profile, adding a warm, aromatic note that complements the caramel and butter. Opt for high-quality vanilla extract for the best taste.
– Dry Ingredients: The dry ingredients in this recipe include all-purpose flour, baking powder, baking soda, and salt. Flour provides the structure needed for the bars, while baking powder and baking soda help with rising. A pinch of salt balances the sweetness and amplifies the flavors in the dessert.
– Caramel Sauce: The star of this dessert is undoubtedly the caramel sauce. You can choose to use store-bought caramel sauce for convenience or make your own from scratch for an extra touch of indulgence. When selecting store-bought options, look for high-quality brands that use real ingredients without additives.
– Sea Salt Flakes: To finish off your salted caramel butter bars, a sprinkle of sea salt flakes is essential. The crunchy texture of sea salt adds an extra layer of flavor and visual appeal, making each bite a delightful experience. Sea salt flakes are preferred for their delicate taste and presentation.
With these essential ingredients in hand, you’re well on your way to creating a batch of salted caramel butter bars that will leave your taste buds singing. Now, let’s dive into the step-by-step instructions for perfecting this delectable dessert.
Step-by-Step Instructions for Perfect Bars
Step 1: Preheat the Oven
Before you start mixing your ingredients, preheat your oven to 350°F (175°C). This ensures that the bars bake evenly and achieve the perfect texture. While the oven is heating, line an 8×8-inch baking dish with parchment paper, allowing for some overhang on the sides. This will make it easy to lift the bars out of the dish once they’re baked and cooled.
Step 2: Cream the Butter and Sugars
In a large mixing bowl, combine the softened unsalted butter, granulated sugar, and brown sugar. Using an electric mixer, cream the ingredients together on medium speed until the mixture is light and fluffy, which should take about 2-3 minutes. This step is crucial as it incorporates air into the batter, resulting in a tender, chewy texture.
Step 3: Add the Eggs and Vanilla
Once the butter and sugars are well combined, add the eggs one at a time, mixing well after each addition. Then, pour in the vanilla extract and continue mixing until everything is fully combined. The batter should be smooth and creamy at this point.
Step 4: Combine Dry Ingredients
In a separate bowl, whisk together the all-purpose flour, baking powder, baking soda, and salt. This step ensures that the leavening agents are evenly distributed throughout the flour, preventing any clumps in the final batter. Gradually add the dry ingredients to the wet mixture, mixing on low speed until just combined. Be careful not to overmix, as this can result in dense bars.
Step 5: Prepare the Caramel Layer
If you’re using homemade caramel sauce, prepare it according to your preferred recipe. If you’ve opted for store-bought, simply warm it slightly to make it easier to spread. Once your caramel is ready, set it aside while you prepare the batter for the bars.
Step 6: Assemble the Bars
Pour half of the batter into the prepared baking dish, spreading it into an even layer. Next, drizzle the caramel sauce over the batter, ensuring to leave some space around the edges to prevent it from spilling over during baking. Finally, spoon the remaining batter over the caramel layer, using a spatula to gently spread it out. It’s okay if some of the caramel peeks through; this will add to the character of the bars.
Step 7: Bake to Perfection
Place the baking dish in the preheated oven and bake for 25-30 minutes, or until the edges are golden brown and a toothpick inserted into the center comes out with a few moist crumbs. Keep an eye on the bars during the last few minutes of baking to ensure they don’t overcook.
Step 8: Add Sea Salt Flakes
Once the bars are out of the oven, immediately sprinkle a generous amount of sea salt flakes over the top while they’re still warm. The heat will help the salt adhere to the surface, enhancing the overall flavor profile.
Step 9: Cool and Slice
Allow the salted caramel butter bars to cool in the baking dish for at least 20-30 minutes, then use the parchment overhang to lift them out onto a cutting board. Let them cool completely before slicing into squares or rectangles, revealing the luscious layers of caramel and buttery goodness within.
Stay tuned for the next part of this article, where we will delve into tips for achieving the best results with your salted caramel butter bars, as well as answers to some common questions about this delectable dessert.

Sweet & Salty Heaven: Salted Caramel Butter Bars
Preheat and Prepare
Before diving into the baking process, it’s crucial to preheat your oven to 350°F (175°C). Preheating is not just a formality; it ensures that your bars bake evenly from the moment they enter the oven. A properly heated oven helps the batter rise appropriately and sets the structure of your sweet and salty treats, creating that irresistible texture.
While the oven is heating, take a moment to prepare your baking pan. Use a 9×13 inch baking dish for this recipe, as it provides the perfect surface area for your butter bars. Line the bottom and sides of the pan with parchment paper, allowing some overhang. This step will simplify the process of removing the bars once they’re baked, ensuring they don’t break apart in the pan. For an extra layer of assurance, lightly grease the parchment paper with cooking spray or butter to prevent sticking.
Creaming Technique
Next, you’ll want to focus on the creaming technique, which is fundamental for achieving the right texture in your bars. Start by combining softened butter and granulated sugar in a mixing bowl. Use an electric mixer on medium speed to cream the two ingredients together until the mixture becomes light and fluffy. This step is essential, as it incorporates air into the batter, contributing to the overall rise and texture of your bars. Aim for a pale yellow color and a noticeably increased volume in the mixture.
After creaming the butter and sugar, slowly add in the brown sugar. The combination of granulated and brown sugar not only enhances the flavor but also contributes to the chewy texture that makes these bars so delectable. Continue mixing until the mixture is well combined and smooth.
Incorporating Wet Ingredients
Now it’s time to incorporate the eggs and vanilla extract into your creamed mixture. Adding these wet ingredients will help to bind the batter together and provide moisture. Crack in the eggs one at a time, mixing well after each addition. This gradual incorporation allows for better emulsification, ensuring that the eggs are fully integrated and the batter remains smooth.
Next, add the vanilla extract, which adds depth to the flavor profile of your salted caramel butter bars. Mix until just combined, being careful not to overmix, as this can lead to a dense texture.
Mixing Dry Ingredients
In a separate bowl, sift together your dry ingredients: all-purpose flour, baking powder, and a pinch of salt. Sifting helps to aerate the flour and break up any clumps, resulting in a smoother batter. The salt also enhances the flavors of the sweet components, balancing the overall taste of the bars.
Once sifted, gradually add the dry ingredient mixture into the wet ingredients. It’s important to mix gently, using a spatula or a wooden spoon, until just combined. Overmixing can develop the gluten in the flour, leading to tough bars rather than the desired tender and chewy texture.
Layering the Batter
When your batter is ready, it’s time to layer it in the prepared baking pan. Start by pouring half of the batter into the pan, spreading it evenly across the bottom with a spatula. This base layer serves as the foundation for the luscious salted caramel filling.
Next, pour your homemade salted caramel sauce over the first layer of batter. Use a spoon or a spatula to spread the caramel gently, leaving some space around the edges to prevent it from spilling over during baking. Then, pour the remaining batter on top of the caramel layer. This will encase the caramel, creating a beautiful contrast once baked.
Swirling Technique
To achieve that signature marbled effect, use a knife or a skewer to gently swirl the top layer of batter with the caramel below. Insert the knife into the batter and make a few figure-eight motions, being careful not to overmix. The goal is to create a beautiful swirl that allows the caramel to peek through without fully integrating it into the batter.
Baking Tips
Place the pan in the preheated oven and bake for 25-30 minutes. Keep a close eye on your bars as they bake. The edges should turn a golden brown, while the center may still appear slightly soft. A toothpick inserted into the center should come out with a few moist crumbs, indicating that the bars are baked to perfection without being overdone. Remember, they will continue to cook slightly as they cool.
Cooling and Serving Suggestions
After removing the baking pan from the oven, it’s important to let your salted caramel butter bars cool in the pan for at least 15 minutes. Cooling allows the bars to set, making them easier to cut into squares without falling apart. For best results, transfer the pan to a wire rack to cool completely.
Once cooled, use the parchment paper overhang to lift the bars out of the pan and onto a cutting board. Cut them into squares or rectangles, depending on your serving preferences. These bars are delightful on their own, but they can be elevated even further with some creative serving suggestions.
For a truly indulgent experience, serve the salted caramel butter bars warm with a scoop of vanilla ice cream or a dollop of whipped cream. The contrast of temperatures and textures creates a heavenly dessert. Pair them with a rich cup of coffee or tea for a delightful afternoon treat. Alternatively, consider arranging them as part of a dessert platter alongside fresh fruit, cookies, or other pastries for a visually appealing and varied spread.
When it comes to storage, keep your bars in an airtight container at room temperature for up to a week. If you want to prolong their freshness, you can refrigerate them for up to two weeks. These bars also freeze beautifully; simply wrap them tightly in plastic wrap and place them in a freezer-safe container. They can be frozen for up to three months, allowing you to enjoy a homemade treat whenever the craving strikes.
Nutritional Information and Serving Size
For those mindful of their dietary choices, here’s a breakdown of the nutritional information for a typical serving size of one salted caramel butter bar (assuming the recipe yields 12 bars):
– Calories: 240
– Total Fat: 12g
– Saturated Fat: 7g
– Cholesterol: 50mg
– Sodium: 120mg
– Total Carbohydrates: 30g
– Dietary Fiber: 1g
– Sugars: 18g
– Protein: 2g
If you’re hosting a larger gathering, consider doubling the recipe to ensure there are enough bars for everyone to enjoy. Alternatively, if you’re looking for a smaller treat, feel free to halve the ingredients to create a smaller batch perfect for a cozy night in.
Conclusion
Baking salted caramel butter bars is not just about creating an indulgent dessert; it’s about the joy of creating something delicious from scratch. The combination of sweet and salty flavors, with the rich texture of the butter bars, truly embodies a heavenly experience. These bars are perfect for any occasion, whether you’re celebrating a special event, hosting friends for coffee, or simply treating yourself to a well-deserved snack.
Don’t hesitate to experiment with variations in toppings or flavors. Consider adding nuts, a sprinkle of sea salt on top, or even drizzling additional caramel sauce over the finished bars for an extra touch of decadence. The kitchen is a canvas for creativity, and baking should always be a fun and fulfilling endeavor.
So gather your ingredients, preheat that oven, and dive into the delightful world of salted caramel butter bars. Indulge in the sweet and salty experience they offer, and share the joy of homemade treats with your loved ones. Happy baking!
