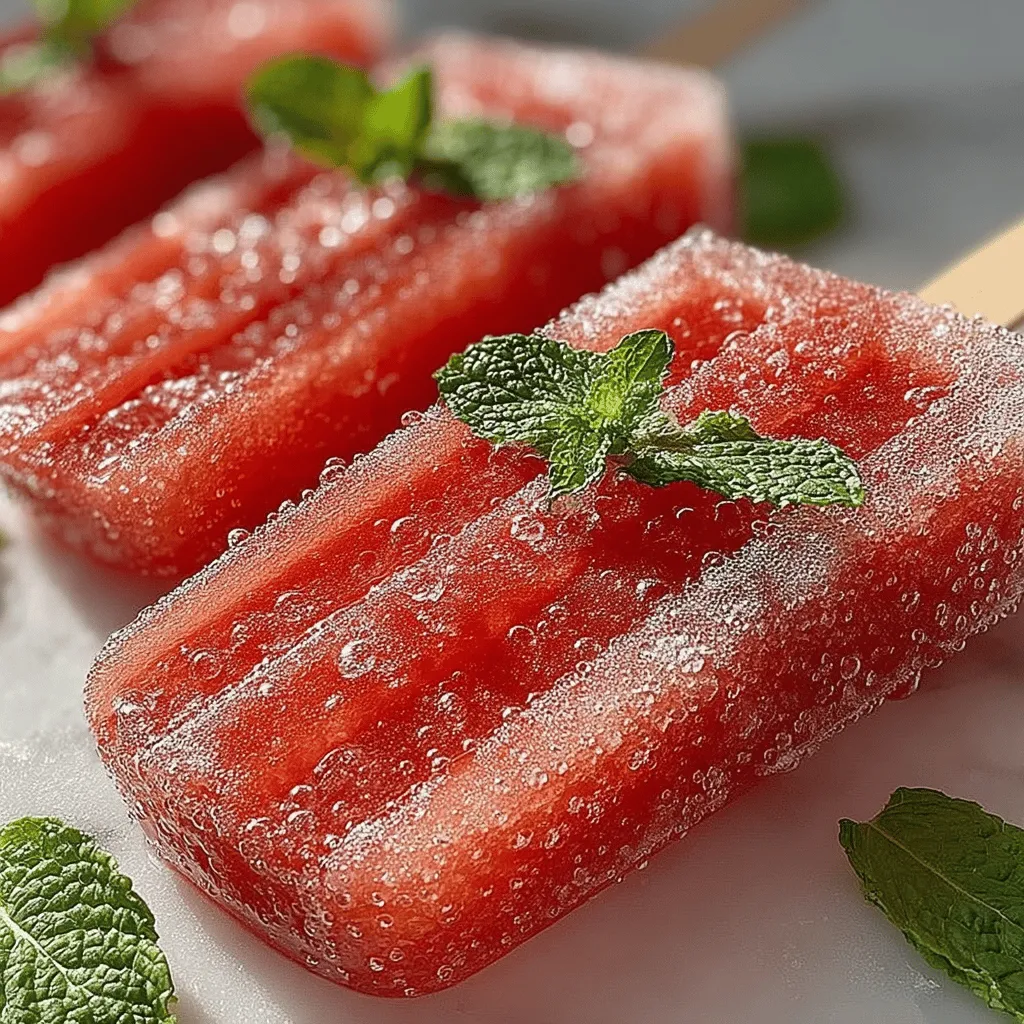
Refreshing Watermelon Bliss Pops: A Cool Treat for Hot Days
As the temperatures rise and summer days stretch long, the craving for frozen treats becomes almost universal. Whether lounging by the pool, enjoying a backyard barbecue, or simply seeking relief from the heat, popsicles are a go-to indulgence. However, many store-bought options are loaded with sugars, artificial flavors, and preservatives, making them less than ideal for health-conscious individuals. This is where the Watermelon Bliss Pops come into play—a delightful, healthy alternative that promises not only to quench your thirst but also to nourish your body.
The Healthier Choice
Watermelon Bliss Pops are not just a simple recipe; they are a celebration of fresh, wholesome ingredients that offer numerous health benefits. Using vibrant, juicy watermelon as the base, these pops are naturally hydrating and bursting with flavor. By crafting your own frozen treats at home, you can control the ingredients, ensuring that every bite is packed with nutrients and devoid of any unnecessary additives. This recipe is incredibly versatile, allowing you to customize flavors with various natural sweeteners, zesty additions, and even creamy enhancements.
Understanding the Ingredients
To create the perfect Watermelon Bliss Pops, it’s essential to understand the role of each ingredient in the recipe. Here’s a closer look at the key components that make these pops not only delicious but also nutritious.
Fresh Watermelon
The star of the show, watermelon is not only refreshing but also incredibly hydrating, composed of around 92% water. It’s low in calories and packed with essential vitamins and antioxidants, including vitamins A and C, which promote skin health and boost immunity. The natural sweetness of watermelon serves as the primary flavor profile for these pops, making them a guilt-free treat.
Honey or Agave Syrup
To enhance the natural sweetness of the watermelon, you can incorporate honey or agave syrup. Both are natural sweeteners that offer additional health benefits compared to refined sugars. Honey is known for its antibacterial properties and can aid in digestion, while agave syrup has a lower glycemic index, making it a suitable option for those monitoring their blood sugar levels.
Fresh Lime Juice
Adding a splash of fresh lime juice introduces a zesty kick that brightens the overall flavor of the pops. Lime juice is rich in vitamin C, which is essential for collagen production and immune support. The acidity from the lime helps balance the sweetness of the watermelon and sweeteners, creating a harmonious flavor profile.
Sea Salt
A pinch of sea salt may seem unconventional in a dessert, but it plays a crucial role in enhancing flavors. Salt can help to balance sweetness, making the overall taste more rounded. Additionally, it provides trace minerals that are beneficial for hydration, particularly important during the hot summer months.
Optional Ingredients
For those looking to add a creamy texture to their Watermelon Bliss Pops, consider incorporating Greek yogurt or coconut cream. Greek yogurt is an excellent source of protein and probiotics, promoting gut health. Coconut cream adds a rich, tropical flavor and healthy fats that can enhance satiety.
Step-by-Step Guide to Making Watermelon Bliss Pops
Now that you understand the ingredients, let’s dive into the initial steps of creating your Watermelon Bliss Pops.
Preparing the Watermelon
The first step in making these refreshing pops is selecting the right watermelon. Look for a ripe, seedless watermelon, as this will provide the best flavor and convenience. A ripe watermelon should feel heavy for its size and have a uniform shape, with a dull spot where it rested on the ground, indicating ripeness.
Once you have your watermelon, it’s time to cut and seed it. Start by placing the watermelon on a sturdy cutting board. Use a sharp knife to slice it in half lengthwise. Then, take each half and cut it into manageable wedges. From there, you can easily remove the rind and any seeds. Aim for about four cups of watermelon flesh, which will yield enough pops for a summer gathering.
Blending the Ingredients
Once the watermelon is prepared, it’s time to blend the ingredients. Place the watermelon chunks into a blender or food processor, and blend until smooth. For a creamier texture, consider adding a cup of Greek yogurt or a few tablespoons of coconut cream to the blender. Blend until fully incorporated, ensuring a smooth consistency that will freeze evenly.
When blending, take a moment to taste the mixture. This step is vital for adjusting the flavor profile. If you prefer a sweeter pop, add honey or agave syrup gradually, blending and tasting until you reach the desired sweetness. Similarly, if you love a tangy flavor, a bit more lime juice can elevate the taste.
Adjusting Flavor
The beauty of making your own Watermelon Bliss Pops lies in the ability to customize flavors to your liking. After blending, it’s essential to taste the mixture again. If the pops are too sweet, a dash of lime juice can help cut through the sweetness. Conversely, if you desire more sweetness, don’t hesitate to add a little more honey or agave syrup.
The key is to find the perfect balance that suits your palate, ensuring that each pop is a delight to eat. This process of tasting and adjusting not only enhances the flavor but also allows you to experiment with different combinations, making it a fun and creative endeavor.
Pouring and Freezing
Once you’re satisfied with the flavor of your watermelon mixture, it’s time to pour it into the molds. To avoid spills, use a ladle or a measuring cup with a spout for more precise pouring. Carefully fill each popsicle mold, leaving a little space at the top to allow for expansion as the mixture freezes.
After filling the molds, insert the sticks and place them in the freezer. For best results, allow the Watermelon Bliss Pops to freeze for at least 4 to 6 hours, or until they are completely solid. Once frozen, you’ll have a delightful treat ready to be enjoyed on a hot day.
As you embark on making these Watermelon Bliss Pops, remember that each step allows you to infuse your personal touch into this delightful recipe. The combination of fresh ingredients and the joy of creating something delicious from scratch makes these pops not only a refreshing treat but also a wholesome choice for summer enjoyment.

Freezing Times and Conditions for Best Results
To achieve the perfect texture and flavor in your Watermelon Bliss Pops, it’s essential to freeze them correctly. For optimal results, allow your pops to freeze for at least 4 to 6 hours. This ensures they are solid enough to hold their shape when removed from the molds. If you’re planning to make these treats in advance, you can freeze them overnight for a hassle-free, refreshing snack the next day.
When freezing, it’s best to place the molds in the coldest part of your freezer, typically the back, where temperatures remain consistent. Avoid opening the freezer repeatedly during the freezing process, as this can introduce warm air and prolong freezing times. Once frozen solid, you can store the pops in an airtight container for up to two weeks, allowing you to enjoy them anytime you crave a refreshing treat.
Releasing the Pops
Once your Watermelon Bliss Pops are fully frozen, it’s time to release them from the molds. The key to success here is to handle them gently to avoid damaging your beautiful creations.
Techniques for Removing Pops from Molds Without Damage
1. Warm Water Technique: One of the most effective methods for removing pops from their molds is to briefly dip the bottom of the mold in warm water. Fill a bowl or sink with warm (not hot) water, and submerge the mold for about 10 to 20 seconds. This slight warmth will help loosen the pops without melting them.
2. Twisting the Mold: After warming, you can also try gently twisting the mold. This action helps create a gap between the pop and the mold, allowing for easier removal. If the pops still don’t budge, return them to the warm water for a few more seconds.
3. Using a Silicone Mold: If you’re planning to make pops frequently, consider investing in silicone molds. These molds are inherently flexible, making it much easier to release the pops without any hassle. Simply flex the sides of the mold, and your pops should slide out effortlessly.
Garnishing and Serving Suggestions
Creative Ideas for Garnishing
Once you have successfully removed your Watermelon Bliss Pops from their molds, it’s time to elevate their presentation with some garnishing ideas:
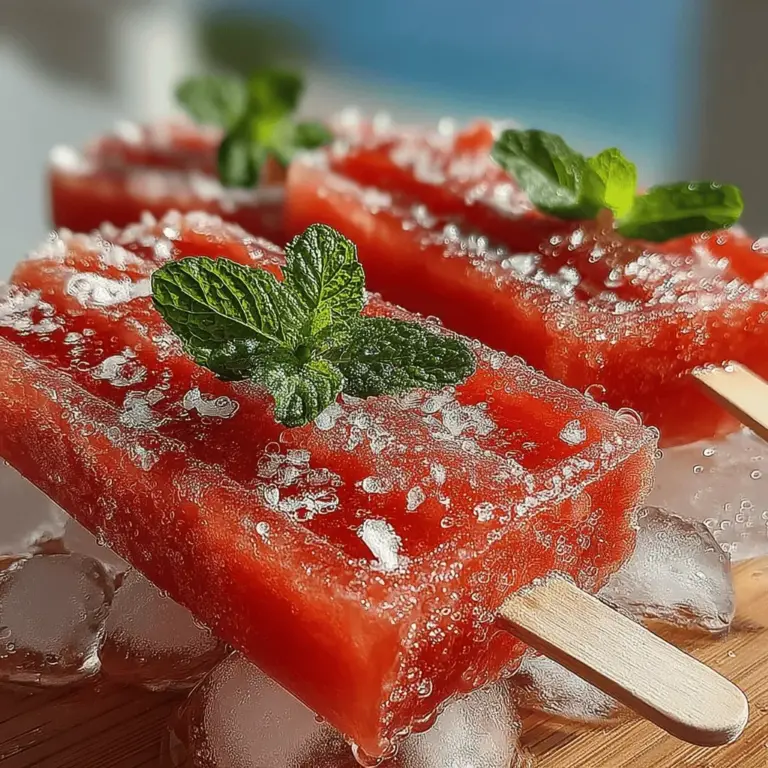
– Fresh Mint Leaves: Adding a sprig of fresh mint not only enhances the visual appeal of your pops but also provides an aromatic touch that complements the sweet watermelon flavor. You can either place a mint leaf on top of the pop or serve it alongside the treat for a refreshing contrast.
– Additional Toppings: For added texture and flavor, consider pairing your pops with toppings like granola or shredded coconut. These toppings can be sprinkled on top right before serving or served on the side for a delightful crunch. The combination of creamy watermelon and crispy toppings creates a satisfying contrast that will please your palate.
Ideal Occasions for Serving Watermelon Bliss Pops
Watermelon Bliss Pops are the perfect treat for various occasions, including:
– Summer Parties: Whether you’re hosting a backyard barbecue or a pool party, these pops are a fun and refreshing addition to your summer menu. Their vibrant color and fruity flavor are sure to impress your guests.
– Family Gatherings: Serve these pops as a delightful dessert option during family gatherings. They are not only easy to make but also a healthy alternative to traditional sugary snacks that everyone can enjoy.
– Hot Day Refreshment: On particularly hot days, these pops serve as a perfect cooling snack. Keep a batch in your freezer for a quick grab-and-go treat that helps beat the heat.
Nutritional Benefits of Watermelon Bliss Pops
Watermelon Bliss Pops are not only delicious but also packed with nutritional benefits, making them an excellent choice for a healthy frozen treat.
Breakdown of Nutritional Components
– Low-Calorie Profile: Watermelon is naturally low in calories, making these pops a guilt-free snack option. A single serving of watermelon provides hydration without excessive calories, perfect for those watching their intake.
– Hydrating and Vitamin-Rich: Watermelon is composed of about 92% water, making it one of the most hydrating fruits available. It’s also rich in vitamins A and C, both of which are essential for maintaining healthy skin and boosting the immune system.
Benefits of Natural Sweeteners Versus Refined Sugars
Using natural sweeteners like honey or agave syrup in your Watermelon Bliss Pops not only enhances their natural sweetness but also provides additional health benefits. Unlike refined sugars, natural sweeteners have a lower glycemic index, meaning they won’t spike your blood sugar as dramatically. This makes your pops not just a tasty treat, but a healthier option as well.
Health Advantages of Consuming Frozen Fruit Treats
Frozen fruit treats like Watermelon Bliss Pops allow you to enjoy the benefits of fruit in a different and fun way. These pops can be a great way to increase your fruit intake, especially for children who may be reluctant to eat whole fruits. They also provide a refreshing snack option that can help satisfy sweet cravings without resorting to unhealthy desserts.
Creative Variations on Watermelon Bliss Pops
Once you’ve mastered the classic Watermelon Bliss Pops, don’t hesitate to get creative with flavor combinations and variations.
Ideas for Flavor Combinations
– Mixed Fruit Medley: Enhance the flavor profile by incorporating other fruits such as strawberries, kiwi, or mango. Blending these fruits with watermelon not only adds color but also a variety of flavors that can make your pops even more delightful.
– Herb Infusions: For an unexpected twist, consider experimenting with herbs like basil or rosemary. Muddling these herbs into the watermelon puree before freezing can introduce a sophisticated flavor that elevates your pops to gourmet status.
Different Types of Molds and Their Effects on Presentation
The type of mold you choose can significantly impact the presentation of your Watermelon Bliss Pops. Traditional popsicle molds create classic shapes, while novelty molds, such as those shaped like animals or stars, can add a fun element for kids. Additionally, consider using clear molds to showcase the beautiful colors of the fruit blend, making the pops visually appealing.
Conclusion
In summary, Watermelon Bliss Pops are not just a delicious and refreshing treat; they are also a healthy snack option that is easy to prepare at home. With their vibrant colors, hydrating properties, and nutritional benefits, these pops are perfect for summer gatherings, family events, or simply as a delightful snack on a hot day.
Encouraging readers to try this recipe allows them to enjoy a healthier frozen treat that’s not only simple to make but also brings a sense of joy to their summer months. The process of creating easy, wholesome snacks creates opportunities for family bonding and enhances the enjoyment of seasonal produce. So grab your molds, blend up some watermelon, and delight in the sweet, refreshing bliss of homemade Watermelon Bliss Pops!

