Refreshing Watermelon Bliss Pops
 Save
Save
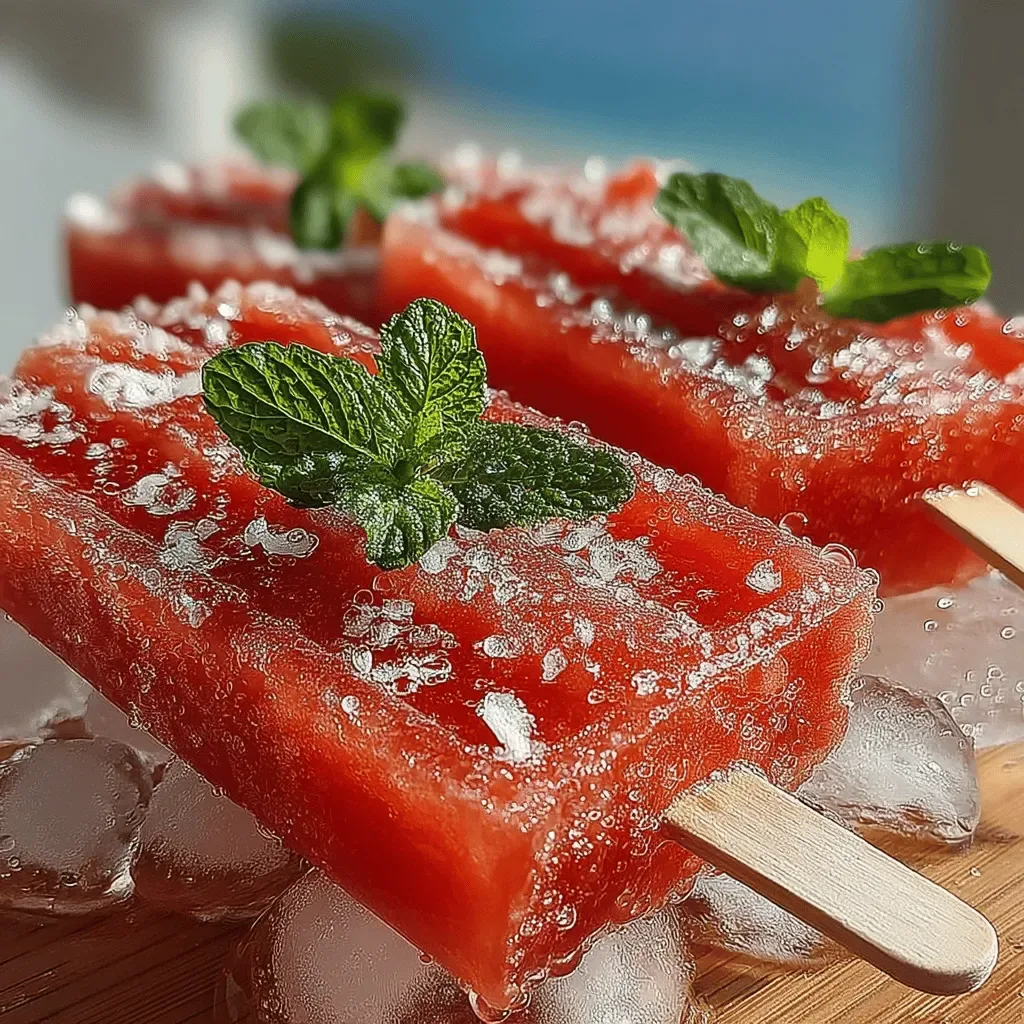
Imagine a bite‑size burst of summer that cools you from the inside out—those are the Refreshing Watermelon Bliss Pops. Each pop delivers crisp, juicy watermelon paired with a silky, lightly sweetened coconut‑lime swirl, creating a palate‑pleasing contrast that feels both indulgent and guilt‑free.
What makes this recipe truly special is the balance between natural fruit sweetness and a touch of honey, plus a whisper of lime zest that lifts the flavor without overpowering the delicate watermelon. The result is a vibrant, melt‑in‑your‑mouth treat that looks as beautiful as it tastes.
This frozen delight is perfect for kids on a hot day, fitness enthusiasts seeking a post‑workout refresher, or anyone who simply craves a light, hydrating dessert. Serve them at backyard barbecues, picnics, or as a cool finish to a brunch spread.
The process is straightforward: cube the watermelon, blend it with coconut milk and sweeteners, pour into molds, add a swirl of lime‑infused cream, and freeze. In under an hour you’ll have a tray of eye‑catching, palate‑pleasing pops ready to enjoy.
Why You'll Love This Recipe
Hydrating & Light: Watermelon is over 90% water, so each pop delivers a refreshing boost of hydration while keeping calories low—a perfect summer snack.
No Added Preservatives: Made entirely from fresh ingredients, these pops contain no artificial colors or preservatives, giving you peace of mind with every bite.
Customizable Flavors: The base invites endless mix‑ins—berries, mint, or a dash of chili—so you can tailor the pops to your taste preferences.
Kid‑Friendly Fun: The bright colors and easy‑to‑hold molds make these pops a hit with children, encouraging them to enjoy fruit in a playful way.
Tips & Tricks
Perfecting the Recipe
Use Seedless Watermelon. Removing seeds prevents unwanted crunch and makes blending smoother, ensuring a flawless puree.
Chill the Coconut Milk. Cold coconut milk emulsifies better with the fruit puree, reducing separation during freezing.
Don’t Over‑Blend. Blend just until smooth; over‑blending can introduce excess air, leading to icy crystals.
Flavor Enhancements
Add a pinch of sea salt to the coconut‑lime mixture for depth, or swirl in a teaspoon of pureed fresh berries for a fruity ribbon. A dash of grated ginger gives a subtle heat that pairs beautifully with lime.
Common Mistakes to Avoid
Avoid using water‑rich canned watermelon juice, which dilutes flavor and creates icy textures. Also, never skip the quick water‑bath when unmolding; it prevents the pops from cracking or sticking to the mold.
Pro Tips
Freeze in Layers. Pour a thin layer of puree first, freeze for 30 minutes, then add the swirl. This creates a clean separation between flavors.
Use Silicone Molds. They release the pops effortlessly and are dishwasher‑safe, making cleanup a breeze.
Store with a Thin Wax Paper Sheet. Placing a sheet between pops prevents them from sticking together during storage.
Variations
Ingredient Swaps
Swap coconut milk for almond or cashew milk for a lighter mouthfeel, or replace honey with agave nectar for a vegan version. For a tropical twist, add a splash of pineapple juice to the watermelon puree.
Dietary Adjustments
To keep the recipe keto‑friendly, use a sugar‑free sweetener such as erythritol instead of honey. For a fully dairy‑free approach, ensure the coconut milk is unsweetened and avoid any added dairy‑based toppings.
Serving Suggestions
Pair the pops with a light cucumber‑mint salad or a bowl of fresh berries for a balanced summer spread. They also make a delightful garnish for a chilled fruit punch, adding both flavor and visual appeal.
Storage Info
Leftover Storage
Allow the pops to sit at room temperature for a minute, then transfer them to an airtight container lined with parchment paper. Store in the freezer for up to 3 months; the parchment prevents them from sticking together.
Reheating Instructions
For a quick snack, run the pops under warm tap water for 10‑15 seconds to loosen them, then enjoy. If you prefer a softer texture, place them in the refrigerator for 20‑30 minutes before serving.
Frequently Asked Questions
Can I make these pops ahead of time?
What if I don’t have a pop‑sicle mold?
How can I keep the pops from getting icy crystals?
Refreshing Watermelon Bliss Pops bring together bright, hydrating fruit with a creamy, citrus‑kissed swirl, all in a freezer‑friendly package that’s as simple as it is stunning. By following the step‑by‑step guide, you’ll achieve perfectly smooth, colorful pops every time. Feel free to experiment with herbs, spices, or alternate milks to make the recipe truly yours. Enjoy the cool, guilt‑free indulgence on a scorching day—or any day you crave a burst of summer freshness!
Refreshing Watermelon Bliss Pops
Delicious Refreshing Watermelon Bliss Pops
Ingredients
Main Ingredients
- 4 cups seedless watermelon, cubed
- 1 cup full‑fat coconut milk
Sweetener & Acid
- 2 tablespoons raw honey
- 1 teaspoon lime zest
- 2 teaspoons fresh lime juice
Optional Add‑Ins
- ½ cup fresh mint leaves, chopped
- ¼ cup diced strawberries (for a berry swirl)
Instructions
Assembling & Freezing the Pops
- Layer the Base. Pour the watermelon puree into each pop mold, filling them about three‑quarters full. This creates a solid foundation that will hold the swirl.
- Add the Swirl. Drop a teaspoon of the coconut‑lime mixture into the center of each mold. Using a skewer or a small spoon, gently swirl the two layers together to create a marbled effect.
- Insert Sticks. If you’re using silicone molds, insert wooden sticks now, making sure they stand straight. For pop‑sicle trays, the sticks are already integrated.
- Freeze. Transfer the molds to the freezer and let them set for 4‑5 hours, or until completely solid. Avoid opening the freezer frequently to maintain a consistent temperature.
- Release & Garnish. To unmold, run the bottom of each mold under warm water for 10‑15 seconds. Finish with a sprinkle of extra lime zest or a thin watermelon ribbon for visual flair.
Similar Recipes
 Desserts
The Very Best Coconut Pound Cake
Delicious The Very Best Coconut Pound Cake
 Desserts
Decadent Red Velvet Strawberry Cheesecake Recipe
Delicious Decadent Red Velvet Strawberry Cheesecake Recipe
 Desserts
Tropical Bliss Pineapple Cake: A Slice of Paradise
Delicious Tropical Bliss Pineapple Cake: A Slice of Paradise
 Desserts
Raspberry Sugar Cookies: A Delicious Treat for Every Occasion
Delicious Raspberry Sugar Cookies: A Delicious Treat for Every Occasion
 Desserts
Deliciously Decadent Brownie Bottom Mini Cheesecakes: Indulge in the Ultimate Dessert Experience
Delicious Deliciously Decadent Brownie Bottom Mini Cheesecakes: Indulge in the Ultimate Dessert Experience
 Desserts
No-Bake Balsamic Vinaigrette Energy Bites
Delicious No-Bake Balsamic Vinaigrette Energy Bites
 Desserts
Heavenly Apple Fritter Donuts Recipe
Delicious Heavenly Apple Fritter Donuts Recipe
 Desserts
Rhubarb Coffee Cake: 5 Irresistible Secrets to Delight
Learn how to make delicious Rhubarb Coffee Cake: 5 Irresistible Secrets to Delight. Easy recipe with…

Eva
I cook these recipes at home before they ever land here — simple ingredients, clear steps.