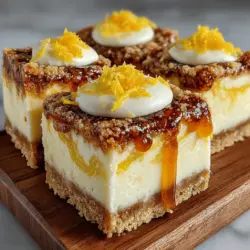
Indulging in a delicious dessert doesn’t always mean slaving away in the kitchen for hours. Enter the Zesty No-Bake Lemon Cheesecake Swirl Bars—an ideal treat for lemon lovers that combines creamy cheesecake filling and zesty lemon curd, all without the need for baking. This recipe is simple, quick to prepare, and yields a refreshing dessert perfect for any occasion. Whether you’re hosting a summer barbecue, celebrating a birthday, or simply craving something sweet, these bars are sure to impress both family and friends. In this article, we will explore the ingredients, the step-by-step preparation, and some insights into why this dessert is a must-try.
Understanding the Ingredients
Exploring the Crust Components
The crust of the Zesty No-Bake Lemon Cheesecake Swirl Bars is the foundation that holds all the delicious layers together. Here’s a closer look at the key components that make up this delightful crust:
– Graham Cracker Crumbs: The backbone of our crust, graham cracker crumbs provide a sweet and crunchy base that perfectly complements the creamy filling. Their slightly toasted flavor adds depth to the dessert while also being easy to work with.
– Unsalted Butter: Adding richness and helping bind the crumbs together, unsalted butter is crucial for achieving the right texture. It brings a luxurious mouthfeel to the crust and balances the sweetness of the graham crackers.
– Sugar: A touch of sugar enhances the overall sweetness of the crust and contributes to a delightful flavor profile. It helps create that perfect balance, ensuring the crust isn’t overly sweet but harmonizes beautifully with the cheesecake filling.
– Salt: Just a pinch of salt is necessary to balance the sweetness and enhance the flavors of the crust. It’s surprising how a small amount of salt can elevate the overall taste of a dessert, making the sweet notes pop.
Diving into the Cheesecake Filling
The cheesecake filling is where the magic happens. It’s creamy, dreamy, and bursting with flavor. Here are the essential ingredients that create this luscious filling:
– Cream Cheese: The star of the filling, cream cheese creates a rich and creamy texture that is the hallmark of any good cheesecake. It provides the base for the filling and is responsible for that indulgent mouthfeel we all love.
– Powdered Sugar: Unlike granulated sugar, powdered sugar ensures sweetness without any graininess. It dissolves easily into the cream cheese, creating a smooth and velvety filling. This ingredient is key to achieving a luxurious texture.
– Vanilla Extract: A splash of vanilla extract adds a warm, aromatic flavor that complements the tartness of the lemon. It rounds out the filling beautifully, making every bite a well-balanced experience.
– Fresh Lemon Juice and Zest: Infusing the filling with zesty brightness, fresh lemon juice and zest are what make this dessert truly shine. The acidity from the lemon cuts through the richness of the cream cheese, providing a refreshing contrast that is both uplifting and invigorating.
– Whipped Cream: Lightening the mixture for a fluffy texture, whipped cream adds an airy quality to the filling. This ingredient is essential for creating that lightness that makes these bars so delightful and easy to enjoy.
Exploring the Lemon Swirl
No lemon cheesecake would be complete without a vibrant lemon swirl. This component adds both visual appeal and an extra burst of flavor. Here’s what you need to know:
– Lemon Curd: The star of the swirl, lemon curd provides a tart contrast to the sweet cheesecake filling. Its smooth texture and intense lemon flavor create a beautiful balance, making each bite a delightful experience.
– Optional Lemon Zest: For those wanting an extra punch of lemon flavor, adding a bit of optional lemon zest to the curd can elevate the overall taste. This simple addition enhances the brightness and makes the dessert even more fragrant.
Step-By-Step Preparation
Now that we’ve explored the ingredients, it’s time to dive into the preparation process. Crafting the perfect Zesty No-Bake Lemon Cheesecake Swirl Bars is simple and enjoyable. Let’s break down the steps for creating the crust and the filling.
Crafting the Perfect Crust
1. Mixing the Ingredients: Begin by gathering your graham cracker crumbs, sugar, and melted unsalted butter in a mixing bowl. Using a spatula or fork, combine these ingredients until well mixed. The texture should resemble wet sand, with all the crumbs coated in butter and sugar. If it feels too dry, you can add a little more melted butter, but be careful not to make it too greasy.
2. Pressing the Crust: Once you achieve the ideal texture, it’s time to transfer the mixture to a rectangular baking pan lined with parchment paper. Using the back of a flat measuring cup or your fingers, press the crust mixture evenly into the bottom of the pan. Make sure to apply even pressure to create a compact and solid base. This step is crucial to ensure that the crust holds together once the bars are set.
3. Chilling the Crust: After pressing the crust, place the pan in the refrigerator for about 10-15 minutes to allow it to set. This chilling time helps the butter firm up, making the crust easier to slice once the dessert is fully assembled.
With the crust set, we are now ready to move on to the cheesecake filling and the lemon swirl. This no-bake dessert is not only quick to make but also offers a delightful combination of textures and flavors that will leave everyone wanting more. Stay tuned for the next section where we will delve into preparing the creamy filling and the zesty lemon swirl that makes these bars so irresistible.
Setting in the Refrigerator: Importance of Chilling for Structure
After you have prepared the crust and the creamy cheesecake filling, the next crucial step is to let everything chill in the refrigerator. Chilling is essential for setting the bars and achieving the right texture. The cold environment allows the cheesecake to firm up, giving it that perfect sliceable consistency. If you skip this step or do not chill the bars long enough, you may end up with a runny mixture that does not hold its shape when cut.
When placing your assembled cheesecake bars in the refrigerator, ensure they are covered to prevent any absorption of odors from other foods. A tight-fitting lid or plastic wrap works well to maintain freshness.
Creating the Creamy Cheesecake Filling
Beating the Cream Cheese: Tips for Achieving the Perfect Smooth Consistency
Start with cream cheese at room temperature. It’s crucial because cold cream cheese will not blend smoothly, resulting in lumps in your filling. Use a hand mixer or a stand mixer fitted with a paddle attachment to beat the cream cheese until it is light and fluffy. This usually takes about 2-3 minutes.
Be sure to scrape down the sides of the bowl periodically to ensure that all the cream cheese is incorporated. This step is vital for achieving a uniform texture without any lumps.
Adding in Other Ingredients: How to Incorporate Them Seamlessly
Once your cream cheese is fluffy, it’s time to add in the remaining ingredients: powdered sugar, vanilla extract, and lemon juice. To prevent any powdery mess, add the powdered sugar gradually while mixing on low speed. After the sugar is fully incorporated, increase the speed to medium and mix until everything is combined. The lemon juice not only adds flavor but also helps to thicken the filling slightly.
Folding in Whipped Cream: Techniques to Maintain Lightness
The final step in creating your filling is folding in whipped cream. This step is what gives your cheesecake a light and airy texture. Start by whipping heavy cream in a separate bowl until stiff peaks form. Then, add a small amount of the whipped cream to the cheesecake mixture to lighten it up before folding in the rest.
To fold, use a spatula and gently lift the mixture from the bottom of the bowl, turning it over on itself. Be careful not to overmix; you want to maintain that airy consistency that makes these bars so delightful.
Layering the Cheesecake and Creating the Lemon Swirl
Spreading the Filling Evenly: Importance of Uniformity for Presentation
Once your filling is ready, it’s time to layer it over the prepared crust. Using a spatula, spread the cheesecake filling evenly across the crust. An even layer is crucial for both presentation and taste, as it ensures that every bite has the same creamy texture and rich flavor.
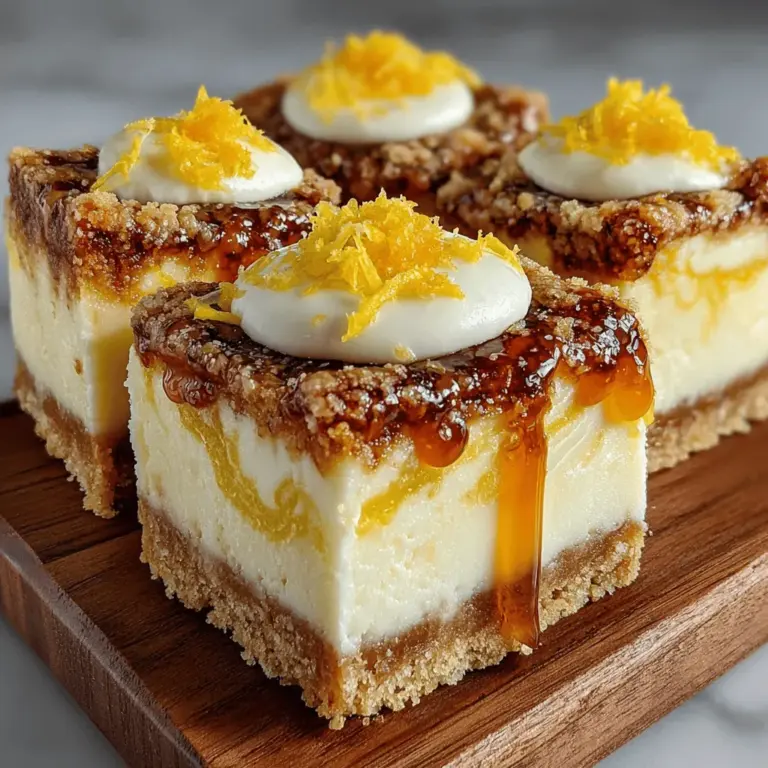
Swirling the Lemon Curd: Step-by-Step to Achieve a Beautiful Marbled Effect
To create the signature lemon swirl, take your lemon curd (homemade or store-bought) and dollop it over the cheesecake filling. Use the back of a spoon or a knife to gently swirl the lemon curd into the filling. Aim for a marbled effect rather than fully mixing it in, as you want to see ribbons of lemon curd throughout the bars.
Be cautious not to over-swirl, as this can lead to a blended look rather than distinct layers. The visual appeal of the bars is just as important as the flavor, and a beautiful swirl will make them even more enticing.
Chilling and Serving the Bars
Chilling for Success
Importance of Chilling Time: How It Impacts Texture and Flavor
After you’ve layered the cheesecake and lemon curd, it’s time to return the dish to the refrigerator to chill. This chilling time allows the flavors to meld and the filling to set properly. Without sufficient chilling, the bars may not hold their shape, making them difficult to cut and serve.
Suggested Chilling Duration: Why Overnight is Best
For the best results, allow the bars to chill for at least 4 hours, but ideally overnight. Chilling overnight ensures that the bars are fully set, allowing for easier cutting and better flavor development. The longer chilling time helps the flavors to deepen, resulting in a more cohesive taste.
Serving Suggestions
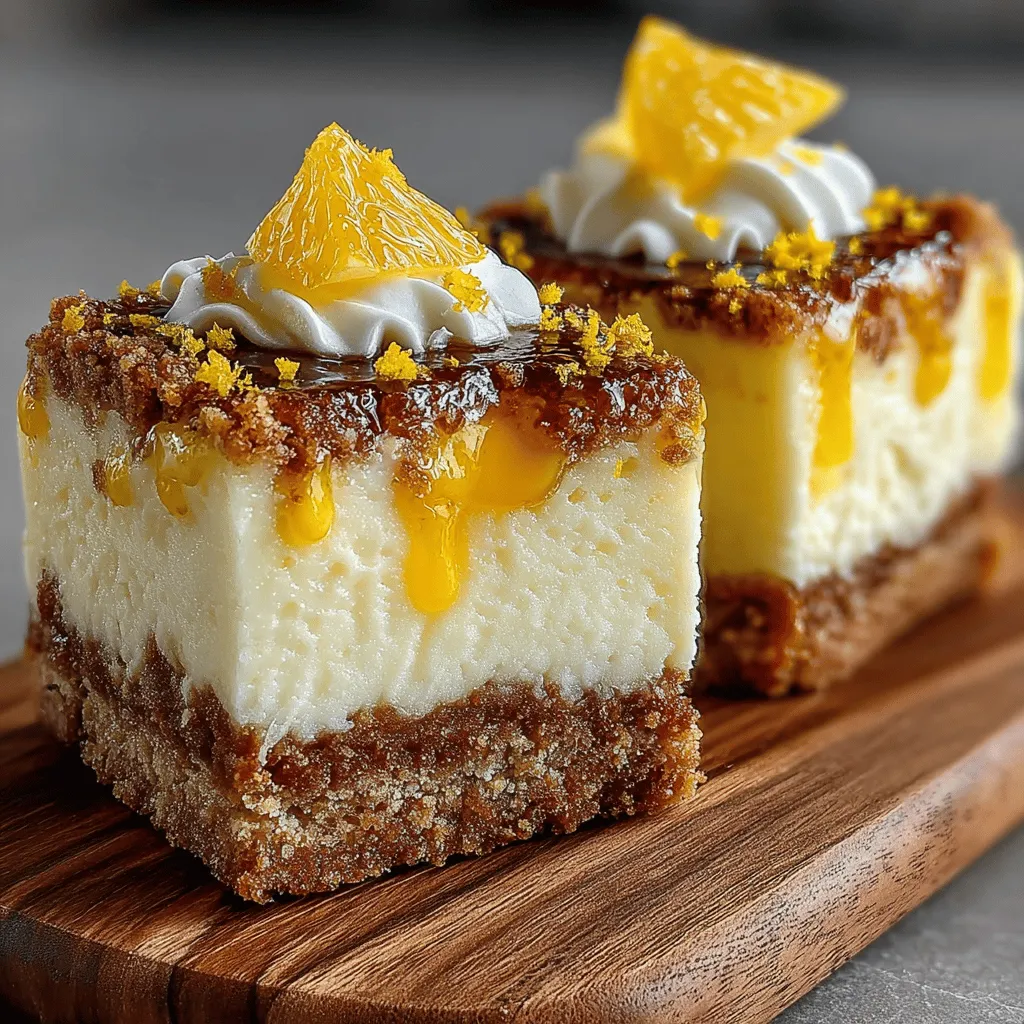
Cutting the Bars: Techniques for Clean, Even Squares
When it’s time to serve your Zesty No-Bake Lemon Cheesecake Swirl Bars, using a sharp knife is key to achieving clean cuts. To make the process easier, you can dip the knife in warm water before cutting, then wipe it dry. This technique helps to prevent the filling from sticking to the knife, resulting in neat, even squares.
Garnishing Ideas: Suggestions for Enhancing Presentation
To elevate your cheesecake bars further, consider garnishing them with fresh lemon zest or lemon slices. A sprinkle of whipped cream on top or a few mint leaves can add a pop of color while enhancing the flavors. These small touches can make your dessert look as delightful as it tastes.
Nutritional Information and Serving Size
Understanding the Nutritional Value
Caloric Breakdown Per Serving: Insight into the Dessert’s Richness
Each serving of these Zesty No-Bake Lemon Cheesecake Swirl Bars contains approximately 250 calories, making them a rich yet satisfying dessert option. The combination of cream cheese and heavy cream contributes to the decadent feel of the bars, while the lemon adds a refreshing twist.
Portion Size: Ideal Serving Suggestions for Gatherings
For gatherings, it’s best to cut the bars into smaller squares, about 2 inches by 2 inches. This way, guests can enjoy a taste without feeling overwhelmed by richness. Serving them alongside a cup of coffee or tea can balance the sweetness and enhance the overall experience.
Conclusion
The Zesty No-Bake Lemon Cheesecake Swirl Bars not only offer a delightful balance of creamy and tangy flavors but also present a simple approach to enjoying a homemade dessert. Whether you’re hosting a gathering or simply treating yourself, this recipe is sure to impress. With its easy preparation and refreshing taste, these bars are destined to become a staple in your dessert repertoire.
Embrace the ease of no-bake desserts while delighting in the vibrant flavors of lemon with this delectable recipe. The combination of a buttery crust, a rich cheesecake filling, and a luscious lemon swirl creates a treat that’s perfect any time of year. So gather your ingredients, follow the steps, and get ready to enjoy a slice of sunshine in dessert form.