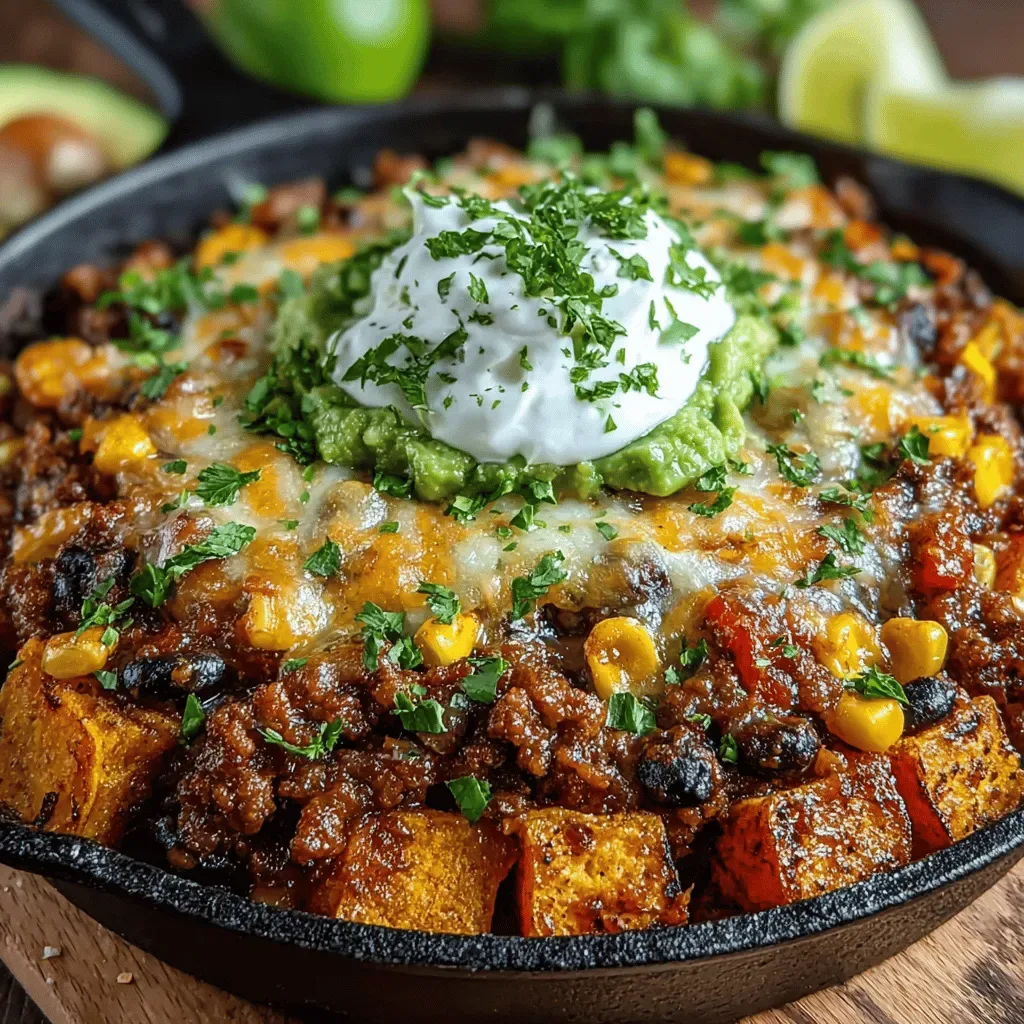
S’mores Sushi Recipe
 Save
Save
The first time I tried to combine two of my favorite childhood treats—marshmallows and chocolate—into something that looked like a sushi roll, I was sitting around a crackling campfire on a chilly October night. The moment I lifted the lid of the pot, a cloud of sweet, toasted marshmallow steam swirled around me, mixing with the faint scent of toasted graham crackers and the rich aroma of melting chocolate. I could hear the faint pop of the fire, feel the warmth on my hands, and see the golden glow of the embers reflecting off the darkening sky. That memory sparked an idea: what if I could capture that campfire magic in a bite‑size, handheld dessert that looks as fun as it tastes?
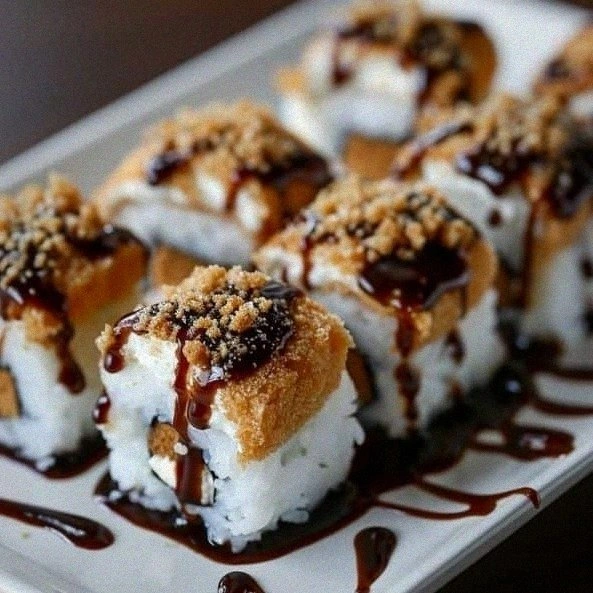
Fast forward a few years, and the concept evolved into what I now proudly call S’mores Sushi. Imagine a delicate roll, the crisp crunch of graham cracker “nori,” a glossy ribbon of melted chocolate, fluffy marshmallows that melt just enough to stay soft, and a surprising crunch of Rice Krispies that adds a playful texture. Each bite delivers that nostalgic campfire feeling—sweet, smoky, and slightly gooey—while also looking sleek enough for a dinner party appetizer plate. The best part? No actual sushi rice or seaweed is involved, so even the most skeptical kids (and adults) dive in without hesitation.
What makes this recipe truly special is the balance between simplicity and surprise. You don’t need a fancy kitchen gadget; a few pantry staples and a little patience are all that stand between you and a dessert that will have everyone asking for the secret. Have you ever wondered why store‑bought s’mores kits never taste quite the same as the ones you make at home? The answer lies in the quality of each component and the way they’re layered—something we’ll explore in depth later. Trust me, once you master this, you’ll never look at a marshmallow the same way again.
But wait—there’s a little twist that takes this dish from “good” to “mind‑blowing,” and I’m not going to give it away just yet. It’s a secret technique that ensures the chocolate stays glossy and the marshmallows stay perfectly gooey, even after the roll has cooled. Ready to find out? Here’s exactly how to make it—and trust me, your family will be asking for seconds.
🌟 Why This Recipe Works
- Flavor Depth: The combination of toasted graham cracker crumbs, rich chocolate, and sweet marshmallows creates layers of flavor that echo the classic campfire experience while adding a sophisticated twist.
- Texture Harmony: The crispness of the crushed graham crackers contrasts beautifully with the melt‑in‑your‑mouth marshmallows and the airy crunch of Rice Krispies, giving each bite a multi‑dimensional feel.
- Ease of Preparation: With only four core ingredients and a handful of simple steps, this recipe is approachable for cooks of any skill level, making it perfect for spontaneous gatherings.
- Time Efficiency: The total time is under an hour, and most of that is hands‑on fun—no long marinating or waiting periods, just quick assembly and a short bake.
- Versatility: While it shines as a dessert, you can serve it as a playful appetizer at a themed party, or even as a sweet snack for kids after school.
- Ingredient Quality: Using high‑quality chocolate and fresh marshmallows elevates the dish from a simple treat to a memorable culinary experience.
- Crowd‑Pleasing Factor: The familiar flavors of s’mores paired with an unexpected presentation make it a conversation starter and a guaranteed hit with both kids and adults.
- Nutrition Balance: While indulgent, the inclusion of Rice Krispies adds a light, airy component that reduces overall density, making it feel less heavy than traditional candy bars.
🥗 Ingredients Breakdown
The Foundation: Crunchy Grahams
Graham crackers are the unsung heroes of this recipe. Their sweet, honey‑laden flavor and sturdy texture make them the perfect substitute for traditional nori sheets. By crushing them finely and then lightly toasting, you create a base that holds together without becoming soggy. If you can, opt for organic or whole‑grain graham crackers for a richer, more complex taste. The secret to a flawless roll? Press the toasted crumbs firmly onto the chocolate layer so they act like an edible “wrap.”
The Sweet Glue: Marshmallows
The marshmallows provide that iconic, pillowy softness that defines a classic s’more. Large marshmallows are ideal because they give you enough surface area to spread evenly without tearing. When you gently warm them, they become tacky enough to bind the chocolate and Rice Krispies together, yet they retain enough structure to keep the roll from collapsing. If you’re allergic to gluten, look for gluten‑free marshmallows—they behave the same way in this recipe.
The Silky Layer: Melted Chocolate
Half a cup of melted chocolate is the luxurious binding agent that holds everything in place. I recommend using a high‑cocoa dark chocolate (70% or higher) for a balanced bitterness that cuts through the sweetness of the marshmallows. If you prefer a milkier taste, a semi‑sweet chocolate works just as well. Melt it slowly over a double boiler to avoid scorching; a smooth, glossy finish ensures the graham “wrap” adheres perfectly.
The Surprise Crunch: Rice Krispies
Rice Krispies add an unexpected airy crunch that lightens the overall mouthfeel. Their delicate puffiness creates tiny pockets of air that keep the roll from feeling too dense, making each bite feel like a playful surprise. You can substitute them with puffed quinoa for a gluten‑free version, but the classic Rice Krispies give the most authentic texture. Sprinkle them generously over the chocolate before adding the marshmallows for maximum crunch.
With your ingredients prepped and ready, let's get cooking. Here's where the fun really begins…
🍳 Step-by-Step Instructions
🔐 Expert Tips for Perfect Results
The Taste Test Trick
Before you roll the entire sheet, take a tiny bite of the chocolate‑graham mixture. This quick taste test lets you adjust the sweetness or add a pinch of sea salt if you crave a sweet‑salty contrast. I once added a dash of smoked paprika for a subtle smoky note, and it completely transformed the flavor profile.
Why Resting Time Matters More Than You Think
Allowing the roll to rest in the fridge isn’t just about setting the chocolate; it also gives the marshmallows a chance to settle into the rice matrix. This prevents them from sliding out when you slice. Skipping this step will leave you with a messy, uneven roll that looks less polished.
The Seasoning Secret Pros Won’t Tell You
A pinch of flaky sea salt on the final garnish can elevate the entire dish. The salt amplifies the chocolate’s richness while cutting through the sweetness of the marshmallows, creating a balanced bite that feels sophisticated. Trust me on this one: a little salt goes a long way.
Rolling with Confidence
When you roll, use a bamboo sushi mat if you have one; it gives you even pressure and a tighter roll. If you don’t have a mat, a clean kitchen towel works just as well. The key is to keep the roll tight enough that the layers don’t separate, but not so tight that the chocolate cracks.
The Perfect Garnish Finish
A drizzle of white chocolate or caramel over the sliced pieces adds visual appeal and a buttery finish. I like to use a small pastry brush to create delicate, artistic lines. This simple touch makes the dish feel restaurant‑quality without any extra effort.
🌈 Delicious Variations to Try
One of my favorite things about this recipe is how versatile it is. Here are some twists I've tried and loved:
Nutty Crunch Roll
Swap half of the graham cracker crumbs for finely chopped toasted almonds. The nutty aroma adds depth, and the almond pieces create an extra crunch that pairs beautifully with the chocolate.
Berry‑Infused Bliss
Add a thin layer of raspberry jam between the marshmallows and Rice Krispies. The tartness of the berries cuts through the sweetness, giving the roll a fresh, summery vibe.
White Chocolate Dream
Use white chocolate instead of dark for a milder, creamier flavor. Pair it with vanilla‑flavored marshmallows for an ultra‑sweet, dreamy bite that’s perfect for a bridal shower.
Spicy S’mores Sushi
Incorporate a pinch of cayenne pepper into the melted chocolate. The subtle heat adds an unexpected kick that balances the sweetness—ideal for adventurous eaters.
Gluten‑Free Delight
Replace the graham crackers with gluten‑free oat crackers and use gluten‑free Rice Krispies. The texture remains the same, and everyone can enjoy the treat without worry.
Caramel Swirl Surprise
Drizzle a thin ribbon of caramel sauce over the chocolate before adding the graham crumbs. The caramel adds a buttery richness that melds perfectly with the chocolate and marshmallows.
📦 Storage & Reheating Tips
Refrigerator Storage
Place any leftover sushi rolls in an airtight container lined with parchment paper. They’ll stay fresh for up to 3 days. The chocolate may firm up further, but a quick room‑temperature sit before serving restores the perfect texture.
Freezing Instructions
Wrap each roll tightly in plastic wrap, then place them in a freezer‑safe bag. They can be frozen for up to 1 month. To thaw, move them to the fridge overnight and let them sit at room temperature for 15 minutes before slicing.
Reheating Methods
If the chocolate has hardened too much, pop the roll in a low oven (300°F) for 5‑7 minutes, or microwave for 10‑15 seconds on low power. The trick to reheating without drying it out? Add a splash of milk or a tiny dab of butter to the chocolate before warming; this restores its glossy sheen.
❓ Frequently Asked Questions
Can I use regular sushi rice instead of Rice Krispies?
What type of chocolate works best?
Do I need a sushi mat?
Can I make this vegan?
How do I prevent the chocolate from cracking?
Can I add other fillings?
What’s the best way to slice the roll?
Can I prepare this ahead of time for a party?
Take the 10 large marshmallows and slice each in half lengthwise. Arrange the marshmallow halves on top of the Rice Krispies, spacing them out so each bite gets a gooey center. Gently press the marshmallows into the rice layer so they stick, but be careful not to squish them flat.
Using the parchment paper as a guide, carefully roll the entire sheet from one short side to the other, tightening as you go. The rolling motion should be firm yet gentle—think of rolling a sushi mat. If the roll resists, let the chocolate soften slightly; a warm roll is easier to shape.
Place the finished roll back on the parchment and refrigerate for 10‑12 minutes. This chilling period allows the chocolate to fully set, securing the graham “wrap” and the marshmallow filling. You’ll notice the roll becomes firm to the touch, and the edges will no longer feel soft.
Finally, remove the roll from the refrigerator and slice it into 1‑inch thick pieces using a sharp, warm knife. The warm blade prevents the chocolate from cracking. Arrange the sushi pieces on a serving platter, drizzle any remaining melted chocolate over the top, and sprinkle a few extra graham crumbs for garnish. Go ahead, take a taste—you’ll know exactly when it’s right.
Similar Recipes
 Desserts
Pumpkin Gooey Butter Cake
Learn how to make delicious Pumpkin Gooey Butter Cake. Easy recipe with step-by-step instructions.
 Desserts
Peanut Butter Marshmallow Squares
Learn how to make delicious Peanut Butter Marshmallow Squares. Easy recipe with step-by-step instructions.
 Desserts
Tropical Sunshine Mango Lime Sorbet Recipe
Delicious Tropical Sunshine Mango Lime Sorbet Recipe
 Desserts
Pecan Pie Balls Delight: A Delectable No-Bake Treat
Delicious Pecan Pie Balls Delight: A Delectable No-Bake Treat
 Desserts
Delightful Indulgence: Candied Orange Peel Dark Chocolate Bark Recipe
Delicious Delightful Indulgence: Candied Orange Peel Dark Chocolate Bark Recipe
 Desserts
Crunchy Peanut Butter Bliss Balls: A Delicious and Nutritious Snack
Delicious Crunchy Peanut Butter Bliss Balls: A Delicious and Nutritious Snack
 Desserts
Irresistible Pinwheel Cookies: A Colorful Delight
Learn how to make delicious Irresistible Pinwheel Cookies: A Colorful Delight. Easy recipe with step-by-step instructions.
 Desserts
Depression Era Water Pie
Learn how to make delicious Depression Era Water Pie. Easy recipe with step-by-step instructions.

Eva
I cook these recipes at home before they ever land here — simple ingredients, clear steps.