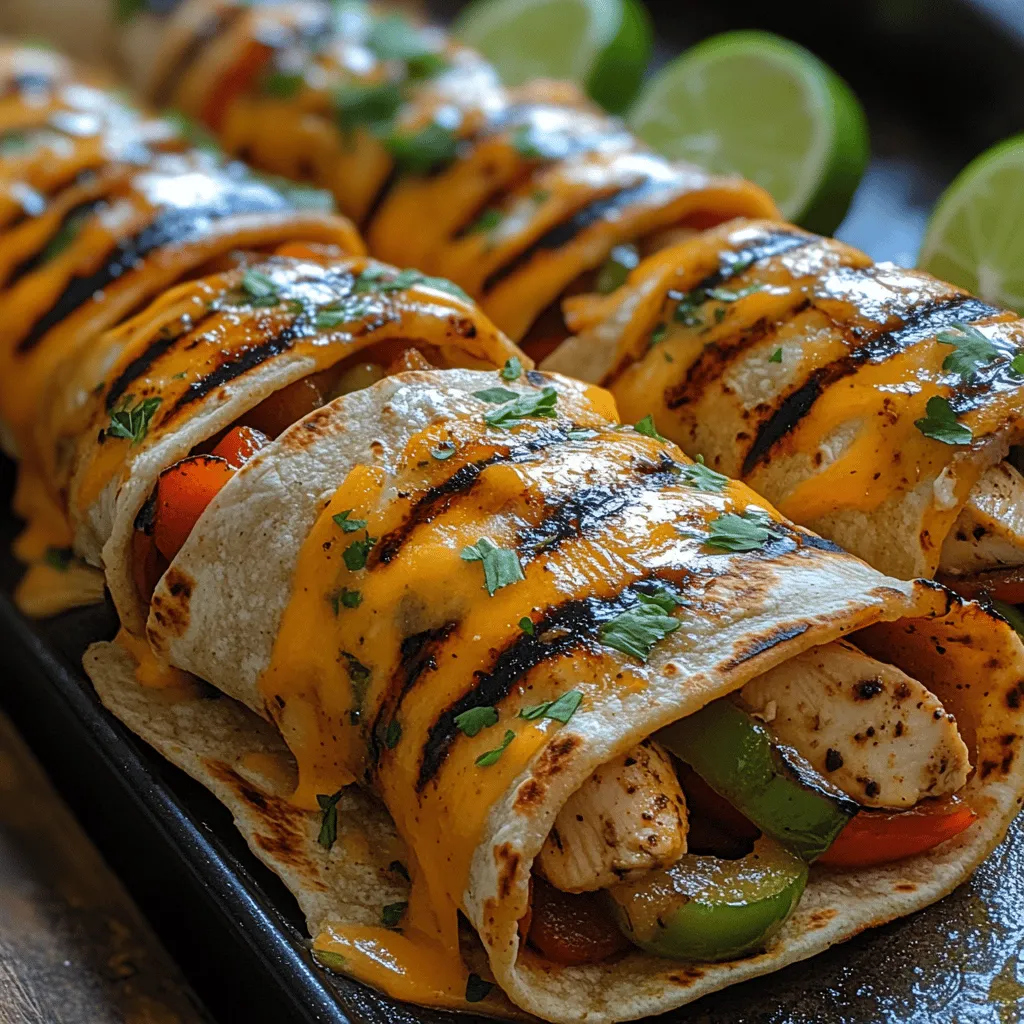
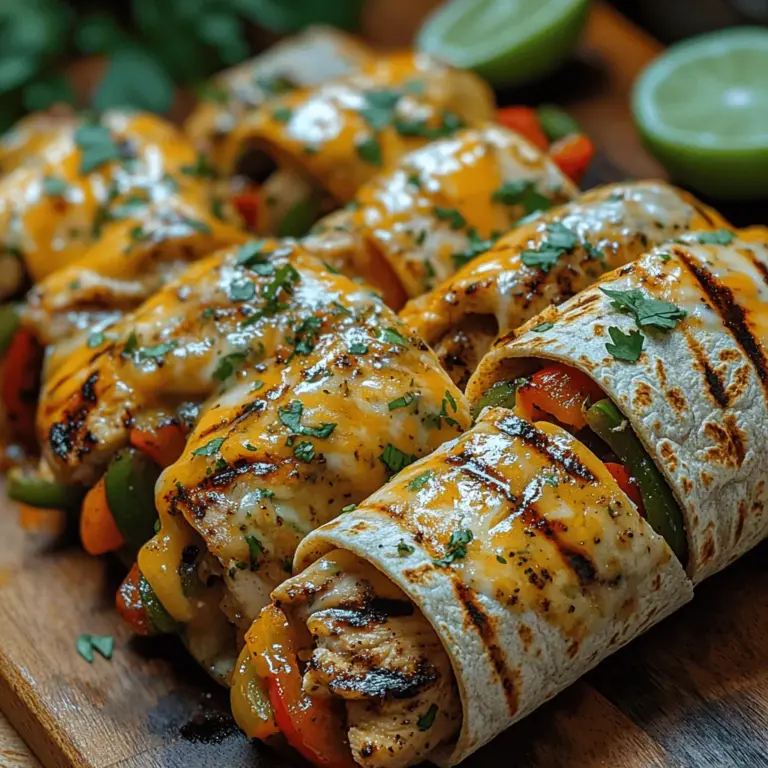
In the realm of quick and delicious meals, few dishes can compete with the vibrant flavors and satisfying textures of grilled chicken fajita wraps. These wraps have become a staple in many households, thanks to their ease of preparation and the ability to customize them according to personal taste. Whether you’re hosting a casual gathering or looking for a weeknight family meal, these wraps offer a perfect blend of lean protein, colorful vegetables, and zesty seasonings.
The popularity of fajitas can be traced back to the 1930s when ranch workers in Texas were given the less desirable cuts of beef as part of their wages. They would marinate and grill the meat, serving it with tortillas and whatever vegetables they had on hand. Over the decades, this humble dish evolved, and the chicken version gained popularity for its health benefits and versatility. Today, chicken fajitas are often enjoyed in various forms, from traditional plates served with all the toppings to creative wraps like the ones we’ll explore in this article.
In this guide, we will dive into the essentials of crafting mouthwatering grilled chicken fajita wraps, covering everything from the ingredients you’ll need to the cooking techniques that will ensure you can recreate this dish with confidence and flair. Get ready to unleash your inner chef and impress your family and friends with this delightful meal.
Understanding the Ingredients
The Chicken: Selecting the Right Cut
The foundation of any great fajita wrap begins with the chicken. For this recipe, boneless, skinless chicken breasts are the ideal choice. Not only are they easy to work with, but they also cook quickly, making them perfect for busy weeknights. Chicken breasts are a fantastic source of lean protein, providing essential nutrients without the excess fat found in other cuts of meat. They also absorb marinades beautifully, ensuring that every bite is packed with flavor.
When selecting chicken, look for breasts that are firm and free of any discoloration. Fresh chicken is always preferable, but if you’re short on time, frozen chicken breasts can work well too—just be sure to thaw them properly before marinating.
The Marinade: Building Flavor
Marinades are crucial for infusing the chicken with flavor and tenderness. The key spices for our sizzling grilled chicken fajita wraps include chili powder, cumin, smoked paprika, and garlic powder. Each of these spices contributes its unique characteristics:
– Chili Powder: Adds a mild heat and depth of flavor.
– Cumin: Offers an earthy, warm taste that complements the other spices beautifully.
– Smoked Paprika: Provides a hint of smokiness, enhancing the grilled flavor.
– Garlic Powder: Infuses a rich, savory element that balances the spices.
Additionally, olive oil plays a significant role in our marinade. It not only helps to distribute the spices evenly but also adds moisture to the chicken, preventing it from drying out during grilling.
Fresh Vegetables: A Colorful Addition
No fajita wrap would be complete without a generous helping of fresh vegetables. For our recipe, we recommend using a combination of red and green bell peppers and onions. These vegetables not only add a burst of color but also bring a delightful crunch and sweetness that balances the savory chicken.
Incorporating fresh vegetables into your meal is essential for both flavor and nutrition. Bell peppers are rich in vitamins A and C, while onions provide antioxidants and other health benefits. The combination of these vegetables enhances the overall taste of the wraps, making them more satisfying and nutritious.
Tortillas: Choosing the Right Base
The choice of tortilla is crucial for the success of your fajita wraps. While traditional flour tortillas are commonly used, opting for whole wheat tortillas can elevate the nutritional profile of your meal. Whole wheat tortillas are higher in fiber, which aids digestion and keeps you feeling fuller for longer.
If you’re looking for gluten-free alternatives, consider corn tortillas or gluten-free wraps made from alternative grains. Both options provide an excellent base for your fajitas while accommodating various dietary needs.
Cheese and Toppings: Adding the Finishing Touch
To create the ultimate grilled chicken fajita wrap, cheese and toppings are essential. When it comes to cheese, you have a couple of options. Cheddar cheese is a classic choice, offering a sharp flavor that pairs well with the spices in the marinade. Alternatively, a Mexican blend cheese can add a creamy texture and additional flavors, making each bite even more indulgent.
To elevate your wrap further, consider adding fresh cilantro and a squeeze of lime juice. Cilantro adds a burst of freshness that brightens the dish, while lime juice provides a zesty tang that enhances the overall flavor profile.
Marinating the Chicken
Marination is a vital step in the fajita-making process. Not only does it develop flavor, but it also helps to tenderize the chicken, resulting in juicy, flavorful bites that are sure to impress.
Preparing the Marinade
Creating the marinade is a straightforward process. Start by combining the key spices—chili powder, cumin, smoked paprika, and garlic powder—in a bowl. Next, add olive oil to the mixture, whisking until well combined. For an extra layer of flavor, consider adding a splash of lime juice or vinegar, which can help to brighten the marinade.
Once your marinade is ready, place the chicken breasts in a resealable plastic bag or shallow dish. Pour the marinade over the chicken, ensuring each piece is evenly coated. Seal the bag or cover the dish, then refrigerate for at least 30 minutes. For optimal flavor infusion, marinating for 1 to 2 hours is ideal.
Marination Time: How Long is Enough?
The marination time you choose can significantly impact the flavor and texture of your chicken. While 30 minutes is the minimum time needed to allow the spices to permeate the meat, extending the marination to 1-2 hours allows for deeper flavor penetration and improved tenderness.
During this time, the acids in the marinade help to break down the proteins in the chicken, resulting in a more enjoyable texture. However, avoid marinating for too long, as the acid can start to break down the meat excessively, leading to a mushy texture.
Grilling Techniques
Mastering the art of grilling chicken for fajitas is essential for achieving the perfect wrap. The grilling process is where the magic happens, transforming marinated chicken into delicious, charred perfection.
Prepping the Grill
Before you start grilling, it’s crucial to prepare your grill or grill pan properly. If you’re using a traditional grill, preheat it to medium-high heat. If using a grill pan, allow it to heat up on the stovetop for several minutes. A hot grill is key to achieving those coveted grill marks and a nice sear on the chicken.
To prevent sticking, lightly oil the grill grates with a paper towel dipped in vegetable oil or spray them with non-stick cooking spray. This step ensures that your chicken cooks evenly and can be easily flipped without tearing.
Grilling the Chicken
Once your grill is prepped and ready, it’s time to cook the chicken. Remove the chicken from the marinade, allowing any excess marinade to drip off before placing it on the grill. Grill the chicken for about 6-7 minutes per side, depending on the thickness of the breasts. It’s essential to cook the chicken until it reaches an internal temperature of 165°F (75°C) to ensure it’s safe to eat.
To achieve even cooking and prevent dryness, avoid flipping the chicken too often. Let it develop a nice sear on one side before turning it over. If you’re using a grill pan, you can also cover the pan with a lid to help retain heat and cook the chicken evenly.
Resting the Chicken: Why It Matters
After grilling, allow the chicken to rest for about 5 minutes before slicing. Resting is a critical step that allows the juices to redistribute throughout the meat. If you cut into the chicken immediately after grilling, the juices will run out, leaving you with dry meat. By letting it rest, you ensure every bite is juicy and flavorful, making your fajita wraps all the more delicious.
With these foundational steps, you’re well on your way to creating sizzling grilled chicken fajita wraps that will impress anyone who takes a bite. In the next part of this guide, we’ll explore how to assemble your wraps and serve them with style, ensuring a delightful dining experience for you and your guests. Stay tuned for the next steps in crafting this delicious dish.

The Importance of Letting Grilled Chicken Rest
Before diving into the heart of the recipe, it’s crucial to understand the importance of letting your grilled chicken rest after cooking. This step, often overlooked in the kitchen, plays a key role in ensuring that your chicken fajitas are juicy and flavorful.
How Resting Enhances Juiciness and Flavor
When chicken is cooked, the muscle fibers contract, forcing the juices toward the center. If you cut into the chicken immediately after grilling, these juices escape, leading to dry meat. Letting the chicken rest for at least 5 to 10 minutes after it comes off the grill allows the juices to redistribute throughout the meat. This simple step not only locks in moisture but also enhances the overall flavor of the chicken, making every bite succulent and satisfying.
Sautéing the Vegetables
Now that your chicken has rested, it’s time to focus on the vegetables that will elevate your fajita wraps. A perfect vegetable medley is essential for a balanced and vibrant dish.
Creating a Perfect Vegetable Medley for Your Wraps
The classic combination for fajitas includes bell peppers and onions. Their sweetness and slight crunch add texture and flavor that complement the grilled chicken beautifully.
Choosing the Right Pan
When it comes to sautéing, the choice of pan can significantly affect the cooking process. A wide, heavy-bottomed skillet is ideal for sautéing as it allows for even heat distribution. Non-stick pans are a great option for beginners, but cast iron skillets are preferred by many chefs for their ability to retain heat and develop a nice char on the vegetables.
The Importance of Using the Right Amount of Heat
Getting the heat right is crucial for sautéing. Too low, and the vegetables will steam instead of caramelizing; too high, and they can burn. Aim for medium-high heat, which allows the vegetables to cook quickly while developing that desirable charred flavor.
Sautéing Techniques
Step-by-Step Guide to Sautéing Bell Peppers and Onions
1. Prep the Vegetables: Start by slicing two bell peppers (one red and one green for color) and one large onion into thin strips. Uniformity in size ensures even cooking.
2. Heat the Pan: Place your skillet over medium-high heat and add a tablespoon of olive oil. Allow the oil to heat until it shimmers but does not smoke.
3. Add the Onions First: Add the onion strips to the pan first, as they take a bit longer to soften. Sauté for about 2-3 minutes, stirring frequently.
4. Incorporate the Bell Peppers: Once the onions are starting to become translucent, add the bell peppers. Continue sautéing for another 5-7 minutes, stirring occasionally, until the vegetables are tender yet retain a slight crunch.
5. Season to Taste: Sprinkle a pinch of salt and pepper while cooking to enhance the flavors. You can also add a teaspoon of chili powder or cumin for an extra kick.
Tips for Achieving the Ideal Tenderness and Char
– Don’t Overcrowd the Pan: If you’re making a large batch, consider sautéing in batches to prevent steaming.
– Let Them Sit: Allow the vegetables to sit undisturbed for a minute or two during cooking to develop a nice char.
– Taste as You Go: Continuously test the vegetables to ensure they reach your desired level of tenderness without losing their vibrant color.
Assembling the Wraps
With your grilled chicken and sautéed vegetables ready, it’s time to put everything together for your fajita wraps. This is where the fun begins.
Layering the Ingredients
To create a well-balanced wrap, the order in which you layer your ingredients is essential.
1. Start with the Tortilla: Lay a warm tortilla flat on a clean surface.
2. Add Chicken First: Place sliced grilled chicken in the center. This will be the base of your wrap.
3. Follow with Vegetables: Scoop a generous portion of the sautéed bell peppers and onions over the chicken.
4. Optional Toppings: If desired, add toppings such as shredded cheese, fresh salsa, or a dollop of sour cream for added flavor.
Tips for Ensuring an Even Distribution of Flavors
– Don’t Overfill: Aim for a modest amount of filling to make wrapping easier and prevent spillover.
– Use Fresh Ingredients: Fresh herbs, such as cilantro or parsley, can brighten the flavors and add freshness to your wraps.
Wrapping Techniques
Once your ingredients are layered, it’s time to wrap them securely.
1. Fold the Sides: Start by folding the sides of the tortilla inward towards the center, covering the fillings.
2. Roll from the Bottom: Hold the sides in place and roll the tortilla upwards, tucking in the fillings as you go to create a tight wrap.
3. Secure with Toothpicks: For easier serving, you can secure the wrap with toothpicks. This not only holds everything together but also makes for a neat presentation.
Serving Suggestions
Creating a delightful dining experience doesn’t stop at the wraps themselves. Here are some ideas to elevate your meal.
Ideal Pairings
Grilled chicken fajita wraps are delicious on their own but can be enhanced with complementary sides.
– Chips and Guacamole: A side of crispy tortilla chips and creamy guacamole provides a perfect crunch and richness.
– Fresh Salads: A simple mixed green salad with lime vinaigrette can add a refreshing contrast to the warm wraps.
– Rice or Quinoa: A side of cilantro-lime rice or fluffy quinoa can offer an extra layer of heartiness to your meal.
Suggestions for Beverages
Pair your fajita wraps with beverages that complement the flavors:
– Margaritas: A classic margarita adds a festive touch and pairs perfectly with the spices.
– Iced Tea or Lemonade: For a non-alcoholic option, refreshing iced tea or lemonade can balance the meal nicely.
Presentation Tips
How you present your grilled chicken fajita wraps can make a significant difference in the dining experience.
– Plating: Serve the wraps on a vibrant platter, perhaps with a sprinkling of fresh herbs for color.
– Garnishing: Add lime wedges and fresh cilantro to the plate, allowing guests to customize their wraps with a squeeze of lime.
– Accompaniments: Include small bowls of salsa, sour cream, or guacamole for dipping.
Nutritional Breakdown
Understanding the nutritional aspects of your grilled chicken fajita wraps can enhance your dining experience, making it both delicious and health-conscious.
Caloric Content
A typical serving of grilled chicken fajita wrap contains approximately 400-500 calories, depending on the size and ingredients used. This estimate includes the tortilla, chicken, and sautéed vegetables, making it a satisfying meal that won’t derail your diet.
Discussing the Balance of Macronutrients in the Dish
– Protein: Grilled chicken provides a lean source of protein, essential for muscle repair and overall health.
– Carbohydrates: The tortilla and vegetables contribute complex carbohydrates, offering energy for your day.
– Fats: Healthy fats from cooking oil or optional toppings like avocado help in nutrient absorption.
Health Benefits
Grilled chicken fajita wraps offer numerous health benefits thanks to their whole food ingredients.
– Lean Proteins: Chicken is low in fat and provides high-quality protein, which is crucial for maintaining muscle mass.
– Vitamins and Minerals: Vegetables like bell peppers and onions are packed with vitamins A and C, antioxidants, and fiber, contributing to overall health.
– Customizable: You can easily adjust the wrap to suit dietary needs, such as using whole wheat tortillas or adding more greens.
Conclusion: Enjoying Your Sizzling Grilled Chicken Fajita Wraps
Grilled chicken fajita wraps are not just a meal; they are a celebration of flavor, color, and nutrition. By mastering the techniques outlined in this article, you can create a dish that not only satisfies hunger but also delights the palate. With each bite, enjoy the fusion of spices, fresh vegetables, and juicy chicken, making your dining experience both healthy and delicious. Whether shared with friends or savored solo, these wraps are sure to become a staple in your culinary repertoire.
Prepare to impress your family and friends with the sizzling flavors of grilled chicken fajita wraps, and enjoy the satisfaction of creating a dish that is both nutritious and utterly delicious.

