Introduction
Meringues have long held a special place in the hearts of dessert lovers around the world. These light, airy confections, known for their delicate crispiness and melt-in-your-mouth texture, are a staple in many celebratory dishes. With their charming appearance and delightful flavor, meringues can elevate any occasion, making them an ideal treat for parties, weddings, and festive gatherings. Among the myriad of meringue recipes available, Rainbow Cotton Candy Meringues stand out as a particularly enchanting choice.
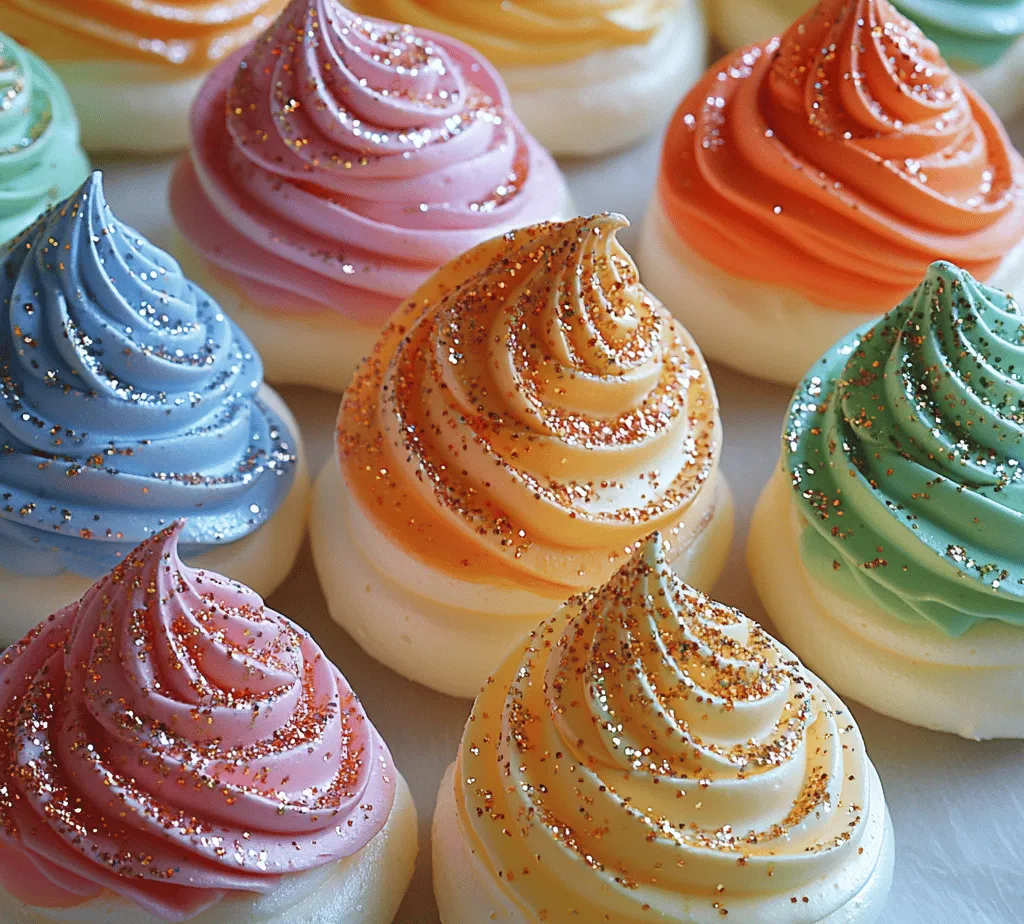
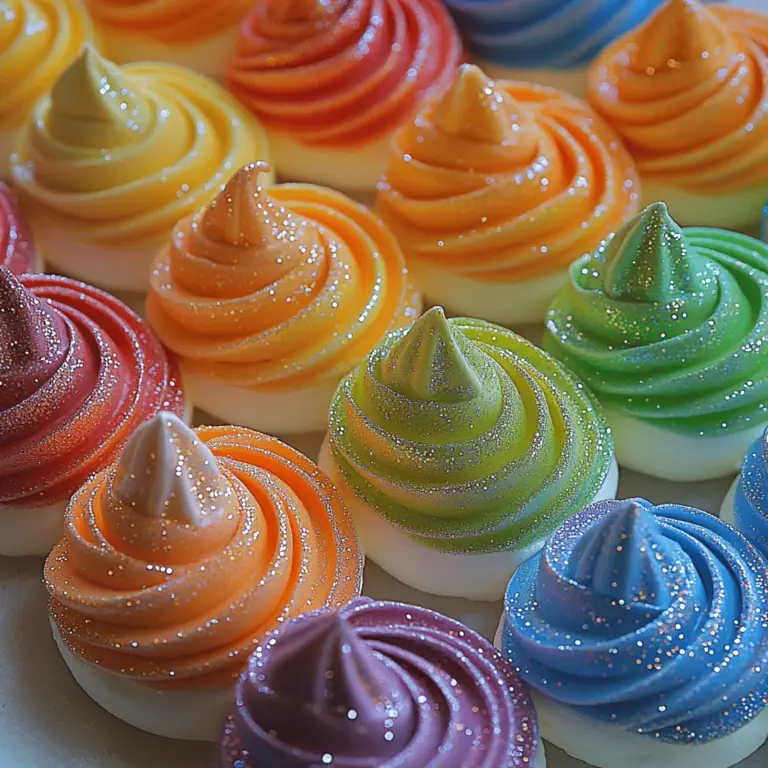
Imagine a sweet, nostalgic journey back to childhood fairs and summer carnivals, where the air is filled with the scent of cotton candy and laughter. Rainbow Cotton Candy Meringues encapsulate this whimsy in every bite. The vibrant colors and delightful flavors make them not just a dessert, but an experience that captivates both the eyes and the palate. Perfect for celebrations, these meringues are not only visually stunning but also provide a unique flavor profile that combines the classic sweetness of meringue with the nostalgic essence of cotton candy.
In this article, we will delve into the fascinating world of meringues, explore the science behind their creation, and guide you through the process of making your very own Rainbow Cotton Candy Meringues. From understanding the foundational elements of meringue to breaking down each ingredient and providing step-by-step instructions, you’ll be well-equipped to create this whimsical treat in your own kitchen.
Understanding Meringue: The Foundation of Rainbow Cotton Candy Meringues
What is Meringue?
Meringue is a light, sweet dessert made from whipped egg whites and sugar. Its airy structure is achieved through the process of beating air into the egg whites, creating a foam that can be baked into various forms. Meringue serves as a versatile base for a variety of desserts, including pies, pavlovas, and, of course, our delightful Rainbow Cotton Candy Meringues. The ethereal quality of meringue not only makes it a favorite among pastry chefs but also lends a touch of elegance to any dessert table.
Types of Meringue
There are three primary types of meringue: French, Swiss, and Italian. Each type has its own unique method of preparation and culinary applications.
1. French Meringue: This is the simplest and most commonly used type of meringue, making it perfect for our cotton candy-inspired recipe. It is made by whipping egg whites until soft peaks form and then gradually adding granulated sugar until the mixture becomes glossy and stiff. French meringue is typically baked at a low temperature until dry and crisp, resulting in a delicate texture that melts in your mouth.
2. Swiss Meringue: This type involves gently heating the egg whites and sugar together over a double boiler before whipping them into stiff peaks. The heat helps dissolve the sugar, resulting in a smoother texture. Swiss meringue is often used in buttercream frosting and for topping pies.
3. Italian Meringue: This meringue is made by pouring a hot sugar syrup into whipped egg whites, creating a stable and glossy mixture. Italian meringue is often used in confections and is known for its stability, making it ideal for frostings and mousses.
For our Rainbow Cotton Candy Meringues, we will be using French meringue due to its lightness and ease of preparation, making it accessible for home bakers of all levels.
The Science Behind Meringue
Understanding the science of meringue is key to achieving the perfect texture and stability. The primary ingredients in meringue are egg whites, sugar, and, optionally, cream of tartar. Here’s how each ingredient plays a role in creating these delightful confections:
– Egg Whites: The base of meringue, egg whites contain proteins that, when whipped, create a stable foam. To achieve the best volume and stability, it’s crucial to use room temperature egg whites. Cold egg whites do not whip as well, and achieving the desired texture becomes challenging.
– Granulated Sugar: Sugar not only sweetens the meringue but also stabilizes the whipped egg whites. When sugar is added gradually to the egg whites, it helps to form a strong protein network, resulting in a glossy and firm meringue. The sugar should be incorporated slowly to allow the egg whites to adjust and build the necessary structure.
– Cream of Tartar: This acidic powder acts as a stabilizer for the egg whites, helping to prevent them from collapsing and ensuring that the meringue maintains its shape. It also enhances the overall volume of the meringue by allowing the proteins to bond more effectively.
– Flavoring and Color: In the case of our Rainbow Cotton Candy Meringues, we will enhance the flavor with vanilla extract and cotton candy flavoring while adding vibrant food coloring to create the eye-catching rainbow effect. These additions not only elevate the taste but also contribute to the whimsical aesthetic.
Ingredients Breakdown for Rainbow Cotton Candy Meringues
To create your own Rainbow Cotton Candy Meringues, you’ll need the following ingredients. Each component plays a crucial role in achieving not just the right texture, but also the delightful flavors and visual appeal.
1. Egg Whites (4 large): Ensure your egg whites are at room temperature before whipping. This will help them achieve maximum volume. Fresh eggs are preferable for making meringue, as they whip better than older eggs.
2. Granulated Sugar (1 cup): Fine granulated sugar works best for meringues. As it dissolves, it provides sweetness and stability to the whipped egg whites.
3. Cream of Tartar (1/4 teaspoon): This small amount is essential in stabilizing the egg whites. It helps prevent the meringue from deflating and ensures a firm texture.
4. Vanilla Extract (1 teaspoon): A classic flavor enhancer, vanilla adds depth to the sweetness of the meringues. Choose pure vanilla extract for the best flavor.
5. Food Coloring: For the rainbow effect, choose gel food coloring in multiple colors. Gel food coloring is preferred over liquid as it doesn’t add extra moisture to the meringue.
6. Cotton Candy Flavoring (1-2 teaspoons, optional): This flavoring adds a nostalgic touch and enhances the overall theme of the meringues. Look for high-quality cotton candy flavoring for the best results.
7. Edible Glitter or Sprinkles (optional): To make these meringues even more festive, consider adding edible glitter or colorful sprinkles. They contribute to the visual allure and make your meringues stand out.
With these ingredients on hand, you are ready to embark on the delightful journey of creating Rainbow Cotton Candy Meringues. The combination of sweet, airy meringue with the nostalgia of cotton candy makes this recipe a unique addition to your dessert repertoire.
Step-by-Step Instructions for Perfecting Rainbow Cotton Candy Meringues
Now that you have a solid understanding of meringue and its key ingredients, let’s dive into the step-by-step process of creating your Rainbow Cotton Candy Meringues. Follow these instructions carefully for the best results:
Step 1: Preheat the Oven
Begin by preheating your oven to 200°F (93°C). A low temperature is crucial for baking meringues, allowing them to dry out rather than cook, resulting in a crisp texture.
Step 2: Prepare the Baking Sheets
Line two baking sheets with parchment paper. To prevent the meringues from sticking, you can lightly grease the parchment paper with a bit of oil or cooking spray. This will ensure easy removal once they are baked.
Step 3: Whip the Egg Whites
In a clean, dry mixing bowl, add your room temperature egg whites. Using a stand mixer or hand mixer, start whisking the egg whites on medium speed until they become frothy. This usually takes about 1-2 minutes.
Step 4: Add Cream of Tartar
As the egg whites begin to froth, add the cream of tartar. Continue whisking on medium-high speed until soft peaks form. Soft peaks are achieved when the egg whites hold a shape but the tips gently fold over.
Step 5: Gradually Add Sugar
Once you have soft peaks, gradually add the granulated sugar, one tablespoon at a time. Ensure that each addition is fully incorporated before adding the next. This process may take about 5-7 minutes. You want to whisk until the mixture is glossy and stiff peaks form. The meringue will feel smooth between your fingers when ready.
Step 6: Incorporate Vanilla Extract and Flavoring
Once the meringue reaches stiff peaks, gently fold in the vanilla extract and cotton candy flavoring using a spatula. Be careful not to deflate the meringue as you mix.
Step 7: Add Food Coloring
Divide the meringue into separate bowls if you wish to create multiple colors for your rainbow effect. Add gel food coloring to each bowl and gently fold until you achieve the desired vibrancy. For a classic rainbow look, consider using red, orange, yellow, green, blue, and purple.
Step 8: Pipe the Meringues
Using a piping bag fitted with a star tip (or simply snipping the corner of a zip-top bag), pipe small mounds of meringue onto the prepared baking sheets. You can create swirls or even layered colors for a fun, eye-catching effect.
Step 9: Bake the Meringues
Place the baking sheets in the preheated oven and bake for 1.5 to 2 hours. The meringues should be dry to the touch and easily peel away from the parchment paper when done. If you want to ensure they dry out completely, turn off the oven and leave the meringues inside for an additional hour.
Step 10: Cool and Serve
Once fully baked, remove the meringues from the oven and allow them to cool completely on the baking sheets. Once cooled, you can dust them with edible glitter or sprinkles if desired, adding an extra touch of whimsy.
With these detailed steps, you’ll be well on your way to creating your own delightful Rainbow Cotton Candy Meringues. These treats are sure to impress your guests and make any occasion a little more special.
Stay tuned for the next part of this article, where we will explore tips for achieving the best results and address some common questions about meringue and its preparation!

Preheating the Oven: Importance of Temperature Control in Baking Meringues
One of the most critical steps in baking perfect meringues is preheating your oven. Meringues require a consistent, low temperature to dry out properly without browning. Generally, setting your oven to a temperature of 200°F (95°C) is ideal for meringue. This gentle heat allows the moisture to evaporate slowly, resulting in a crisp exterior and a soft, chewy center. If your oven is too hot, the meringues may brown and lose their delicate flavor and texture. Use an oven thermometer to ensure accuracy, as the dial on your oven may not always reflect the true internal temperature.
Preparing the Meringue Base: Techniques for Achieving Soft Peaks
To begin, gather your ingredients: egg whites, granulated sugar, and a pinch of cream of tartar. The cream of tartar acts as a stabilizing agent, helping the egg whites maintain their structure. Start by placing the egg whites in a clean, dry mixing bowl. Using a stand mixer or a handheld mixer, beat the egg whites on medium speed until they become frothy.
Once frothy, add the cream of tartar and continue beating until you achieve soft peaks. This stage is crucial; the meringue should form peaks that gently bend over at the tips when the beaters are lifted. If you beat the egg whites too much, they can become dry and grainy, leading to a less desirable texture in your final meringues.
Gradually Adding Sugar: The Significance of Incorporating Sugar Slowly for Stability
With your egg whites at soft peaks, it’s time to add the sugar. This step is vital for achieving a stable meringue. Gradually sprinkle in the granulated sugar, about one tablespoon at a time, while continuing to beat the mixture on medium-high speed. This method allows the sugar to dissolve properly, resulting in a smooth, glossy meringue.
After about 5-7 minutes of mixing, you should reach stiff peaks, where the meringue holds its shape well and is shiny. If you rub a small amount between your fingers and feel any sugar granules, continue beating until fully dissolved.
Flavoring and Coloring: Tips for Folding Ingredients Without Deflating Meringue
Once you’ve achieved stiff peaks, it’s time to flavor and color your meringue. For this rainbow cotton candy effect, consider using a combination of cotton candy flavoring and food coloring. Start by dividing your meringue base into separate bowls for each color you want to create.
Add a few drops of food coloring to each bowl, using gel-based colors for a vibrant appearance. Gently fold the coloring into the meringue using a spatula, being careful not to deflate the mixture. The goal is to maintain the airiness while creating distinct colored sections. A folding technique helps to gently incorporate the colors without losing volume.
Creating the Rainbow Swirl: Techniques for Layering Colors in a Piping Bag
To create the rainbow swirl effect, you’ll need a piping bag fitted with a star tip. Take a piece of parchment paper and lay it flat on your working surface. Using a spatula, spoon each colored meringue into the piping bag, layering them side by side. Start with your first color, then add the next color alongside it, continuing until all colors are layered.
To enhance the swirl effect, you can use a toothpick or skewer to gently swirl the colors together in the piping bag before piping. Be cautious not to overmix, as you want to retain distinct color bands for that beautiful rainbow effect.
Piping the Meringues: Best Practices for Size and Spacing on the Baking Sheet
When piping your meringues onto the prepared baking sheet lined with parchment paper, maintain even spacing. Pipe small swirls or rounds about 1-2 inches apart, as the meringues will not spread during baking. Hold the piping bag vertically and apply even pressure to create consistent shapes.
For added flair, you can pipe multiple layers, creating a layered look that enhances the visual appeal. If you want to create a more whimsical design, try different piping tips or shapes to bring your creative vision to life.
Baking Process: Ideal Conditions for Drying Meringues and Signs of Doneness
Once your meringues are piped, place them in the preheated oven. Baking meringues is less about cooking and more about drying them out completely. The ideal baking time is typically between 1.5 to 2 hours, depending on the size and thickness of your meringues.
To check for doneness, the meringues should feel dry to the touch and easily lift off the parchment paper. A slight tap on the bottom should sound hollow. If they appear shiny and sticky, they need more time. Remember, patience is key when it comes to baking meringues; rushing this step can lead to chewy instead of crisp treats.
Cooling Technique: Importance of Leaving the Meringues in the Oven for a Gentle Cooldown
After baking, turn off the oven and leave the door slightly ajar. Allow the meringues to cool slowly inside the oven for at least an hour. This gradual cooling process helps to prevent cracks and maintains the structure of the meringues. If you remove them from the oven too soon, the sudden temperature change can lead to collapsing or weeping.
Once cooled, carefully transfer the meringues to a wire rack to cool completely. They should feel light and airy, with a crisp outer layer that shatters when bitten into.
The Art of Presentation: Decorating and Serving Suggestions
To elevate your rainbow cotton candy meringues, consider adding edible glitter or colorful sprinkles for that extra festive touch. A light dusting of powdered sugar can also enhance their appearance, giving a whimsical and sweet finish.
Meringues can serve as delightful decorations for cakes, adding a playful element to your dessert table. Alternatively, they can be used as garnishes for mousses, puddings, or even ice cream sundaes. Create a colorful dessert platter by pairing meringues with fruits like strawberries and blueberries, or other treats like macarons and chocolate truffles, to impress your guests.
Storing and Enjoying Rainbow Cotton Candy Meringues
To keep your rainbow cotton candy meringues fresh and maintain their delightful texture, store them in an airtight container at room temperature. Avoid refrigerating, as the humidity can cause them to become chewy. When stored properly, meringues can last for up to two weeks, making them an excellent make-ahead treat for celebrations.
For an optimal taste experience, enjoy meringues within a week of making them. Additionally, consider incorporating meringues into other desserts—crush them over a bowl of yogurt, or layer them in a parfait with whipped cream and fresh fruit for an enjoyable twist.
Conclusion
Making rainbow cotton candy meringues is not just about creating a sweet treat; it’s about embracing creativity and the joy of baking. These whimsical confections bring color and personality to any occasion, from birthday parties to seasonal celebrations. The versatility of meringues allows you to experiment with flavors and colors, creating personal touches that reflect your culinary style.
Encourage your culinary curiosity by diving into the world of meringue-making, exploring different combinations of colors and flavors that will delight your taste buds and impress your friends and family. Every batch of these delightful meringues is an opportunity to create something unique and enchanting that will leave a lasting impression.

