Introduction
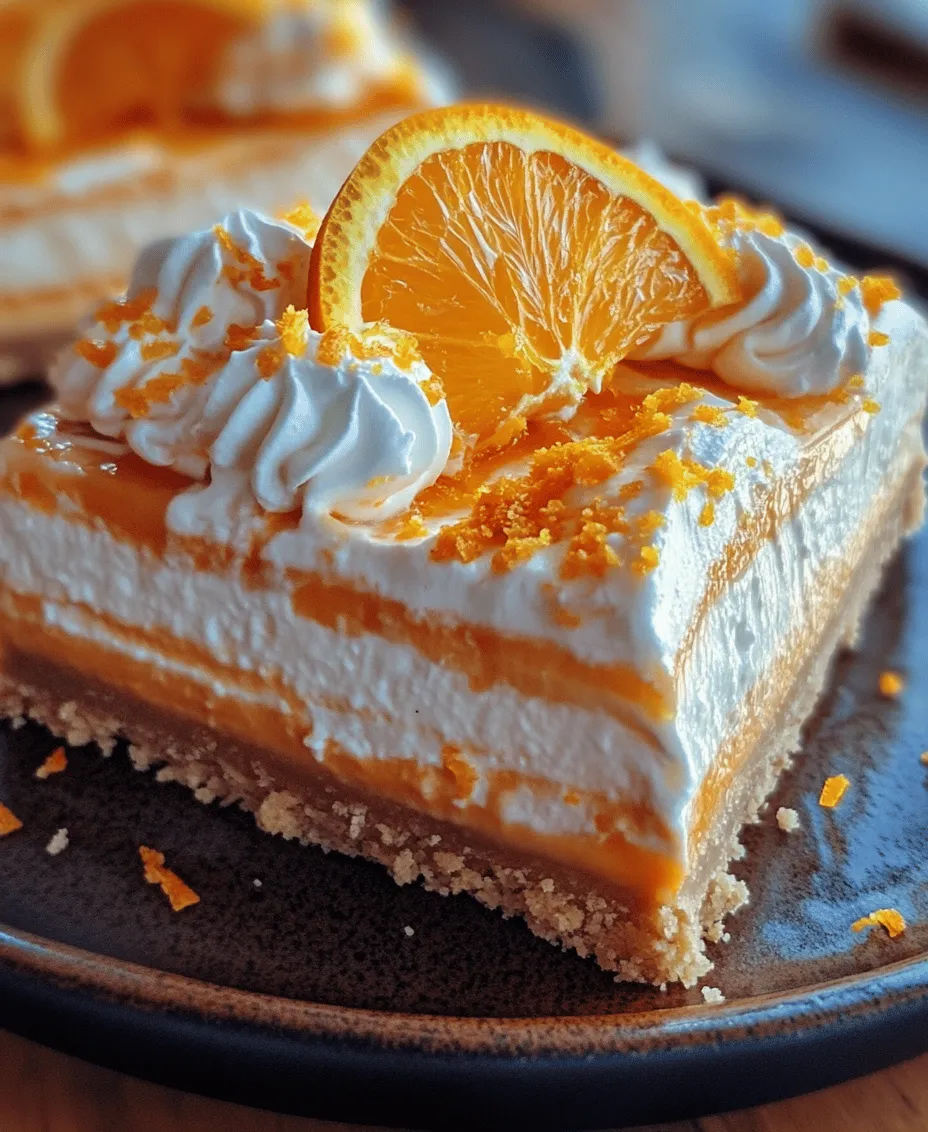
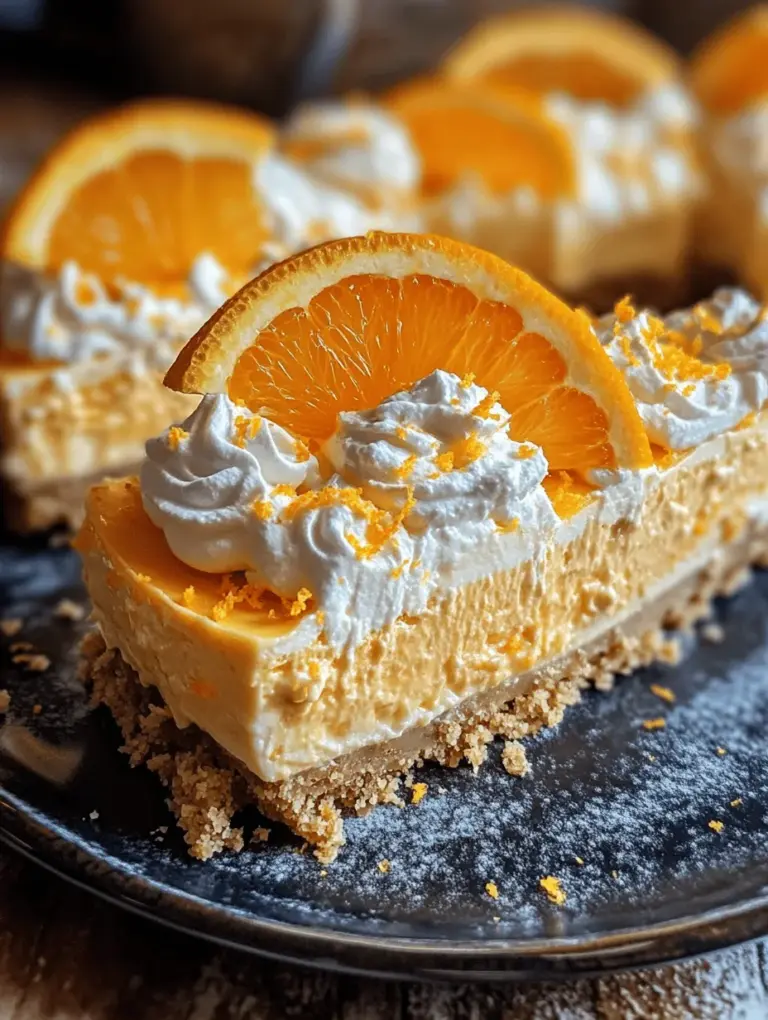
If you’re searching for a dessert that perfectly encapsulates the essence of summer, look no further than the No-Bake Orange Creamsicle Cheesecake. This delightful confection brings back memories of warm days spent enjoying the classic orange creamsicle popsicles that many of us cherished during childhood. With its luscious, creamy texture and refreshing citrus notes, this cheesecake is a nostalgic treat that is both easy to make and irresistibly delicious.
No-bake cheesecakes have become increasingly popular in recent years, and for good reason. They offer a simple, stress-free alternative to traditional baked cheesecakes without compromising on flavor or texture. Perfect for those who want to create an impressive dessert without the need for baking, these cheesecakes can be assembled quickly and chilled until ready to serve. The No-Bake Orange Creamsicle Cheesecake stands out, not only for its simplicity but also for its harmonious blend of flavors that evoke the spirit of summer in every bite.
Imagine sinking your fork into a slice of this creamy cheesecake, where the sweet and tangy flavor of fresh oranges mingles with a smooth, velvety filling. Paired with a buttery graham cracker crust, each slice is a delightful reminder of sunny days and carefree moments. Whether you’re hosting a summer gathering, celebrating a special occasion, or simply indulging in a sweet treat, this no-bake cheesecake is sure to impress your guests and satisfy your sweet tooth.
Understanding the Ingredients
To create a delicious No-Bake Orange Creamsicle Cheesecake, it’s essential to use high-quality, fresh ingredients that will enhance the overall flavor and texture of the dessert. The key components of this recipe include cream cheese, powdered sugar, heavy whipping cream, orange juice, orange zest, and a few others that contribute to the cheesecake’s delightful character.
Fresh Ingredients: One of the most important aspects of this recipe is the use of freshly squeezed orange juice and zest. Fresh oranges not only provide a vibrant flavor but also infuse the cheesecake with natural sweetness and a bright color that can’t be replicated with bottled juice. When selecting your oranges, look for those that are firm and heavy for their size, as they’ll yield the juiciest results.
Cheesecake Base Ingredients: The star of the show is the cream cheese, which gives the cheesecake its rich and creamy texture. It’s crucial to allow the cream cheese to come to room temperature before starting, as this will make it easier to mix and achieve a smooth filling. Powdered sugar is used to sweeten the filling without adding graininess, while heavy whipping cream adds lightness and fluffiness to the mixture.
Optional Ingredients: Some recipes may call for gelatin powder, which can help stabilize the cheesecake and give it a firmer texture. While this ingredient is optional, it can be particularly useful if you’re planning to serve the cheesecake on a hot day or if you want to prepare it in advance. If you choose to use gelatin, it’s essential to follow the instructions carefully to ensure it’s properly incorporated into the filling.
Creating the Perfect Crust
The foundation of any great cheesecake is its crust, and for the No-Bake Orange Creamsicle Cheesecake, we’ll be using a simple yet delicious graham cracker crust. This crust is made with just three ingredients: graham cracker crumbs, unsalted butter, and granulated sugar.
Ingredients for the Crust:
– 1 ½ cups graham cracker crumbs
– ½ cup unsalted butter, melted
– ¼ cup granulated sugar
Step-by-Step Guide to Preparing the Crust
1. Mix the Dry Ingredients: In a medium mixing bowl, combine the graham cracker crumbs and granulated sugar. Mix them together until evenly combined. The sugar adds a hint of sweetness and helps bind the crumbs together.
2. Incorporate the Butter: Pour the melted unsalted butter into the crumb mixture. Using a fork or your hands, mix until the crumbs are well-coated with the butter, and the mixture resembles wet sand. The butter is key to achieving a rich flavor and providing the necessary moisture for the crust.
3. Achieving the Right Consistency: The mixture should hold together when squeezed in your hand. If it crumbles apart, you may need to add a bit more melted butter, a tablespoon at a time, until you reach the right consistency.
4. Pressing the Crust: Transfer the crumb mixture into a 9-inch springform pan. Using the bottom of a measuring cup or your fingers, press the crumbs evenly across the bottom of the pan and slightly up the sides. It’s essential to ensure the crust is tightly packed to prevent it from crumbling when sliced.
5. Chill the Crust: Once the crust is pressed evenly, place it in the refrigerator for at least 30 minutes. Chilling the crust will help it set and firm up, making it easier to add the creamy filling later.
Taking the time to create a well-prepared crust is crucial for the overall success of your No-Bake Orange Creamsicle Cheesecake. A sturdy, flavorful crust will provide a delightful contrast to the smooth filling and enhance the overall dessert experience.
Crafting the Silky Cheesecake Filling
Now that we have our crust ready, it’s time to turn our attention to crafting the silky cheesecake filling. The filling is what truly makes this dessert shine, and it’s important to follow the steps carefully to achieve that perfect creamy texture.
Ingredients for the Filling
– 16 oz cream cheese, softened
– 1 cup powdered sugar
– 1 cup heavy whipping cream
– ½ cup freshly squeezed orange juice
– 2 tablespoons orange zest
– 1 teaspoon vanilla extract
Step-by-Step Instructions for Making the Filling
1. Prepare the Cream Cheese: In a large mixing bowl, beat the softened cream cheese using an electric mixer on medium speed until it’s smooth and creamy. This step is vital; if the cream cheese is too cold, it will be lumpy and difficult to incorporate.
2. Add the Powdered Sugar: Gradually add the powdered sugar to the cream cheese, continuing to beat until fully incorporated. The mixture should be smooth and free of lumps.
3. Incorporate the Flavorings: Add the freshly squeezed orange juice, orange zest, and vanilla extract to the cream cheese mixture. Mix well until all the ingredients are combined and the filling is smooth. The orange juice and zest will give the cheesecake its signature flavor, while the vanilla extract adds depth to the overall sweetness.
4. Whip the Heavy Cream: In a separate mixing bowl, whip the heavy whipping cream until stiff peaks form. This means that when you lift the beaters out of the bowl, the cream should hold its shape and not droop. Be careful not to over-whip, as this can lead to a grainy texture.
5. Fold in the Whipped Cream: Using a spatula, gently fold the whipped cream into the cream cheese mixture. Start by adding a small amount of whipped cream to lighten the cream cheese mixture, then gradually fold in the remaining whipped cream. Be gentle to avoid deflating the whipped cream, which is key to achieving a light and airy filling.
6. Final Mixing: Ensure that all ingredients are fully combined, and the filling is smooth and creamy. The result should be a luscious mixture that’s ready to be poured into the prepared crust.
The combination of fresh orange juice and zest in the filling not only provides a refreshing flavor but also creates a beautiful, vibrant color that makes the cheesecake visually appealing.
Optional Firmness: The Role of Gelatin
As mentioned earlier, if you’re looking for a firmer texture to your cheesecake, incorporating gelatin can be a great option. It’s particularly useful for warmer months or if you plan to transport the cheesecake. To use gelatin, you typically dissolve it in a small amount of water and then incorporate it into the cream cheese mixture before folding in the whipped cream. This will help stabilize the cheesecake as it sets in the refrigerator.
By following these steps, you’ll create a delightful No-Bake Orange Creamsicle Cheesecake that captures the essence of summer in every bite. The combination of creamy filling and buttery crust, enhanced by the bright flavors of orange, is sure to be a hit at any gathering. As we continue, we’ll explore how to assemble this cheesecake and the final touches that will make it even more irresistible.

Understanding Gelatin in Desserts
Gelatin is a key ingredient often used in no-bake desserts, including cheesecakes, to provide structure and stability. It is a natural protein derived from collagen, which is found in animal products. When dissolved in a warm liquid and then cooled, gelatin forms a gel-like texture that helps set the dessert, giving it a firm yet creamy consistency.
In the context of a no-bake cheesecake like our Orange Creamsicle Cheesecake, gelatin plays a crucial role in achieving the perfect texture. When added to the cheesecake filling, it helps prevent the dessert from being too runny, ensuring a slice that holds its shape when served. This is particularly important for cheesecakes that are left to set in the refrigerator, as they need to maintain structure without the benefit of baking.
When to Use Gelatin for a Firmer Cheesecake Texture
If you prefer a firmer cheesecake, incorporating gelatin is an excellent choice. Generally, it is recommended to use gelatin when:
– Desired Consistency: You are looking for a cheesecake that can hold its shape well, especially when sliced. This is ideal for serving at gatherings or events where presentation matters.
– Moisture Content: The recipe includes a high moisture content, such as fruit purees or other liquid ingredients, which can lead to a softer texture without the stabilizing effect of gelatin.
– Transporting: If you plan to transport your cheesecake, using gelatin will help ensure it doesn’t lose shape during transit.
Alternative Options for Those Who Prefer Not to Use Gelatin
For those who prefer to avoid gelatin—whether due to dietary restrictions, vegetarian or vegan preferences, or simply personal choice—there are several alternatives that can provide similar results:
– Agar-Agar: A plant-based gelling agent derived from seaweed, agar-agar can be substituted for gelatin in a 1:1 ratio. It sets more firmly, so adjustments may be needed in the recipe.
– Pudding Mix: Instant pudding mix can also help thicken the cheesecake filling. This option adds flavor and sweetness while providing structure.
– Cream Cheese: Increasing the amount of cream cheese or adding sour cream can lend more body to the filling without the need for gelatin.
– Chia Seeds: Ground chia seeds can be used as a natural thickening agent. Mix them with water to create a gel-like consistency before incorporating them into the cheesecake filling.
Assembling the Cheesecake
Now that you have your cheesecake filling ready, it’s time to assemble your No-Bake Orange Creamsicle Cheesecake.
Pouring and Spreading the Cheesecake Filling
1. Prepare Your Crust: Ensure that your crust is set and firm in the springform pan. If you’re using a store-bought crust, make sure it fits snugly in the pan.
2. Pour the Filling: Carefully pour the orange cheesecake filling over the prepared crust. Start in the center and let it spread out towards the edges naturally. This helps to minimize air bubbles.
3. Spread Evenly: Using a spatula, gently spread the filling to ensure it reaches the edges of the crust. Tilt the pan slightly if necessary to allow the filling to settle evenly.
Techniques for Smoothing the Top and Removing Air Bubbles
– Smoothing the Top: After pouring, use an offset spatula or a butter knife to smooth the top of the cheesecake. This step is crucial for an aesthetically pleasing finish.
– Removing Air Bubbles: To eliminate air bubbles that may have formed during mixing, gently tap the sides of the springform pan on the counter. This will cause the bubbles to rise to the surface and pop.
Importance of Covering and Refrigerating the Cheesecake
Once your cheesecake is assembled, it’s essential to cover it tightly with plastic wrap or a lid to prevent any odors from the refrigerator from seeping in and affecting the flavor. Refrigerate the cheesecake for at least 4–6 hours, or overnight if possible. This allows the gelatin or alternative setting agent to work its magic and ensures a firm, sliceable dessert.
Serving Suggestions
When your cheesecake is fully set, it’s time to serve it!
Releasing the Cheesecake from the Springform Pan
1. Carefully Remove the Sides: Once the cheesecake is set, run a thin knife around the edge of the springform pan to loosen it from the sides. This will help prevent any sticking when you release the pan.
2. Open the Pan: Gently remove the sides of the springform pan by unclipping the latch. Be careful to keep the cheesecake intact during this process.
Creative Ideas for Topping the Cheesecake
– Whipped Cream: Add dollops of whipped cream on top of the cheesecake for a light and creamy contrast. You can pipe it using a pastry bag for an elegant look.
– Fresh Orange Slices: Garnish with fresh orange slices or segments. Citrus not only enhances the flavor but also adds a vibrant pop of color.
– Orange Zest: Grate some orange zest over the top to add an aromatic touch and extra citrus flavor.
– Chocolate Drizzle: For a twist, consider drizzling melted chocolate over the top for a delightful contrast between orange and chocolate.
Suggestions for Garnishing and Presenting the Cheesecake
Presentation is key to making your cheesecake irresistible. Serve it on a decorative platter and consider adding fresh mint leaves for a pop of green color. You can also create a fun atmosphere by pairing it with additional orange-flavored treats, such as candied orange peels or orange sorbet on the side. Make sure to slice the cheesecake with a hot knife for clean edges, and wipe the knife with a paper towel between cuts to maintain a beautiful appearance.
Storage and Shelf Life
Proper storage is crucial for maintaining the quality of your No-Bake Orange Creamsicle Cheesecake.
How to Properly Store the Cheesecake
– Refrigeration: Store leftover cheesecake in the refrigerator, covered tightly with plastic wrap or in an airtight container. It’s best consumed within 4–5 days for optimal freshness.
– Freezing: If you want to extend the shelf life, you can freeze the cheesecake. Wrap it well in plastic wrap and then aluminum foil to prevent freezer burn. It can be stored for up to 2 months in the freezer.
Tips for Keeping It Fresh and Delicious Over Time
– Thawing: When you’re ready to enjoy a frozen cheesecake, transfer it to the refrigerator to thaw overnight. Avoid thawing at room temperature, as this can compromise the texture and flavor.
– Avoid Frequent Opening: Try to minimize the number of times you open the refrigerator or freezer, as temperature fluctuations can affect the texture of the cheesecake.
Nutritional Information
Understanding the nutritional aspects of your No-Bake Orange Creamsicle Cheesecake can help you enjoy it responsibly.
Overview of Nutritional Aspects
A typical slice of this cheesecake (assuming about 12 servings) contains approximately:
– Calories: 250–300 calories
– Fat: 15–20g
– Carbohydrates: 30–35g
– Protein: 4–6g
– Sugars: 20–25g
These values can vary based on the specific ingredients used, such as full-fat cream cheese versus low-fat alternatives.
Dietary Considerations
If you’re monitoring your sugar intake or calories, consider using a sugar substitute or reducing the amount of sugar in the filling. For a healthier twist, you could incorporate Greek yogurt into the filling for added protein and creaminess without compromising flavor.
Conclusion
In summary, the No-Bake Orange Creamsicle Cheesecake is a delightful dessert that combines the refreshing taste of oranges with the creamy texture of cheesecake. With the understanding of how gelatin works, the assembling process, and creative serving suggestions, you can easily create a stunning dessert that is sure to impress your family and friends.
This cheesecake is not only perfect for warm weather but also versatile enough for special occasions, potlucks, or as a sweet treat any day of the week. Enjoy the process of making this dessert, and don’t hesitate to customize it with your favorite toppings and flavors. Savor each bite of this delightful creation, and let the refreshing taste of orange take you on a culinary journey!

