Introduction to the Lazy Sunday Neapolitan Cake
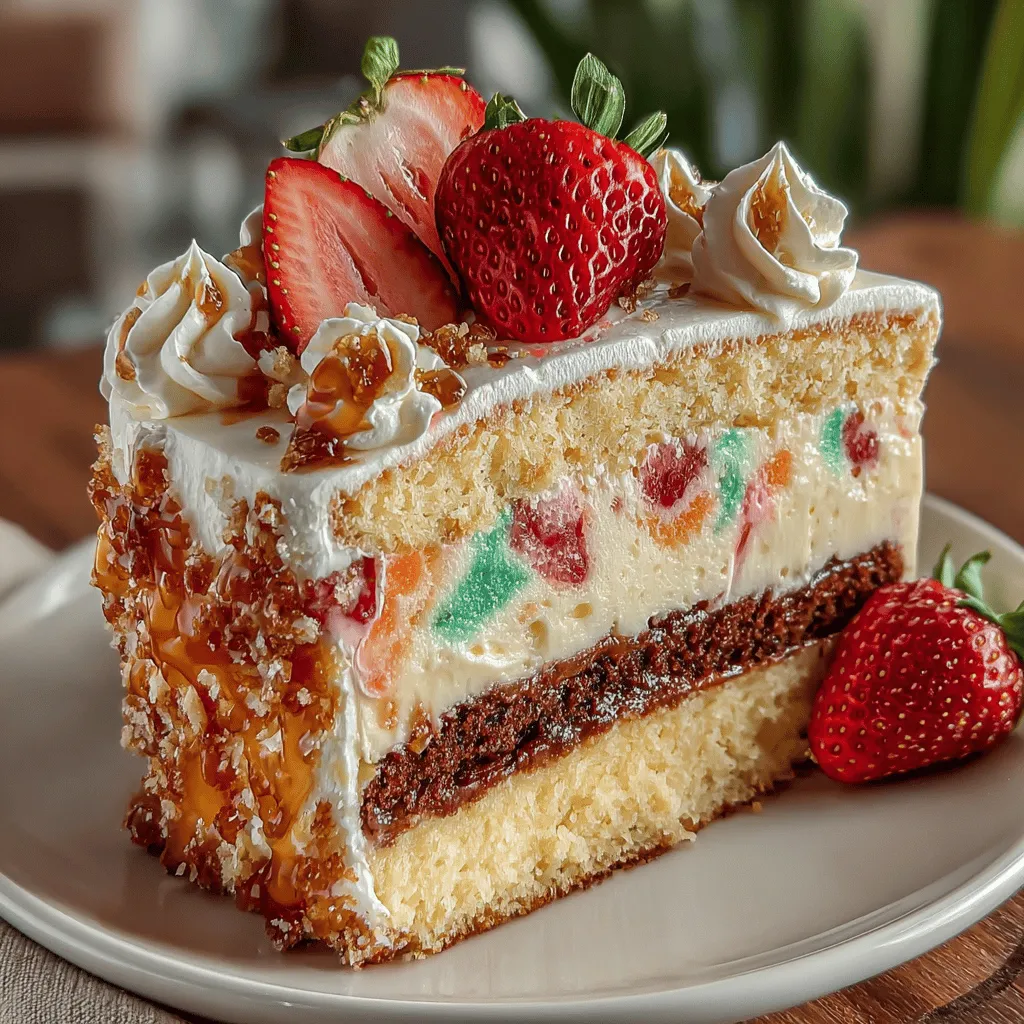
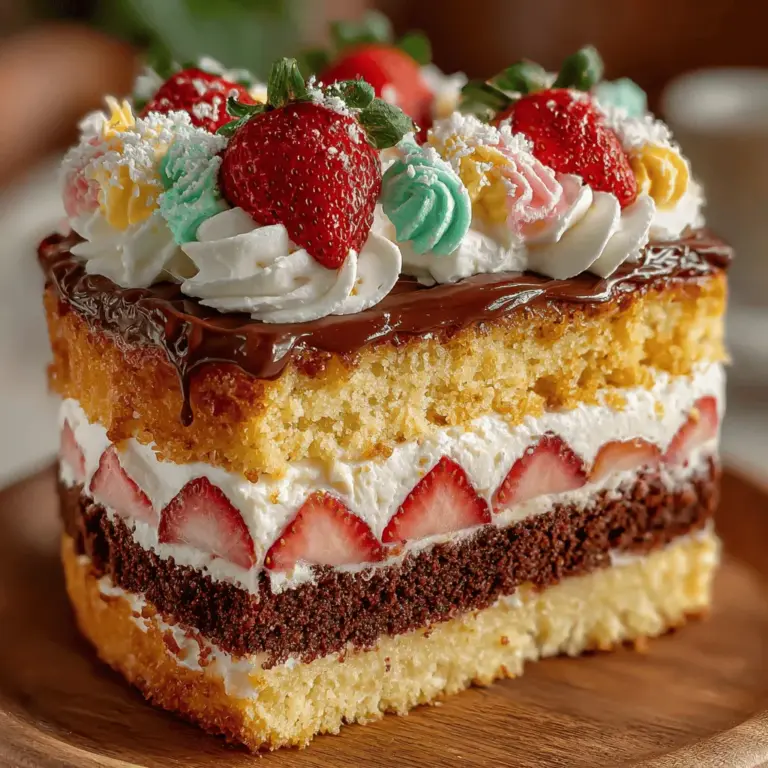
Indulging in a delightful dessert can transform an ordinary day into a special occasion, and what better treat than the Lazy Sunday Neapolitan Cake? This charming cake combines three luscious flavors—classic vanilla, rich chocolate, and fresh strawberry—making it a perfect centerpiece for any gathering or a sweet reward for a relaxing day at home. With its vibrant layers and delectable taste, the Neapolitan Cake not only satisfies your sweet tooth but also serves as a feast for the eyes.
Originating from the Italian city of Naples, the Neapolitan cake has evolved over the years into various interpretations, each celebrating the classic combination of flavors. This version, aptly named the Lazy Sunday Neapolitan Cake, embraces the spirit of laid-back weekends, inviting bakers of all skill levels to enjoy the art of cake-making without the pressure of perfection. Whether you’re hosting a brunch, celebrating a birthday, or simply indulging yourself on a quiet Sunday afternoon, this cake is sure to impress.
In this article, we will guide you through the process of creating this stunning cake, detailing the ingredients, steps, and techniques to ensure that your baking experience is both enjoyable and rewarding. From understanding the individual layers to crafting the perfect buttercream frosting, we will cover everything you need to know to make your Lazy Sunday Neapolitan Cake a memorable dessert.
Understanding the Layers of Flavor
To truly appreciate the Lazy Sunday Neapolitan Cake, it’s essential to delve into its three distinctive layers. Each layer not only contributes to the cake’s overall flavor profile but also adds to its visual appeal. Let’s explore the nuances of each layer, starting with the vanilla.
Exploring the Vanilla Layer
The vanilla layer of the Lazy Sunday Neapolitan Cake serves as a classic foundation, providing a light and airy texture that beautifully complements the richer chocolate and fruity strawberry layers. The flavor profile is sweet and subtly fragrant, thanks to the use of high-quality vanilla extract or vanilla beans, which elevate the cake’s taste significantly. This layer is crucial, as it balances the overall richness of the cake.
To prepare the vanilla layer, begin by gathering the following ingredients: all-purpose flour, granulated sugar, unsalted butter, eggs, milk, baking powder, and a pinch of salt. Using high-quality ingredients is essential for achieving a moist and flavorful cake; for instance, opting for pure vanilla extract instead of imitation can make a noticeable difference in the final product.
Step-by-Step Breakdown of Preparation:
1. Preheat your oven: Start by preheating your oven to 350°F (175°C). This ensures that your cake will bake evenly and rise beautifully.
2. Prepare your baking pan: Grease and flour two 9-inch round cake pans to prevent sticking, or line the bottoms with parchment paper for easier release.
3. Cream the butter and sugar: In a large mixing bowl, cream together 1 cup of unsalted butter and 1 ½ cups of granulated sugar using an electric mixer on medium speed until the mixture is light and fluffy, usually about 3-5 minutes.
4. Add the eggs and vanilla: Incorporate 4 large eggs, one at a time, mixing well after each addition. Add 2 teaspoons of pure vanilla extract and continue mixing until combined.
5. Combine dry ingredients: In another bowl, whisk together 2 cups of all-purpose flour, 2 teaspoons of baking powder, and a pinch of salt.
6. Mix dry and wet ingredients: Gradually add the dry ingredients to the butter mixture, alternating with 1 cup of milk. Start and end with the dry ingredients, mixing until just combined. Be careful not to overmix, as this can result in a dense cake.
7. Bake: Divide the batter evenly between the prepared cake pans and bake for 25-30 minutes, or until a toothpick inserted into the center comes out clean. Once baked, allow the cakes to cool in the pans for about 10 minutes before transferring them to a wire rack to cool completely.
With the vanilla layer complete, it’s time to move on to the next delicious component of our Neapolitan masterpiece: the chocolate layer.
Diving into the Chocolate Layer
The chocolate layer introduces a deeper, richer flavor that contrasts beautifully with the sweetness of the vanilla and the freshness of the strawberry. This layer is essential for adding complexity to the cake, and it is crucial to achieve the right balance of chocolate without overwhelming the other flavors.
For the chocolate layer, you will use similar ingredients to the vanilla layer but with the addition of cocoa powder. Selecting high-quality cocoa powder is vital, as it significantly affects the taste and texture of your cake.
Preparation Steps for a Moist Chocolate Layer:
1. Preheat the oven: If you’re baking the chocolate layer after the vanilla, ensure your oven is still preheated to 350°F (175°C).
2. Prepare your baking pan: Use the same pans as for the vanilla layer, greasing and flouring them or lining them with parchment paper.
3. Mix dry ingredients: In a medium bowl, whisk together 1 ¾ cups of all-purpose flour, ¾ cup of unsweetened cocoa powder, 2 teaspoons of baking powder, and a pinch of salt.
4. Cream butter and sugar: In a large mixing bowl, cream together 1 cup of unsalted butter with 1 ½ cups of granulated sugar until light and fluffy, just as you did for the vanilla layer.
5. Add eggs and vanilla: Mix in 4 large eggs, one at a time, followed by 2 teaspoons of pure vanilla extract.
6. Combine dry and wet ingredients: Gradually add the dry mixture to the wet ingredients, alternating with 1 cup of milk, mixing until just combined.
7. Bake: Pour the chocolate batter evenly into the prepared cake pans, smoothing the top with a spatula. Bake for 25-30 minutes, or until a toothpick comes out clean. Allow the cakes to cool in the pans for a few minutes before transferring them to a wire rack.
Now that the chocolate layer is ready, we can turn our attention to the final layer—the strawberry layer. This is where the Lazy Sunday Neapolitan Cake truly shines, bringing a burst of freshness and natural sweetness that ties the whole dessert together beautifully.
Highlighting the Strawberry Layer
The strawberry layer of the Lazy Sunday Neapolitan Cake is a celebration of fresh fruit, offering a vibrant color and juicy flavor that enhances the overall cake experience. Using ripe, seasonal strawberries ensures that this layer is as fresh and sweet as possible, providing a delightful contrast to the other two layers.
To prepare the strawberry layer, gather fresh strawberries, sugar, and a bit of cornstarch or flour to help bind the fruit. The goal is to create a layer that is both flavorful and has the right consistency to hold its shape when layered with the other components.
Techniques for Preparing and Folding in Strawberries:
1. Prepare the strawberries: Begin by washing and hulling about 2 cups of fresh strawberries. Slice them into thin pieces, ensuring that they are uniform in size for even distribution.
2. Macérate the strawberries: In a bowl, combine the sliced strawberries with ¼ cup of sugar. Allow the mixture to sit for about 10-15 minutes, enabling the strawberries to release their juices and create a natural syrup.
3. Thicken the mixture: After macerating, if desired, you can add 1 tablespoon of cornstarch or flour to the strawberry mixture. This helps to thicken the juices slightly, preventing the layer from becoming too runny when assembled. Gently fold the flour into the strawberries, being careful not to break them down too much.
4. Prepare the batter: For the strawberry layer, you can use a basic vanilla cake batter similar to the first layer, but substitute a portion of the liquid with the strawberry juice collected from the macerated fruit for added flavor. This can be done by reducing the milk amount slightly to accommodate the juice.
5. Bake: Pour the strawberry batter into the prepared cake pans, smoothing the tops, and bake until a toothpick comes out clean, about 25-30 minutes. Allow the cakes to cool completely.
With all three layers—vanilla, chocolate, and strawberry—prepared, you are well on your way to assembling the Lazy Sunday Neapolitan Cake. But first, we need to craft the buttercream frosting that will bring this beautiful dessert together, enhancing both its flavor and aesthetics.
Stay tuned for the next section, where we’ll delve into crafting the perfect buttercream frosting to complete your Lazy Sunday Neapolitan Cake!

Layering Techniques
To create the perfect Lazy Sunday Neapolitan Cake, mastering the art of layering is essential. The visual appeal and structural integrity of your cake largely depend on how well you layer the cake components.
Importance of Cooling Layers Completely
Before you begin layering your cake, it’s crucial to ensure that each layer has cooled completely. If you attempt to layer warm cake, the frosting can melt and cause the layers to slide or deform. Cooling the layers on a wire rack allows for proper air circulation, which helps them cool evenly. This step is non-negotiable if you want a cake that holds its shape and looks as good as it tastes.
Tips for Ensuring Even Layers and Stability
To achieve perfectly even layers, consider using a cake leveler or a serrated knife to trim the tops of the cakes once they have cooled. This step ensures that each layer is flat, making it easier to stack and frost. Additionally, if you’re concerned about stability, you can use a thin layer of frosting as a crumb coat between the layers. This not only adds flavor but also helps keep the layers adhered to each other, reducing the risk of shifting.
Frosting Between Layers
Frosting is not just a decorative finish; it plays a vital role in enhancing the overall flavor and texture of your Lazy Sunday Neapolitan Cake.
Strategies for Achieving a Professional Finish
When frosting between layers, it’s best to apply an even, generous amount of frosting. Use an offset spatula to spread the frosting smoothly over the top of each layer before placing the next one on top. This technique helps avoid lopsided layers. For a more professional look, consider using a bench scraper to smooth the sides of the cake after the outer layer of frosting has been applied.
Ideas for Decorative Techniques with Frosting
Once your cake is fully assembled and frosted, you can get creative with decorative techniques. Use a piping bag fitted with different tips to create swirls, rosettes, or even simple borders around the edges. You can also sprinkle edible glitter or colored sugar on top for a festive touch. Fresh berries, chocolate shavings, or a drizzle of chocolate or caramel sauce can be added on top or around the edges for an extra pop of color and flavor.
Final Touches for Presentation
Presentation is key when it comes to serving desserts. The Lazy Sunday Neapolitan Cake should be as visually appealing as it is delicious.
Suggestions for Garnishing the Cake
Consider garnishing your cake with fresh fruits like strawberries, raspberries, or mint leaves. These not only enhance the visual appeal but also add a fresh flavor that complements the rich cake. You can also use shaved chocolate or a light dusting of cocoa powder to add texture and a touch of elegance.
Importance of Visual Appeal in Dessert Presentation
The visual appeal of your cake can make a significant difference, especially when serving guests. A well-presented cake entices diners before they even take a bite. Remember, we eat with our eyes first, so take the time to ensure that your Lazy Sunday Neapolitan Cake looks just as delightful as it tastes.
Baking and Cooling Process
Understanding the baking and cooling process is vital for achieving the perfect cake layers.
Baking the Cake Layers
When it comes to baking your cake layers, preheat your oven to 350°F (175°C). This temperature allows your cake to rise beautifully without burning. Each layer typically takes about 25-30 minutes to bake, but this can vary based on your oven and the size of your cake pans.
Signs of Doneness for Each Layer
To check for doneness, insert a toothpick into the center of the cake; if it comes out clean or with a few moist crumbs, your cake is ready. The tops should be golden brown, and the cake should spring back when lightly pressed.
Cooling Techniques
Cooling your cake layers properly is as important as baking them.
Importance of Cooling Before Frosting
Once baked, remove the layers from the oven and let them cool in the pans for about 10 minutes. This allows them to set slightly, making it easier to remove them without breaking. After that, turn the cakes out onto a wire rack to cool completely before frosting. If you frost a warm cake, the frosting will melt, ruining the beautiful layers you worked so hard to create.
Best Practices for Transferring Layers Without Damage
To transfer the layers without damage, use a thin, flat spatula to help lift them off the cooling rack. Be gentle, as the layers can be delicate. If you’re worried about breakage, consider freezing the layers for 30 minutes before frosting. This will make them firmer and easier to handle.
Serving Suggestions
The Lazy Sunday Neapolitan Cake is versatile and suitable for various occasions.
Ideal Occasions for the Lazy Sunday Neapolitan Cake
This cake is perfect for celebratory events like birthdays, anniversaries, or casual gatherings with friends and family. Its vibrant colors and delightful flavors make it a hit at potlucks or family meals. Pair it with coffee, tea, or even a glass of champagne for a delightful afternoon treat.
Portioning and Presentation
When it comes to serving, use a sharp knife to cut the cake into even slices. Wipe the knife clean between cuts to maintain clean edges. For a creative serving idea, consider placing a slice on a colorful dessert plate and adding a dollop of whipped cream or a scoop of vanilla ice cream on the side. This not only enhances the presentation but also adds an extra layer of flavor to each bite.
Conclusion: Savoring the Lazy Sunday Neapolitan Cake
The Lazy Sunday Neapolitan Cake is not just a dessert; it’s a celebration of flavors and a testament to the joy of baking. With its vibrant layers and delicious frosting, this cake is sure to become a favorite in your recipe repertoire. Whether enjoyed on a lazy Sunday or at a special gathering, each slice brings together the warmth of homemade goodness and the charm of classic flavors. Embrace the baking process and savor every bite of this delightful creation. Each layer tells a story, and with every forkful, you’ll be reminded of the simple pleasures that come from sharing homemade treats with loved ones. So gather your ingredients, roll up your sleeves, and let the baking magic begin!

