Introduction
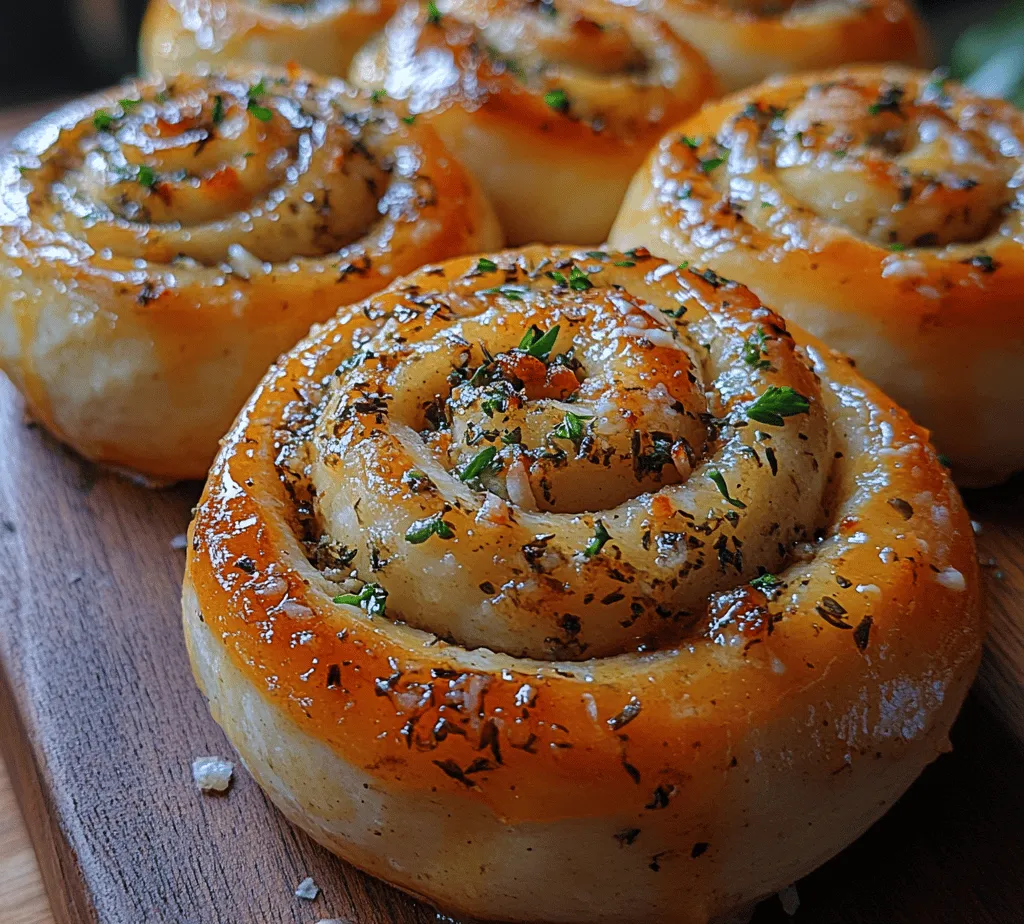
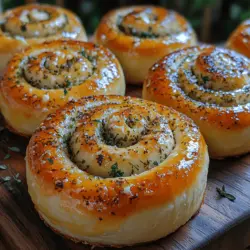
There’s something magical about the scent of homemade bread wafting through your kitchen. The process of kneading, rising, and finally baking transforms simple ingredients into something truly special. Whether served alongside a hearty stew, used to mop up sauce, or enjoyed as a standalone snack with a smear of butter, homemade bread has an undeniable charm that elevates any meal. Among the myriad of bread recipes, Herb & Garlic Swirl Rolls stand out with their enticing aroma and delightful flavor. These rolls offer a unique twist on traditional bread, blending fresh, aromatic herbs with the savory punch of garlic for a truly irresistible experience.
The combination of fragrant herbs and garlic creates a flavor profile that is both comforting and sophisticated, making these rolls a perfect addition to any dining occasion. Imagine pulling a batch of these golden-brown rolls from the oven, their swirls revealing layers of herb-infused goodness, ready to be devoured. With a soft, fluffy interior and a delicate crust, these rolls promise to be a crowd-pleaser for both family dinners and gatherings with friends.
In this article, we will guide you through the process of making Herb & Garlic Swirl Rolls from scratch. From understanding the key ingredients that contribute to the rolls’ delightful taste to detailed step-by-step instructions, you’ll be well on your way to mastering this aromatic recipe.
The Allure of Homemade Bread
Baking bread at home is a sensory experience that engages all your senses. The sight of golden dough rising in a warm environment, the sound of a gentle crackle as it bakes, and the aroma that fills your home as it cooks create an atmosphere of warmth and comfort. There’s a tactile joy in working with dough, feeling its texture transform beneath your hands as you knead it to perfection.
Making bread at home comes with numerous benefits. First and foremost, nothing compares to the freshness of bread baked from scratch. Unlike store-bought varieties, which can contain preservatives and artificial flavors, homemade bread is made with wholesome ingredients that you can trust. You have the freedom to customize your rolls to suit your taste preferences, whether that means adjusting the herbs used, adding spices, or even incorporating different cheeses.
Moreover, sharing homemade rolls with loved ones transforms an ordinary meal into a memorable experience. Nothing sparks joy quite like watching friends and family gather around the table, breaking bread together and enjoying the fruits of your labor. The satisfaction of knowing you’ve created something delicious and nourishing is unparalleled, making the effort of baking bread well worth it.
Understanding the Ingredients
To create the perfect Herb & Garlic Swirl Rolls, it’s essential to understand the role each ingredient plays in this delightful recipe. Here’s a closer look at the key components that contribute to the flavor and texture of these rolls.
All-Purpose Flour
All-purpose flour is the foundation of most bread recipes, including our Herb & Garlic Swirl Rolls. It provides the structure needed for the dough to rise and maintain its shape. When flour is mixed with water and kneaded, it develops gluten—a network of proteins that gives bread its chewy texture. The strength and quality of the flour significantly impact the final result, so opting for a good-quality all-purpose flour is essential for achieving soft, fluffy rolls.
Instant Yeast
Yeast is a vital ingredient in bread-making, responsible for fermentation and the leavening process that allows the dough to rise. In this recipe, we use instant yeast, which is preferred for its convenience and reliability. Unlike active dry yeast, which requires proofing before use, instant yeast can be mixed directly into the dry ingredients. This saves time and ensures that your dough rises efficiently, making it an ideal choice for busy bakers.
Warm Milk and Butter
Warm liquids play a crucial role in activating yeast and enriching the dough. In this recipe, we will use warm milk and melted butter. The warmth helps to dissolve the yeast and provides a nurturing environment for it to thrive. Additionally, the fat from the butter adds richness, contributing to a tender crumb and enhancing the overall flavor of the rolls. When combined, these ingredients create a luscious dough that is both easy to work with and delicious.
Herbs and Garlic
The star of our Herb & Garlic Swirl Rolls is undoubtedly the blend of fresh herbs and garlic. For this recipe, we will be using a combination of parsley, basil, and thyme. Each herb brings its unique flavor profile, creating a complex, aromatic experience. Parsley adds a fresh, slightly peppery note, basil contributes a sweet, fragrant aroma, and thyme offers an earthy depth. Together, these herbs elevate the rolls from ordinary to extraordinary.
Garlic powder serves as a convenient flavor booster, infusing the dough with a savory essence that pairs beautifully with the herbs. The combination of garlic and herbs creates a harmonious blend that bursts with flavor in every bite.
Parmesan Cheese
To take our Herb & Garlic Swirl Rolls to the next level, we’ll add grated Parmesan cheese into the filling. This ingredient not only enhances the flavor but also adds a delightful cheesy richness to the rolls. As the rolls bake, the cheese melts and creates pockets of savory goodness that perfectly complement the herbs and garlic. The result is a harmonious blend of flavors that will leave everyone reaching for seconds.
Step-by-Step Recipe Guide
Now that we’ve covered the ingredients, it’s time to dive into the step-by-step process of making these delectable Herb & Garlic Swirl Rolls. Follow these instructions closely for optimal results.
Preparing the Dough
1. Gather Your Ingredients: Start by assembling all your ingredients on a clean countertop. You will need:
– 4 cups of all-purpose flour
– 2 1/4 teaspoons of instant yeast (1 packet)
– 1 teaspoon of salt
– 1 cup of warm milk (about 110°F)
– 1/4 cup of melted butter
– 1 tablespoon of sugar
– 1 tablespoon of garlic powder
– 1/4 cup of fresh parsley, chopped
– 1/4 cup of fresh basil, chopped
– 1 tablespoon of fresh thyme, chopped
– 1/2 cup of grated Parmesan cheese
2. Mix Dry Ingredients: In a large mixing bowl, combine the all-purpose flour, instant yeast, salt, and sugar. Whisk these dry ingredients together until they are well blended.
3. Combine Wet Ingredients: In a separate bowl, mix the warm milk and melted butter together. The warmth of the milk should help dissolve the butter further.
4. Create the Dough: Make a well in the center of your dry ingredients and pour in the warm milk and butter mixture. Using a wooden spoon or your hands, mix the ingredients until they come together to form a shaggy dough.
Kneading Techniques
5. Knead the Dough: Once the dough has formed, turn it out onto a lightly floured surface. Knead the dough for about 8-10 minutes, or until it is smooth and elastic. If you find the dough is sticking to your hands or the surface, sprinkle a little more flour as needed. The goal is to develop the gluten, which will give your rolls their soft and airy texture.
6. First Rise: After kneading, shape the dough into a ball and place it in a greased bowl. Cover the bowl with a clean kitchen towel or plastic wrap. Allow the dough to rise in a warm, draft-free area for about 1-1.5 hours, or until it has doubled in size.
As the dough rises, the yeast will work its magic, creating air pockets that contribute to the lightness of the rolls. You may notice the delightful aroma of the herbs and garlic filling your kitchen as the dough ferments, hinting at the delicious rolls to come.
Stay tuned for the next part of this article, where we will guide you through the process of shaping the rolls, the second rise, and the final baking steps that will result in a batch of aromatic Herb & Garlic Swirl Rolls ready to impress your family and friends.
By understanding the ingredients and following these initial steps, you are well on your way to creating a delicious homemade treat that will make your kitchen the heart of your home.