Introduction
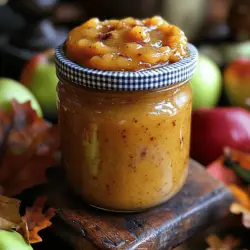
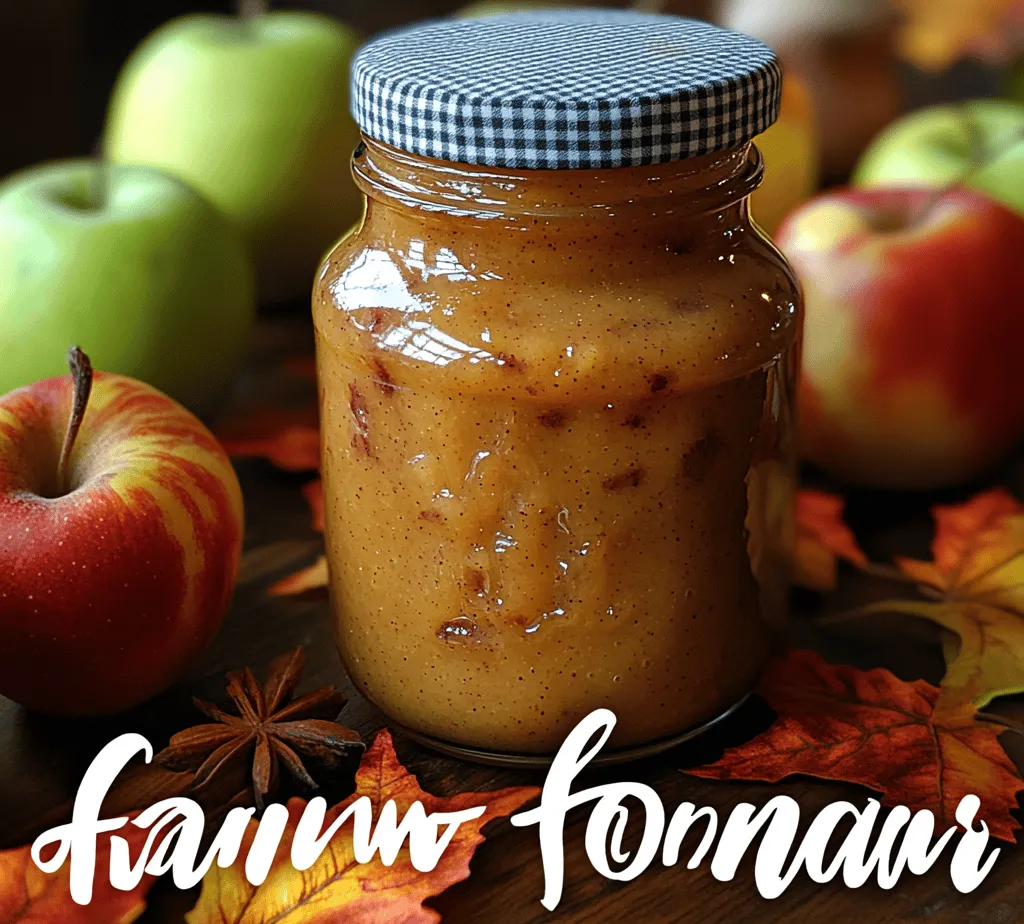
As autumn settles in and the leaves begin to fall, the aroma of spiced apple butter wafts through homes across the countryside. Apple butter is not just a delightful spread; it’s a comforting symbol of the harvest season, capturing the essence of ripe apples and warm spices. Traditionally made in small batches, this beloved preserve transforms tart apples into a velvety-smooth, richly flavored condiment that pairs perfectly with everything from toast to pork.
The Harvest Harmony Apple Butter recipe is a celebration of the season, bringing together the warmth of spices and the sweetness of fresh, tart apples. This homemade treat is not only easy to make but also fills your home with a cozy scent that lingers long after the cooking is done. By choosing the right apples and allowing them to simmer slowly, you will create a deeply flavored butter that showcases the natural beauty and versatility of this iconic fruit.
Using fresh, tart apples is vital for achieving that perfect balance of flavors. The slow-cooking process allows the apples to break down into a luscious spread while enhancing their natural sugars and infusing them with warm spices. Whether you’re slathering it on a warm biscuit, stirring it into oatmeal, or gifting it to friends and family, this apple butter is sure to evoke the spirit of fall with every taste.
Understanding Apple Butter
Apple butter is a concentrated apple spread that is cooked down to a thick, smooth consistency. With a history that dates back to the colonial days, apple butter was a method of preserving apples long after the harvest. Unlike applesauce, which retains a chunkier texture, apple butter is cooked for an extended period, allowing the sugars to caramelize and the spices to meld with the apple flavor, resulting in a rich, dark spread.
One of the key differences between apple butter and other apple preserves, like apple jelly or applesauce, lies in the cooking process and texture. Apple jelly is made from apple juice and sugar, resulting in a clear and sweet spread, while applesauce is typically cooked quickly and retains the natural apple texture. Apple butter, on the other hand, undergoes a slow cooking process that transforms it into a thick, spreadable form, perfect for adding depth to various dishes.
In terms of nutritional benefits, apple butter is a good source of vitamins and antioxidants, particularly if made with fresh, organic apples. It contains dietary fiber, which is beneficial for digestion, and is lower in calories compared to many other sweet spreads. Additionally, apple butter can be used in a variety of ways, from enhancing the flavor of baked goods to serving as a glaze for meats, making it a versatile addition to any kitchen.
Selecting the Right Apples
Choosing the right apples is crucial for making exceptional apple butter. Not all apple varieties are created equal, and certain types lend themselves better to the cooking process than others. For the Harvest Harmony Apple Butter recipe, tart apples such as Granny Smith and Cortland are ideal choices. These apples not only provide a balanced tartness that complements the sweetness of the sugar but also break down beautifully during cooking.
When selecting apples, look for those that are firm and free of bruises or blemishes. Fresh, local apples are generally the best option, as they are picked at peak ripeness and offer the most robust flavor. Many farmers’ markets and orchards sell a variety of apples during the fall season, making it easy to source high-quality fruit. Engaging with local growers can often lead to discovering heirloom varieties that may not be available at grocery stores, adding a unique twist to your apple butter.
The balance of sweetness and tartness significantly affects the final product. If you prefer a sweeter apple butter, you might consider blending tart varieties with sweeter ones like Fuji or Honeycrisp. This combination enhances the complexity of flavors while maintaining that characteristic apple essence that makes apple butter so beloved.
Gathering Ingredients for Harvest Harmony Apple Butter
Creating the perfect Harvest Harmony Apple Butter requires a few key ingredients that work together to enhance the flavor and texture of the final product. Below is a comprehensive list of ingredients needed for this recipe, along with suggested substitutions and their roles in the overall flavor profile.
Ingredients List:
– Fresh Apples (6-8 cups): The star of the show, providing the base flavor for the apple butter.
– Granulated Sugar (1-2 cups): Used to sweeten the apple butter. You can substitute with brown sugar for a deeper flavor or maple syrup for a unique twist.
– Fresh Lemon Juice (1/4 cup): Balances the sweetness and helps prevent browning of the apples. Freshly squeezed juice is highly recommended for the best flavor.
– Ground Cinnamon (1-2 teaspoons): Adds warmth and depth; can be adjusted to taste.
– Ground Nutmeg (1/4 teaspoon): A little goes a long way in adding a cozy spice note.
– Ground Allspice (1/4 teaspoon): Complements the other spices and enhances the overall flavor profile.
– Vanilla Extract (1 teaspoon): Adds a lovely aromatic quality; high-quality vanilla will yield the best results.
– Salt (1/4 teaspoon): Enhances the sweetness of the apples and balances the flavors.
Each ingredient plays a key role in the final taste of your apple butter. The apples bring the primary flavor, while the sugar enhances sweetness, and the spices contribute to the overall warmth and comfort associated with this seasonal spread. Fresh lemon juice not only adds a zesty brightness but also helps preserve the color and flavor during the cooking process.
When it comes to spices, feel free to experiment! Adding a pinch of cloves or ginger can introduce new layers of flavor, allowing you to customize the apple butter to your liking.
Step-by-Step Guide to Making Harvest Harmony Apple Butter
Preparing the Apples
Now that you have gathered all the necessary ingredients, it’s time to prepare the apples for the Harvest Harmony Apple Butter. Proper preparation is key to ensuring a smooth and delicious end product. Here’s a detailed guide on how to peel, core, and chop the apples.
1. Washing the Apples: Start by thoroughly washing the apples under cold running water to remove any dirt or residues. This step is essential, especially if you’re using apples that haven’t been peeled or waxed.
2. Peeling the Apples: Using a vegetable peeler or a paring knife, carefully peel the apples to remove the skins. While some recipes may leave the skin on for added texture and nutrients, peeling ensures that your apple butter has a silky-smooth consistency.
3. Coring the Apples: Once peeled, it’s time to core the apples. You can use an apple corer for this task, or simply cut the apples into quarters and remove the core with a knife. Be sure to remove any seeds as they can impart a bitter flavor.
4. Chopping the Apples: After coring, chop the apples into small chunks, roughly 1-inch in size. This uniformity will help the apples cook evenly and break down more quickly during the simmering process.
5. Storing Cut Apples: If you’re not cooking the apples immediately, place the chopped pieces in a bowl of water with a splash of lemon juice to prevent them from browning. However, aim to start cooking them as soon as possible for best results.
With your apples prepped, you’re ready to move on to the next steps of cooking and transforming these fresh fruits into the warm, aromatic Harvest Harmony Apple Butter that will fill your home with the essence of fall.
Combining Ingredients: Ensuring Even Distribution
To achieve the perfect blend of flavors in your Harvest Harmony Apple Butter, it’s essential to combine your ingredients thoughtfully. Begin by peeling, coring, and chopping your apples into small pieces. This step is crucial as it allows for even cooking and ensures that the spices and sugars integrate well throughout the mixture.
In a large mixing bowl, combine your chopped apples with the sugar, cinnamon, nutmeg, and any additional spices you choose, such as allspice or cloves. It’s vital to mix these ingredients thoroughly to ensure that every apple piece is evenly coated with sugar and spices. This not only enhances the flavor but also creates a harmonious balance in the final product.
Using your hands or a sturdy spatula, fold the ingredients gently, ensuring that you don’t mash the apples. You want the spices to be distributed evenly without compromising the structure of the apples. Once everything is well combined, it’s time to transfer the mixture to your slow cooker, setting the stage for the magic of low and slow cooking.
Cooking Process: The Benefits of Low and Slow Cooking
When it comes to making apple butter, patience is key. The slow cooker is your best friend in this process, allowing the natural sugars in the apples to caramelize and meld beautifully with the spices.
Set your slow cooker to the low setting and cover it with a lid. Cooking on low for 8 to 10 hours is ideal, as this slow cooking method helps to break down the apples, resulting in a rich and flavorful apple butter. During the first few hours, it’s a good idea to stir occasionally; this will help prevent any apples from sticking to the sides and ensure that everything cooks evenly.
One of the significant benefits of using a slow cooker is that it allows for minimal supervision. You can go about your day while the delicious aroma of simmering apples fills your home. As the hours pass, the apples will break down, and the mixture will thicken, transforming into a luscious apple butter.
Blending to Desired Consistency
Once your apple butter has finished cooking, it’s time to decide on the consistency you prefer. Some people love a chunky apple butter with bits of apple throughout, while others prefer a smooth, creamy texture.
If you like your apple butter chunky, simply give it a good stir to break up any larger pieces, and it’ll be ready to jar. However, if you’re aiming for a smoother consistency, you’ll want to blend your apple butter using an immersion blender for ease, or a traditional blender if you prefer.
For an immersion blender, simply insert it into the slow cooker and pulse until you reach your desired smoothness. If using a traditional blender, let the apple butter cool slightly first, then blend in batches to avoid overflow. Always remember to vent the lid to allow steam to escape, ensuring safety during the blending process.
Adjusting Flavor to Personal Preferences
After blending, it’s essential to taste your apple butter and adjust the flavors to your liking. If you find it too sweet, a splash of lemon juice can help balance the sweetness and add a refreshing tang. On the other hand, if you prefer a richer spice profile, consider adding a pinch more cinnamon or nutmeg.
Stir well after each adjustment and taste again. Remember, the key is to create a flavor that resonates with your palate. Once you’ve achieved the perfect blend of flavors, it’s time to move on to the canning process.
Canning and Storing Apple Butter
Instructions on How to Jar Apple Butter Safely
To preserve your homemade Harvest Harmony Apple Butter, proper canning is essential. Begin by sterilizing your jars and lids by placing them in a boiling water bath for about 10 minutes. This step is crucial as it eliminates any bacteria that could spoil your apple butter.
Once your jars are sterilized, carefully ladle the hot apple butter into each jar, leaving about 1/4 inch of headspace at the top. This space allows for any expansion that may occur during processing. Wipe the rims of the jars with a clean, damp cloth to ensure a proper seal, then place the lids on and screw on the metal bands until they are fingertip-tight.
Importance of Sealing Jars Properly for Long-Term Storage
Once your jars are filled and sealed, it’s necessary to process them in a boiling water bath for about 10 minutes. This step not only ensures a vacuum seal but also helps preserve the apple butter for long-term storage. After processing, remove the jars from the water bath and let them cool completely on a clean towel or cooling rack. You should hear a popping sound as the lids seal, indicating that your jars are airtight.
Best Practices for Refrigerating and Storing Apple Butter
If you prefer not to can your apple butter, it can easily be stored in the refrigerator. Allow the apple butter to cool completely before transferring it to an airtight container. Homemade apple butter can last up to two weeks in the fridge. However, for longer shelf life, canning is the best option. When properly sealed and stored in a cool, dark place, your apple butter can last up to a year.
Creative Ways to Enjoy Harvest Harmony Apple Butter
Serving Suggestions
The delightful flavor of your Harvest Harmony Apple Butter allows for endless serving possibilities. Spread it generously on warm, toasted bread or bagels for a comforting breakfast. You can also create a delicious pancake topping by warming the apple butter and drizzling it over fluffy pancakes or waffles.
For a special treat, consider using apple butter as a filling in pastries or as a dip for fresh fruit slices. The sweet and spiced notes of the apple butter complement a variety of flavors and textures, making it a versatile addition to any meal.
Unique Recipe Ideas Using Apple Butter
Apple butter can be an exciting ingredient in various recipes. For instance, try making apple butter muffins by incorporating it into your favorite muffin batter for added moisture and flavor. You can also use apple butter as a glaze for roasted meats, such as pork or chicken, enhancing the dish with a sweet and savory glaze.
Additionally, consider using apple butter in marinades for vegetables or as a base for barbecue sauces. Its rich flavor pairs well with both sweet and savory dishes, making it an ideal ingredient for any culinary adventure.
The Versatility of Apple Butter in Both Sweet and Savory Dishes
The versatility of apple butter truly shines in both sweet and savory applications. It can be a delightful addition to cheese boards, pairing beautifully with sharp cheeses like cheddar or creamy brie. In savory dishes, apple butter can be used to enhance soups or stews, adding a unique depth of flavor.
The Joy of Gifting Homemade Apple Butter
Homemade gifts carry a special sentiment, especially during the fall season when the harvest is at its peak. Gift-giving becomes a heartfelt experience when you share your homemade Harvest Harmony Apple Butter with friends and family.
Ideas for Packaging and Presenting Apple Butter as Gifts
Consider packaging your apple butter in decorative jars with personalized labels. You can add a sprig of cinnamon or a piece of twine for an extra touch. Including a handwritten recipe card for creative ways to use the apple butter can also be a lovely addition, showcasing your thoughtfulness.
The Impact of Sharing Homemade Treats on Community and Relationships
Sharing homemade treats like apple butter fosters connections and strengthens relationships. Whether you’re gifting it to a neighbor, a friend, or bringing it to a gathering, the act of sharing your culinary creation spreads joy and warmth. It’s a beautiful way to celebrate the season and connect with loved ones over the flavors of fall.
Conclusion
Making your own Harvest Harmony Apple Butter is not just about creating a delicious spread; it’s about embracing the flavors of autumn and enjoying the process of homemade cooking. With every step, from combining ingredients to canning and sharing your finished product, you create something special that can be cherished for months.
As you embark on this culinary adventure, remember to savor the moments spent in the kitchen and the joy of sharing your creations with others. Embrace the fall season with this delightful recipe, celebrating the warmth, flavors, and traditions that homemade preserves bring to your home. Enjoy your bountiful harvest and the sweet rewards of your labor with the delightful taste of apple butter!