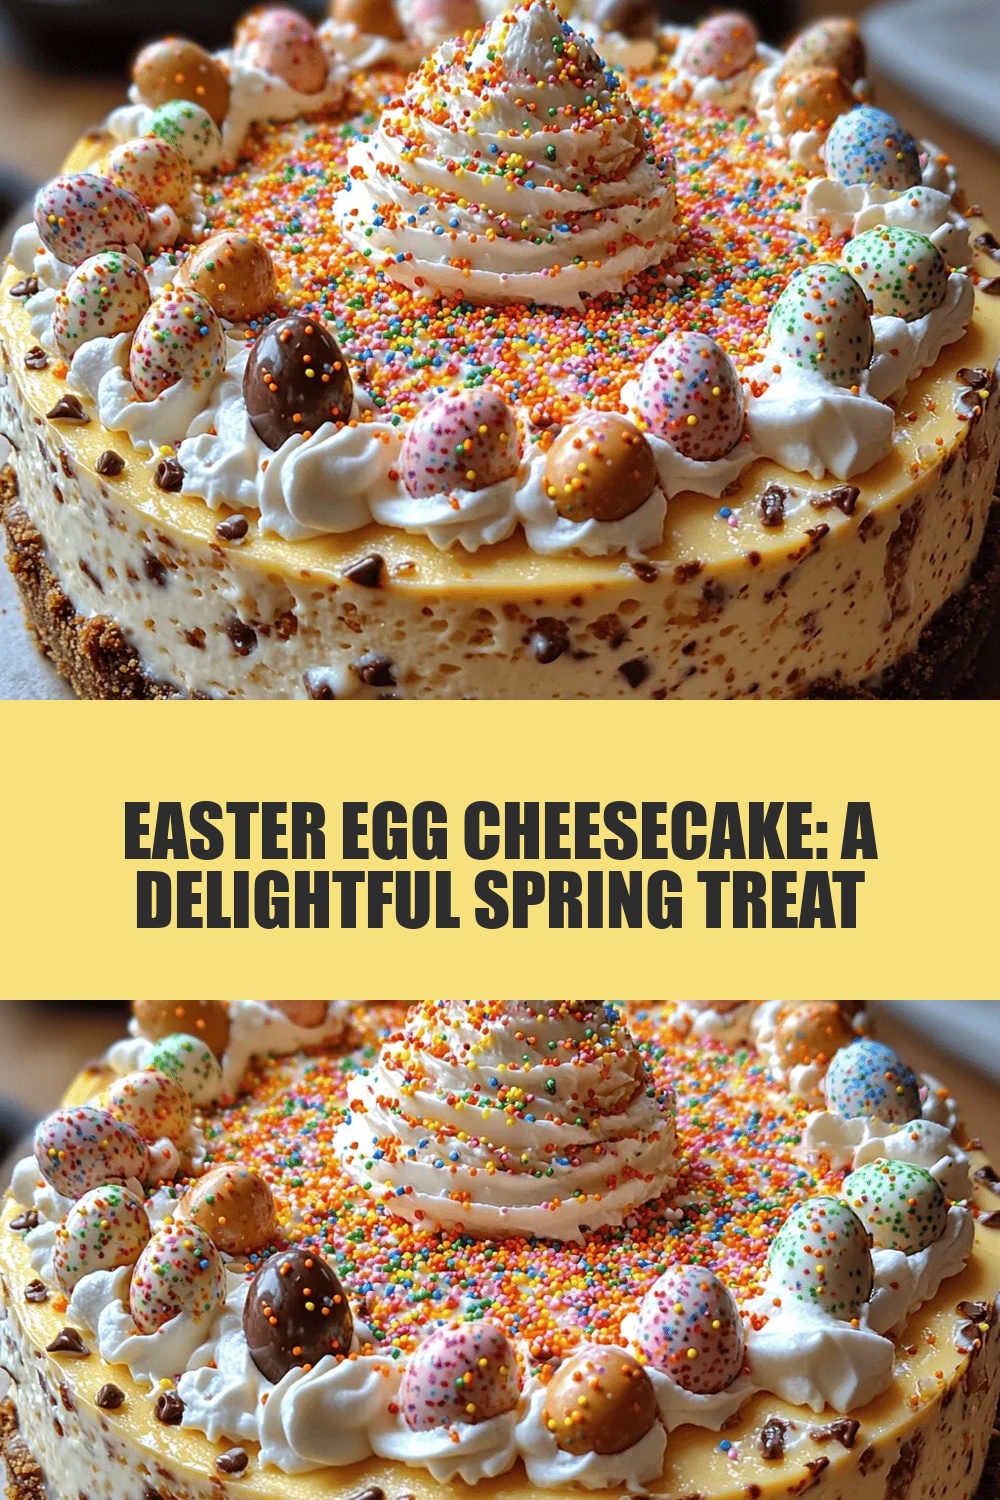
Easter Egg Cheesecake: A Delightful Spring Treat
 Save
Save
Springtime calls for a dessert that captures the joy of the season, and this Easter Egg Cheesecake does exactly that. Imagine a velvety vanilla cheesecake dotted with pastel‑colored chocolate “eggs,” each bite bursting with creamy richness and a hint of citrus.
What makes this treat truly special is the combination of a buttery graham‑cracker crust, a light ricotta‑cream filling, and a playful swirl of pastel ganache that looks as festive as it tastes.
It’s perfect for families with kids, brunch gatherings, or a sophisticated dinner finale. Serve it as the centerpiece of your Easter table, or surprise friends at any spring dinner.
The process is straightforward: prepare the crust, blend the filling, bake gently, then finish with a glossy, colored chocolate drizzle that sets into beautiful “egg” shapes.
Why You'll Love This Recipe
Spring‑Inspired Palette: The pastel chocolate “eggs” add a festive pop of color that instantly brightens any dessert table and celebrates the season.
Silky Texture: A blend of cream cheese and ricotta creates an ultra‑smooth filling that melts in your mouth without feeling heavy.
Simple Steps: With just a few hands‑on moments and a gentle bake, even novice bakers can achieve a professional‑looking result.
Customizable Fun: Swap flavors, colors, or toppings to match any holiday theme—making it a versatile crowd‑pleaser year after year.
Tips & Tricks
Perfecting the Recipe
Room‑Temperature Eggs. Let the eggs sit out for 20 minutes before adding them to the filling. This prevents curdling and helps maintain a smooth batter.
Water Bath Importance. The bain‑marie provides gentle, even heat, which stops the cheesecake from cracking and yields a creamy texture.
Flavor Enhancements
For an extra spring twist, fold in 1 tablespoon of finely chopped fresh mint into the filling, or drizzle a thin ribbon of raspberry coulis over the top just before serving. A pinch of almond extract also adds a subtle depth that pairs beautifully with the chocolate eggs.
Common Mistakes to Avoid
Skipping the cooling period before refrigerating can cause the ganache to melt, ruining the egg shapes. Also, avoid over‑mixing once the eggs are added; too much air creates cracks during baking. Finally, don’t forget to line the bottom of the springform pan with parchment—this makes removal effortless.
Pro Tips
Use a Food Processor for the Crust. Pulse the crumbs and butter together for a uniformly fine texture that bonds perfectly.
Chill the Ganache. After coloring, place the ganache portions in the fridge for 5 minutes before shaping; this firms the chocolate and makes rolling easier.
Measure Ingredients Accurately. Weigh the cream cheese and ricotta for consistency; too much moisture can affect the set.
Serve Straight From the Fridge. Cold slices hold their shape better and showcase the glossy chocolate eggs.
Variations
Ingredient Swaps
Replace the graham‑cracker crust with a chocolate cookie base for a richer flavor. Swap ricotta for mascarpone if you prefer an even creamier mouthfeel. For a dairy‑free version, use coconut cream and a vegan cream cheese alternative, and choose dark chocolate that’s dairy‑free for the “eggs.”
Dietary Adjustments
Gluten‑free diners can use gluten‑free graham‑cracker crumbs or almond meal for the crust. To make it sugar‑reduced, substitute powdered sugar with a blend of erythritol and a touch of maple syrup. Keto lovers can replace the sugar in the crust with a low‑carb sweetener and use a sugar‑free chocolate for the topping.
Serving Suggestions
Pair each slice with a dollop of lightly sweetened whipped cream and a scattering of fresh berries for a burst of acidity. For a brunch setting, serve alongside a citrus‑infused mimosa. A drizzle of honey‑lavender syrup adds an elegant floral note that complements the pastel chocolate eggs.
Storage Info
Leftover Storage
Keep leftovers covered tightly with plastic wrap or stored in an airtight container. Refrigerate for up to 4 days. If you need longer storage, slice the cheesecake, wrap each piece in parchment, then freeze in a zip‑top bag for up to 2 months. Thaw overnight in the fridge before serving.
Reheating Instructions
Cheesecake is best enjoyed cold, but if you prefer a warm slice, gently microwave a single portion for 15‑20 seconds, or place a slice on a warm plate for a minute. Warm the chocolate “eggs” separately in a microwave for 5 seconds, then drizzle over the slice to revive their glossy sheen.
Frequently Asked Questions
Can I make this cheesecake a day ahead?
What if I don’t have ricotta cheese?
How do I keep the chocolate “eggs” from melting on a warm day?
Can I use a different shape for the chocolate topping?
This Easter Egg Cheesecake blends creamy indulgence with a playful spring aesthetic, delivering a dessert that’s as beautiful as it is tasty. By following the step‑by‑step guide, mastering the water‑bath technique, and customizing the chocolate “eggs,” you’ll create a show‑stopping centerpiece for any dinner or holiday gathering. Feel free to experiment with colors, flavors, or toppings—your imagination is the only limit. Enjoy every pastel‑kissed bite and celebrate the season in sweet style!
Easter Egg Cheesecake: A Delightful Spring Treat
Delicious Easter Egg Cheesecake: A Delightful Spring Treat
Ingredients
Crust
- 1 ½ cups graham‑cracker crumbs
- ¼ cup melted unsalted butter
- 2 tablespoons granulated sugar
Filling
- 16 oz cream cheese, softened
- 1 cup whole‑milk ricotta cheese
- ¾ cup powdered sugar
- 2 large eggs, room temperature
- 1 teaspoon vanilla extract
- Zest of 1 lemon
Chocolate “Egg” Topping
- 8 oz semi‑sweet chocolate, chopped
- ¼ cup heavy cream
- Food‑grade pastel gel food coloring (pink, blue, yellow, green)
Instructions
Mixing the Filling
- Blend Cream Cheese. Using a stand mixer on medium speed, beat the cream cheese until smooth and free of lumps, about 2 minutes. This creates a silk‑smooth base for the cheesecake.
- Incorporate Ricotta. Add the ricotta cheese and continue mixing for another minute. The ricotta lightens the texture and adds a subtle tang.
- Sweeten and Flavor. Gradually whisk in the powdered sugar, followed by the vanilla extract, lemon zest, and finally the eggs, one at a time. Mix just until combined; over‑mixing can incorporate too much air, leading to cracks.
Creating the Pastel Chocolate “Eggs”
- Make Ganache. In a small saucepan, bring the heavy cream to a simmer, then pour it over the chopped semi‑sweet chocolate in a heat‑proof bowl. Let sit 2 minutes, then stir until glossy and smooth.
- Color the Ganache. Divide the ganache into four equal portions. Add a few drops of pastel food coloring to each bowl, stirring gently until the hue is uniform. The colors should be soft, reminiscent of dyed Easter eggs.
- Form the Eggs. Using a small spoon, drizzle each colored ganache onto a parchment‑lined tray in an oval shape, about 1‑inch wide. Allow the shapes to set at room temperature for 10‑15 minutes, then gently roll them into small “egg” ovals with a silicone spatula.
Similar Recipes
 Desserts
Blackberry Lavender Ice Cream Sandwiches: A Delightful Summer Treat
Delicious Blackberry Lavender Ice Cream Sandwiches: A Delightful Summer Treat
 Desserts
Perfectly Chewy Snickerdoodle Cookies
Delicious Perfectly Chewy Snickerdoodle Cookies
 Desserts
Mint Chocolate Cheesecake Cake Recipe
Delicious Mint Chocolate Cheesecake Cake Recipe
 Desserts
Heavenly Classic New York Cheesecake: A Timeless Recipe for Dessert Lovers
Delicious Heavenly Classic New York Cheesecake: A Timeless Recipe for Dessert Lovers
 Desserts
Caramel Chocolate Dream Bars Recipe: A Sweet Indulgence
Delicious Caramel Chocolate Dream Bars Recipe: A Sweet Indulgence
 Desserts
Homemade Oatmeal Cream Pies: 8 Foolproof Steps to Perfect Chew
Learn how to make delicious Homemade Oatmeal Cream Pies: 8 Foolproof Steps to Perfect Chew. Easy…
 Desserts
Bourbon Vanilla Bean Whipped Cream: Elevate Your Desserts
Delicious Bourbon Vanilla Bean Whipped Cream: Elevate Your Desserts
 Desserts
Mini Banana Pudding Cheesecakes: A Delightful Dessert Experience
Delicious Mini Banana Pudding Cheesecakes: A Delightful Dessert Experience

Eva
I cook these recipes at home before they ever land here — simple ingredients, clear steps.