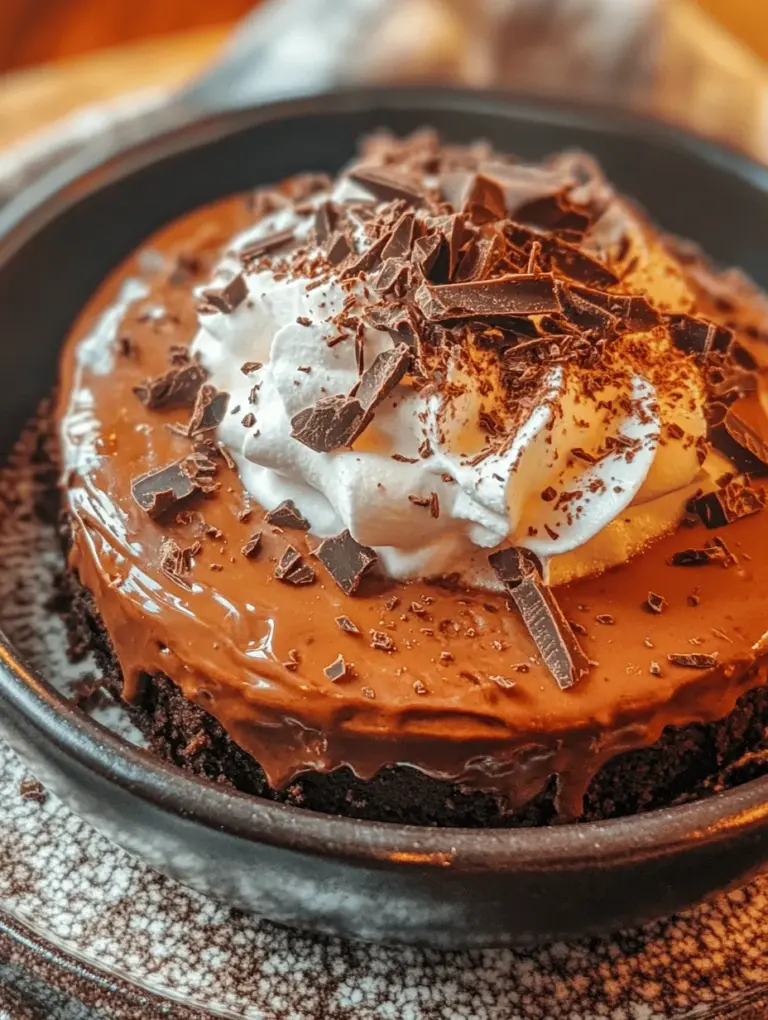
Delightful Banana Pudding Cheesecake Recipe

WANT TO SAVE THIS RECIPE?

Introduction

Desserts hold a special place in our hearts, often evoking cherished memories and indulgent moments. Among the myriad of sweet treats, banana pudding and cheesecake stand out as two beloved favorites. Banana pudding is renowned for its creamy texture and rich banana flavor, while cheesecake brings a perfect balance of sweetness and tanginess. Now, imagine combining these two delectable desserts into one heavenly creation—introducing Banana Pudding Cheesecake. This delightful fusion harmonizes the flavors and textures of both desserts, creating a layered masterpiece that is as visually stunning as it is delicious.

The Banana Pudding Cheesecake is not just a dessert; it is a celebration of taste that is perfect for nearly any occasion. Whether you are hosting a family gathering, an elegant dinner party, or simply craving a sweet treat, this cheesecake is sure to impress. Its unique combination of creamy cheesecake, fluffy banana pudding, and a buttery crust makes it a standout choice, capturing the hearts of dessert lovers everywhere.

Understanding the Components of Banana Pudding Cheesecake

To truly appreciate the Banana Pudding Cheesecake, it’s essential to understand its key components. This dessert boasts several layers, each contributing to the overall flavor and texture:

1. Crust: The base of the cheesecake is crucial, providing a sturdy foundation that holds everything together. The crust is typically made from crushed Nilla wafer cookies, which add a delightful sweetness and subtle vanilla flavor.

2. Cheesecake Filling: This creamy layer is the star of the show, made from softened cream cheese, sugar, and eggs. The cheesecake filling is rich and dense, offering a delightful contrast to the lighter banana pudding layer.

3. Banana Pudding Layer: This component introduces a light and airy texture, along with the unmistakable flavor of ripe bananas. The banana pudding layer is often made from instant pudding mix, making it an easy yet delicious addition.

4. Whipped Topping: The final layer adds a touch of lightness and creaminess, making the dessert even more indulgent. A homemade whipped cream or store-bought topping can be used to crown this cheesecake, providing an attractive finish.

The interplay of these components creates an enticing dessert experience. The buttery, crumbly crust contrasts beautifully with the smooth creaminess of the cheesecake filling, while the banana pudding layer adds a playful lightness. The whipped topping finishes it all off, making each slice of Banana Pudding Cheesecake a delightful journey of flavors and textures.

Creating the Perfect Crust

A solid base is essential for a successful cheesecake, as it helps to support the layers above while providing a contrasting texture. For our Banana Pudding Cheesecake, the crust is made from crushed Nilla wafer cookies, which are a staple in classic banana pudding recipes. The sweetness of the cookies pairs perfectly with the layers of the cheesecake and pudding.

Ingredients for the Crust

Nilla wafer cookies: These cookies will form the backbone of our crust. They are sweet, slightly crunchy, and have a subtle vanilla flavor that complements the other components of the dessert.

Butter: Unsalted butter is recommended, as it enhances the flavor of the crust without adding extra salt.

Granulated sugar: A small amount of sugar is added to the crumbs to enhance the sweetness.

Step-by-Step Guide to Prepare and Bake the Crust

1. Preheat the Oven: Start by preheating your oven to 350°F (175°C). This will ensure that your crust bakes evenly.

2. Crush the Cookies: Place the Nilla wafer cookies in a food processor and pulse them until they reach a fine crumb consistency. Alternatively, you can place the cookies in a resealable plastic bag and crush them with a rolling pin.

3. Mix the Ingredients: In a medium bowl, combine the crushed cookies, melted butter, and granulated sugar. Stir until the mixture resembles wet sand and holds together when pressed.

4. Press into the Pan: Grease a 9-inch springform pan with cooking spray or butter. Pour the cookie mixture into the pan and firmly press it into the bottom and slightly up the sides. Use the bottom of a measuring cup or a flat surface to ensure an even layer.

5. Bake the Crust: Place the crust in the preheated oven and bake for about 10 minutes, or until lightly golden and set. Remove from the oven and allow it to cool completely before adding the cheesecake filling.

Tips for Achieving an Even Crust in a Springform Pan

Use a springform pan: This type of pan allows for easy removal of the cheesecake without damaging the delicate layers. It also provides a nice presentation for serving.

Press firmly: Ensure that the crust mixture is tightly packed and evenly distributed across the bottom and sides of the pan. This will help prevent it from crumbling when you slice the cheesecake.

Cool completely: Allow the crust to cool completely before adding the cheesecake filling to prevent it from becoming soggy.

Crafting the Creamy Cheesecake Filling

The cheesecake filling is the heart of the Banana Pudding Cheesecake. It should be creamy, smooth, and rich, providing a beautiful contrast to the lighter banana pudding layer. To achieve this, it’s crucial to use softened cream cheese, as it blends more easily and results in a velvety texture.

Ingredients for the Cheesecake Filling

Cream cheese: Use full-fat cream cheese for the best flavor and consistency. Make sure it is softened at room temperature for easy mixing.

Granulated sugar: This sweetens the filling and balances the tanginess of the cream cheese.

Eggs: Eggs help to bind the ingredients and provide structure to the cheesecake.

Vanilla extract: Pure vanilla extract adds depth and enhances the overall flavor of the filling.

Banana extract: A small amount of banana extract intensifies the banana flavor without adding extra moisture.

Sour cream: Sour cream adds a subtle tang and contributes to the creaminess of the filling.

Step-by-Step Instructions for Mixing and Preparing the Cheesecake Filling

1. Prepare the Cream Cheese: In a large mixing bowl, beat the softened cream cheese with an electric mixer on medium speed until smooth and creamy. This should take about 2-3 minutes.

2. Add Sugar: Gradually add the granulated sugar and continue to beat until the mixture is fluffy and well combined.

3. Incorporate Eggs: Add the eggs, one at a time, mixing well after each addition. Be careful not to overmix, as this can introduce air bubbles that lead to cracks during baking.

4. Add Flavorings: Mix in the vanilla extract, banana extract, and sour cream until fully combined. Scrape down the sides of the bowl as needed to ensure everything is evenly incorporated.

5. Pour into the Crust: Carefully pour the cheesecake filling over the cooled crust, smoothing the top with a spatula.

Insights on Baking the Cheesecake to Prevent Cracks

Water bath: For a creamier texture and to help prevent cracks, consider baking the cheesecake in a water bath. Wrap the springform pan in aluminum foil to prevent water from seeping in, then place it in a larger baking pan filled with hot water.

Low and slow: Bake the cheesecake at a lower temperature (325°F or 163°C) for a longer time. This gentle baking method helps to prevent the filling from puffing up and cracking.

Don’t open the oven: Avoid opening the oven door during baking, as this can cause sudden temperature changes that may lead to cracks.

By following these steps and tips, you will create a perfectly creamy cheesecake filling that serves as a luscious base for the subsequent layers of banana pudding. As you embark on the next phase of this recipe, get ready to layer on the delicious banana pudding that will elevate your Banana Pudding Cheesecake to new heights.
Desserts hold a special place in our hearts, often evoking cherished memories and indulgent moments. Among the myriad of sweet treats, <strong>banana pudding</strong> and <strong>cheesecake</strong> stand out as two beloved favorites. Banana pudding is renowned for its creamy texture and rich banana flavor, while cheesecake brings a perfect balance of sweetness and tanginess. Now, imagine combining these two delectable desserts into one heavenly creation—introducing <strong>Banana Pudding Cheesecake</strong>. This delightful fusion harmonizes the flavors and textures of both desserts, creating a layered masterpiece that is as visually stunning as it is delicious.” /></p>
</p>
<p>Banana Pudding Cheesecake is a delectable fusion of creamy cheesecake and classic banana pudding, making it a showstopper for any dessert table. The banana pudding layer not only adds a rich and fruity flavor but also complements the richness of the cheesecake, creating a harmonious blend that is sure to delight your taste buds. Here’s how to prepare this delightful dessert step-by-step.</p>
</p>
<h3>The Banana Pudding Layer: A Creamy Delight</h3>
</p>
<p>The banana pudding layer plays a crucial role in this cheesecake by adding a luscious, creamy texture and a burst of banana flavor that melds perfectly with the cheesecake base. This layer is simple to prepare and requires just a few ingredients: whole milk and instant banana pudding mix. Together, they create a velvety layer that enhances the overall dessert experience.</p>
</p>
<h4>Ingredients Breakdown for Banana Pudding Layer</h4>
</p>
<p>– <strong>Whole Milk</strong>: Using whole milk creates a rich and creamy texture that is essential for the banana pudding layer. The fat content helps in achieving a smooth consistency.</p>
<p>– <strong>Instant Banana Pudding Mix</strong>: This is the magic ingredient that not only provides the banana flavor but also helps thicken the pudding quickly without needing to cook it.</p>
</p>
<h3>Preparing the Banana Pudding Layer</h3>
</p>
<p>1. <strong>Combine Ingredients</strong>: In a medium-sized mixing bowl, pour the whole milk and add the instant banana pudding mix. Use a whisk to combine the ingredients until they are fully blended and free of lumps. This should take about 2 minutes.</p>
</p>
<p>2. <strong>Set the Pudding</strong>: Allow the mixture to sit for 5 minutes. During this time, the pudding will thicken to a pudding-like consistency.</p>
</p>
<p>3. <strong>Layering</strong>: Once the pudding has thickened, gently pour it over the chilled cheesecake layer. Use a spatula to spread it evenly, ensuring that it covers the entire cheesecake. This will create a beautiful and creamy top layer.</p>
</p>
<p>4. <strong>Add Fresh Bananas</strong>: For added flavor and visual appeal, slice ripe bananas and arrange them on top of the pudding layer. Ripe bananas are essential as they provide the sweetest flavor and a pleasing texture that contrasts nicely with the creaminess of the pudding.</p>
</p>
<h3>Making the Whipped Topping</h3>
</p>
<p>The whipped topping is the final touch that elevates the Banana Pudding Cheesecake to an entirely new level. Light and fluffy, it adds a delightful creaminess that balances the richness of the cheesecake and the banana pudding.</p>
</p>
<h4>Ingredients Breakdown for Whipped Topping</h4>
</p>
<p>– <strong>Heavy Whipping Cream</strong>: The key to a stable whipped topping, heavy cream contains enough fat to hold its shape and provide a rich flavor.</p>
<p>– <strong>Powdered Sugar</strong>: This sweetens the whipped cream and helps achieve a smooth texture. It dissolves easily, preventing the gritty texture that granulated sugar might cause.</p>
<p>– <strong>Vanilla Extract</strong>: Adds a hint of flavor that enhances the overall taste of the topping.</p>
</p>
<h3>Detailed Instructions for Whipping Cream</h3>
</p>
<p>1. <strong>Chill Your Equipment</strong>: Before you begin, place your mixing bowl and whisk or beaters in the freezer for about 10-15 minutes. Chilling your equipment helps the cream whip faster and increases its volume.</p>
</p>
<p>2. <strong>Combine Ingredients</strong>: In the chilled bowl, pour 1 cup of heavy whipping cream. Add 1/4 cup of powdered sugar and 1 teaspoon of vanilla extract.</p>
</p>
<p>3. <strong>Whipping Process</strong>: Using an electric mixer, start whipping the cream on medium speed. As it begins to thicken, increase the speed to high. Continue whipping until soft peaks form, which means the cream can hold a shape but is still light and fluffy.</p>
</p>
<p>4. <strong>Stiff Peaks</strong>: For a sturdier topping, continue to whip until stiff peaks form. This means that the cream will hold its shape and will not collapse when spread over the pudding layer.</p>
</p>
<p>5. <strong>Spread the Whipped Topping</strong>: Using a spatula, gently spread the whipped cream over the banana pudding layer. Create swirls or peaks for a decorative touch.</p>
</p>
<h3>Chilling the Cheesecake</h3>
</p>
<p>Chilling the Banana Pudding Cheesecake is essential for flavor development and texture enhancement. The cooling process allows the layers to meld together, resulting in a harmonious dessert.</p>
</p>
<h4>Recommended Chilling Times</h4>
</p>
<p>– <strong>Minimum Chill Time</strong>: Allow the cheesecake to chill for at least 4 hours.</p>
<p>– <strong>Optimal Chill Time</strong>: For best results, chill the cheesecake overnight. This extended time ensures that the layers set properly, making it easier to slice and serve.</p>
</p>
<h3>Serving Suggestions and Presentation</h3>
</p>
<p>Presenting your Banana Pudding Cheesecake beautifully can elevate the dining experience. Here are some tips for garnishing and serving:</p>
</p>
<p>1. <strong>Garnishing</strong>: Top the whipped cream with crushed Nilla wafers for a delightful crunch. Arrange banana slices around the edge of the cheesecake for an attractive finish.</p>
</p>
<p>2. <strong>Slicing</strong>: To achieve clean slices, use a sharp knife dipped in warm water. Wipe the knife clean between cuts to maintain a beautiful presentation.</p>
</p>
<p>3. <strong>Pairing Suggestions</strong>: Consider serving the cheesecake with a side of freshly brewed coffee or a scoop of vanilla ice cream. This pairing complements the flavors of the cheesecake and provides a refreshing contrast.</p>
</p>
<h3>Conclusion</h3>
</p>
<p>Making and enjoying Banana Pudding Cheesecake is a delightful experience that brings together the flavors of creamy cheesecake and classic banana pudding in a harmonious dessert. This recipe is perfect for special occasions, family gatherings, or simply as a treat at home. The joy of baking and sharing delicious desserts with loved ones is unparalleled, and this cheesecake is sure to impress everyone at the table.</p>
</p>
<p>So why not take the plunge and try your hand at this Banana Pudding Cheesecake? You’ll not only enjoy the process but also create a dessert that is sure to become a favorite in your household. The layers of flavor and texture create an unforgettable experience that highlights the beauty of baking. Enjoy the sweet moments that come from sharing this delightful dessert!</p>
</div>

Desserts hold a special place in our hearts, often evoking cherished memories and indulgent moments. Among the myriad of sweet treats, banana pudding and cheesecake stand out as two beloved favorites. Banana pudding is renowned for its creamy texture and rich banana flavor, while cheesecake brings a perfect balance of sweetness and tanginess. Now, imagine combining these two delectable desserts into one heavenly creation—introducing Banana Pudding Cheesecake. This delightful fusion harmonizes the flavors and textures of both desserts, creating a layered masterpiece that is as visually stunning as it is delicious.

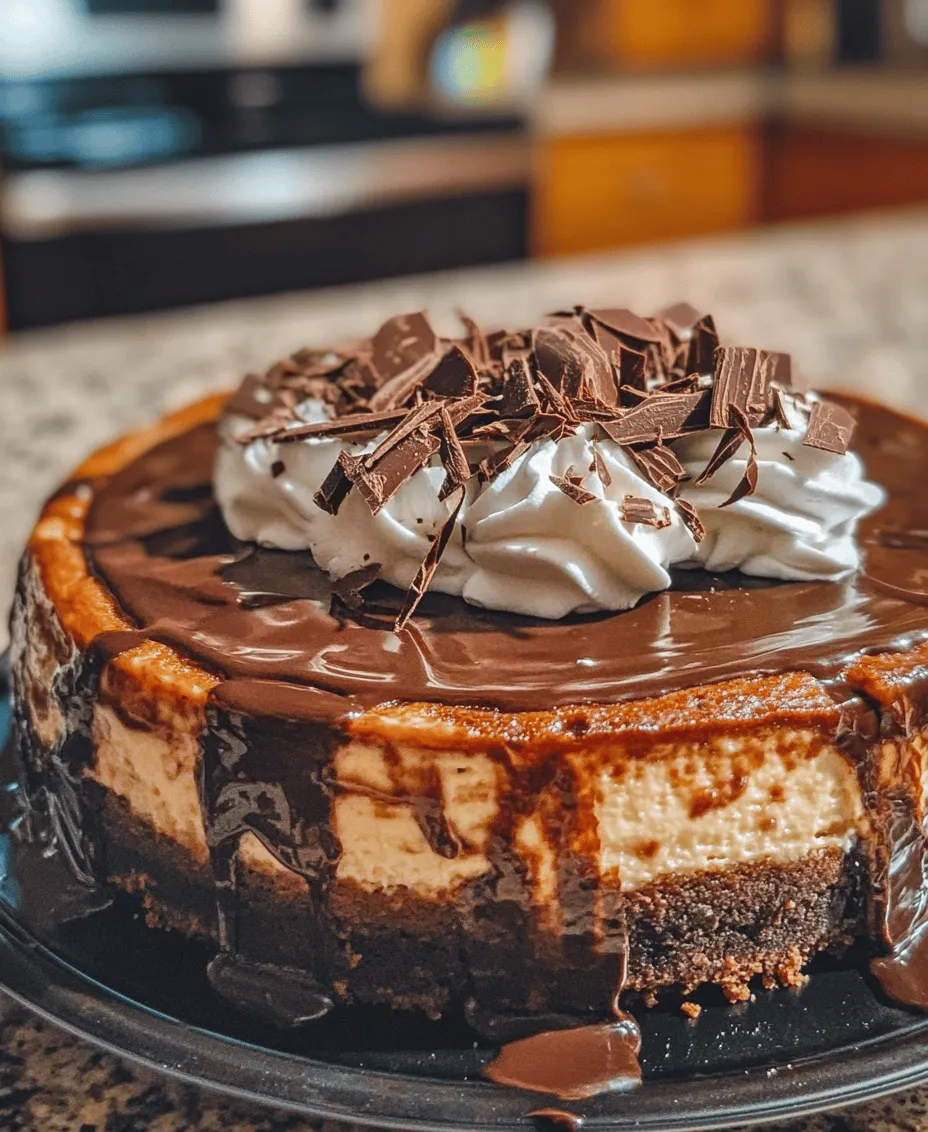
Cheesecake Factory Godiva Chocolate Cheesecake

Indulge in a slice of bliss with this delightful Banana Pudding Cheesecake! Combining creamy cheesecake and classic banana pudding, this dessert is a showstopper for any gathering. With its buttery Nilla wafer crust, rich filling, and light whipped topping, each bite is a harmonious explosion of flavor and texture. Perfect for celebrations or a sweet treat at home. Don't miss out on this dreamy creation! #BananaPuddingCheesecake #DessertLovers #BakingJoy #SweetTreats #CheesecakeHeaven

Ingredients
  

For the crust:

1 ¾ cups chocolate cookie crumbs (like Oreo)

½ cup unsalted butter, melted

2 tablespoons granulated sugar

For the cheesecake filling:

24 oz cream cheese, softened

1 cup granulated sugar

1 teaspoon vanilla extract

4 large eggs

8 oz Godiva chocolate, melted and slightly cooled

1 cup sour cream

For the chocolate ganache topping:

8 oz Godiva chocolate, chopped

½ cup heavy cream

Whipped cream for garnish (optional)

Chocolate shavings for garnish (optional)

Instructions
 

Prepare the crust:

    - Preheat your oven to 325°F (160°C).

      - In a medium bowl, combine chocolate cookie crumbs, melted butter, and sugar until well mixed.

        - Press the mixture into the bottom of a 9-inch springform pan evenly. Bake for 10 minutes. Remove from oven and cool.

          Make the cheesecake filling:

            - In a large mixing bowl, beat the softened cream cheese with sugar until smooth and creamy, about 2-3 minutes.

              - Add vanilla extract and combine well.

                - Add the eggs one at a time, beating well after each addition.

                  - Pour in the melted Godiva chocolate and mix until fully incorporated.

                    - Finally, fold in the sour cream until just combined.

                      Assemble and bake:

                        - Pour the cheesecake filling over the cooled crust, making sure to spread it evenly.

                          - Bake in the preheated oven for 55-65 minutes, or until the center is set but still slightly jiggly. Turn off the oven and crack the door open, allowing the cheesecake to cool inside for 1 hour.

                            Prepare the chocolate ganache:

                              - In a small saucepan, heat the heavy cream over medium heat until just below boiling.

                                - Remove from heat and add the chopped Godiva chocolate. Let sit for a minute, then stir until smooth and glossy.

                                  Cool the cheesecake:

                                    - Remove the cheesecake from the oven and allow it to cool to room temperature.

                                      - Once cooled, spread the chocolate ganache over the top. Cover with plastic wrap and refrigerate for at least 4 hours or overnight for best results.

                                        Serve:

                                          - Before serving, decorate with whipped cream and chocolate shavings if desired. Carefully remove the sides of the springform pan, slice, and enjoy!

                                            Prep Time: 30 min | Total Time: 6 hours | Servings: 12

                                              WANT TO SAVE THIS RECIPE?

                                              Leave a Comment

                                              Recipe Rating