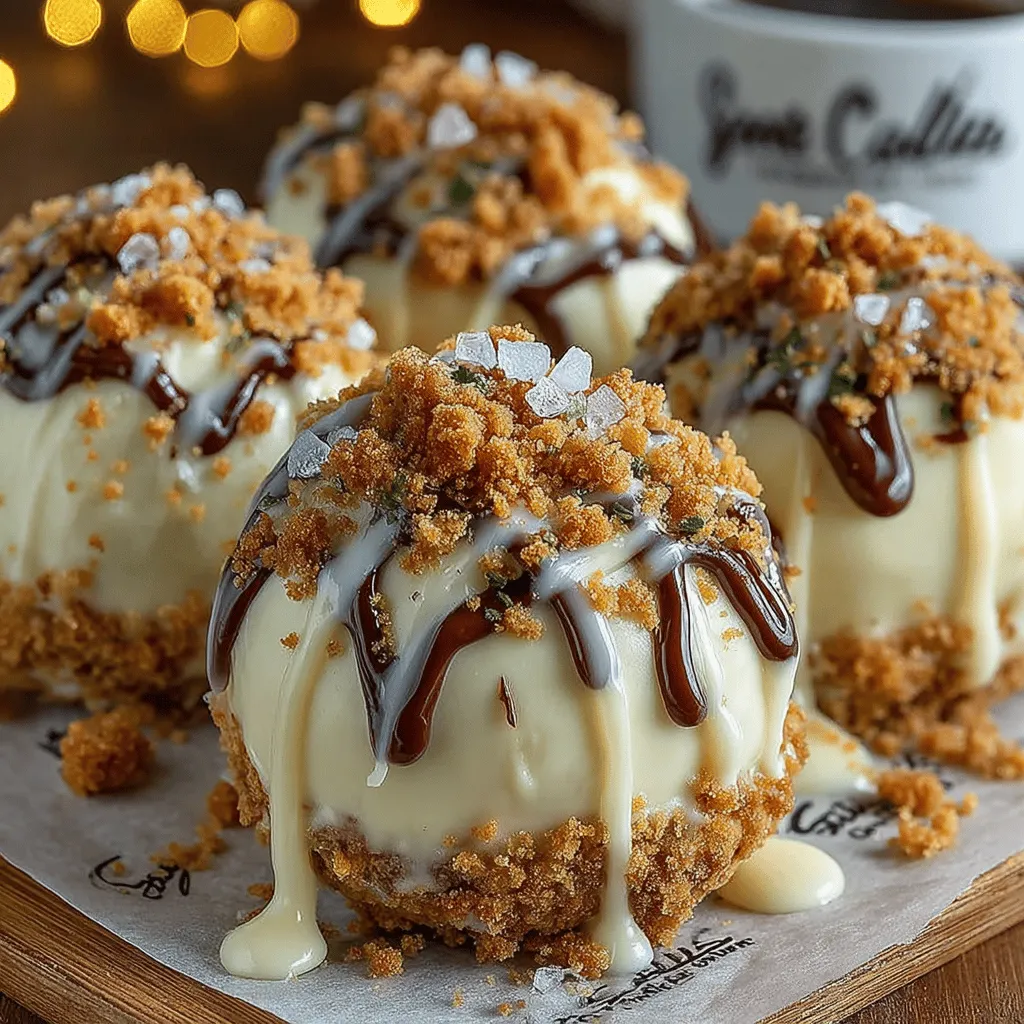
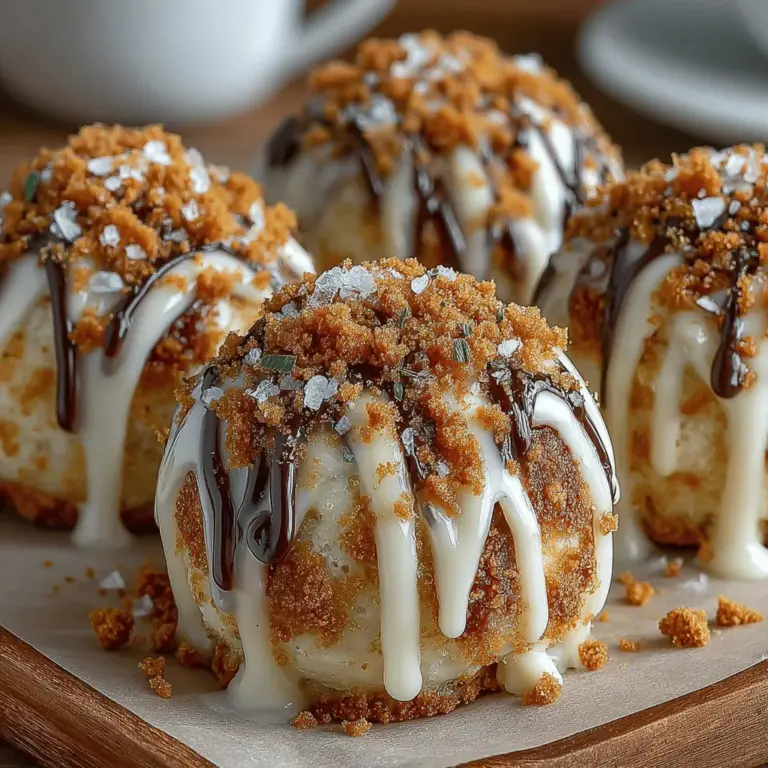
Introduction to Decadent No-Bake Biscoff Cheesecake Truffles
In the realm of dessert, few treats can rival the delightful combination of rich flavors and textures found in No-Bake Biscoff Cheesecake Truffles. These indulgent bites are not only easy to prepare but also provide a luxurious experience that satisfies even the most discerning sweet tooth. The truffles artfully blend the creamy goodness of cheesecake with the unique and irresistible flavor of Biscoff cookies and spread, making them an ideal choice for any occasion, be it a festive celebration or a cozy night in.
The beauty of these truffles lies in their simplicity; they require no baking, allowing you to whip them up quickly without the need for an oven. The combination of ingredients results in a dessert that is both rich and creamy, with a delightful crunch from the crushed cookies. If you’re looking for a treat that combines ease with decadence, these No-Bake Biscoff Cheesecake Truffles are sure to become a staple in your dessert repertoire.
As we delve into this article, we will explore the delightful journey of crafting these truffles, focusing on the essential ingredients, preparation steps, and tips that will help you achieve the perfect bite-sized indulgence. So let’s begin our sweet adventure and uncover the magic behind these decadent truffles.
Understanding the Key Ingredients
To create the ultimate No-Bake Biscoff Cheesecake Truffles, it’s crucial to understand the key ingredients that contribute to their deliciousness. Each component plays a significant role in achieving the right flavor and texture, so let’s break them down.
Exploring Cream Cheese
At the heart of any cheesecake recipe lies cream cheese, and for good reason. Cream cheese provides the rich and creamy base that defines a cheesecake’s texture. When making truffles, using softened cream cheese is essential; it ensures a smooth and easy-to-mix consistency. Softened cream cheese integrates seamlessly with other ingredients, preventing any lumps and creating a luxurious mouthfeel.
In addition to its role in texture, cream cheese also offers a tangy flavor that balances the sweetness of the other components. This balance is crucial in preventing the truffles from becoming overly sweet, allowing the unique flavors of the Biscoff cookies to shine through.
Discovering Biscoff Cookie Spread
Biscoff cookie spread is a game-changer when it comes to dessert recipes. Made from crushed Biscoff cookies and blended with oils, this spread has a rich, caramelized flavor that is both unique and versatile. Its smooth texture makes it a perfect addition to the cheesecake mixture, as it not only enhances the flavor profile but also adds to the creaminess of the truffles.
The flavor of Biscoff is often described as a delightful combination of spices, with hints of cinnamon and nutmeg, which adds warmth and depth to desserts. Whether used as a filling, a topping, or in this case, a primary ingredient, Biscoff cookie spread elevates any sweet treat it graces.
The Sweetness of Powdered Sugar
When it comes to sweetening truffles, powdered sugar is the go-to choice for many bakers. Unlike granulated sugar, which can create a grainy texture, powdered sugar dissolves quickly and easily into mixtures, ensuring a smooth consistency. This fine sugar also contributes to the soft texture that is characteristic of truffles.
Moreover, powdered sugar has a lightness that helps maintain the delicate balance of flavors in the truffles. When combined with cream cheese and Biscoff spread, it enhances the overall sweetness without overwhelming the palate. This subtle sweetness allows the distinct flavors of the Biscoff to remain prominent.
The Crunch Factor: Crushed Biscoff Cookies
Texture is a vital component of any dessert, and crushed Biscoff cookies provide the perfect crunch in these truffles. Not only do they contribute a delightful crunch with each bite, but they also intensify the Biscoff flavor, creating a harmonious blend of creamy and crunchy.
Incorporating crushed cookies into the truffle mixture adds an extra layer of complexity, making each truffle a multi-dimensional experience. The contrast between the creamy cheesecake filling and the crunchy cookie pieces ensures that these truffles are not just delicious, but also texturally satisfying.
Incorporating Vanilla Extract
While the primary flavors in this recipe come from the Biscoff ingredients, the addition of vanilla extract is essential for enhancing the overall flavor profile. Vanilla has a way of rounding out flavors, adding warmth and depth to desserts.
When selecting vanilla extract, choosing high-quality options is crucial. Pure vanilla extract, as opposed to imitation vanilla, provides a richer and more complex flavor that complements the creaminess of the cheesecake and the spiciness of the Biscoff. A small amount goes a long way in elevating the truffle’s taste.
Heavy Whipping Cream: The Secret to Lightness
One of the secrets to achieving the perfect texture in No-Bake Biscoff Cheesecake Truffles is the incorporation of heavy whipping cream. When whipped, heavy cream adds a lightness and airiness to the mixture, preventing it from becoming too dense. This lightness balances the richness of the cream cheese and Biscoff spread, resulting in a truffle that melts in your mouth.
Whipping the cream properly is essential; it should be whipped until stiff peaks form but not over-whipped, which can lead to a grainy texture. Incorporating the whipped cream gently into the cheesecake mixture ensures that the truffles maintain their light and creamy consistency.
Step-by-Step Guide to Making Biscoff Cheesecake Truffles
Now that we have a solid understanding of the key ingredients, let’s dive into the step-by-step process of making these delectable Biscoff Cheesecake Truffles.
Preparation of the Mixture
The first step in creating the perfect truffle mixture is to ensure that your cream cheese and Biscoff spread are well combined. Start by allowing the cream cheese to soften at room temperature for about 30 minutes. This will make it easier to mix with the Biscoff spread, creating a smooth and creamy base.
In a mixing bowl, combine the softened cream cheese and Biscoff cookie spread. Using a hand mixer or a stand mixer fitted with a paddle attachment, beat the two ingredients together on medium speed until they are fully incorporated and smooth. This mixture should be free of lumps; the goal is to achieve a silky consistency that will serve as the foundation for your truffles.
Incorporating Dry Ingredients
Once you have the creamy base ready, it’s time to incorporate the dry ingredients. Gradually add in the powdered sugar and the crushed Biscoff cookies. Mixing these dry ingredients in increments helps prevent clumping and ensures an even distribution throughout the truffle mixture.
Start by sifting the powdered sugar to remove any lumps before adding it to the bowl. Then, fold in the crushed cookies using a spatula, being careful not to overmix. The goal is to create a cohesive mixture that retains some texture from the crushed cookies while being smooth enough to form into truffles.
Flavoring the Mixture
The final touch in preparing the truffle mixture is to add the vanilla extract. This step is crucial for enhancing the overall flavor of the truffles. Pour in the vanilla extract and gently fold it into the mixture, ensuring that it is evenly distributed.
Taking care to mix gently will help maintain the lightness of the truffle mixture, which is essential for achieving that melt-in-your-mouth quality. Once the vanilla is fully incorporated, your mixture is ready for the next step—shaping the truffles into delightful bite-sized pieces.
Now that you have a rich and flavorful mixture prepared, you are well on your way to crafting these Decadent No-Bake Biscoff Cheesecake Truffles. With the right ingredients and a few simple steps, you will create a dessert that is sure to impress and satisfy.

Whipping the Cream
Techniques for Whipping Cream to Soft Peaks
Whipping cream is a crucial step in creating light and airy truffles. To achieve soft peaks, start with cold heavy whipping cream. Pour the cream into a chilled mixing bowl for optimal results. Using an electric mixer, beat the cream on medium speed until it begins to thicken. As you whip, watch for soft peaks to form; this means the cream will gently hold its shape but still have a smooth, glossy texture.
To check for soft peaks, lift the beaters from the cream. The peaks should bend over at the tips rather than standing straight up. Avoid overwhipping, as this can lead to a grainy texture and even butter formation.
How to Fold Whipped Cream into the Mixture Without Deflating
Folding whipped cream into the cheesecake mixture requires a gentle hand to maintain the airy consistency you’ve created. Begin by adding one-third of the whipped cream to the Biscoff mixture. Use a spatula to gently combine, making sweeping motions from the bottom of the bowl to the top. This technique incorporates the whipped cream without deflating it.
Once the first addition is fully incorporated, add the remaining whipped cream in two parts, repeating the gentle folding process. The goal is to maintain the lightness of the whipped cream while ensuring the mixture is fully combined and smooth.
Chilling for Firmness
Why Chilling is Crucial for Shaping Truffles
Chilling the cheesecake mixture is essential for achieving the right texture for shaping truffles. The cold temperature helps the mixture firm up, making it easier to handle and roll into uniform balls. Without adequate chilling, the mixture may be too soft and difficult to shape, leading to a messy process.
Suggested Cooling Times to Achieve the Desired Texture
After preparing the cheesecake mixture, cover the bowl with plastic wrap and place it in the refrigerator. Allow it to chill for at least 30 minutes, but for best results, aim for 1 to 2 hours. This resting period not only helps the flavors meld but also ensures that the mixture is firm enough for shaping.
Shaping the Truffles
Techniques for Rolling Uniform Truffle Balls
Once the mixture has chilled and is firm to the touch, it’s time to shape the truffles. Start by using a small cookie scoop or spoon to portion out the mixture. Aim for about 1 inch in diameter for each truffle.
Roll the portions between your palms to create smooth, uniform balls. If your hands get sticky, consider lightly dusting them with powdered sugar or using a small amount of cooking spray to assist in the rolling process. This technique will help ensure that you have perfectly round truffles every time.
Tips for Achieving a Professional Appearance
For a professional look, ensure your hands are clean and dry while rolling. After forming the balls, place them on a parchment-lined baking sheet. If you want to add a decorative touch, you can lightly roll the truffles in crushed Biscoff cookies or cocoa powder before placing them in the fridge to set. This extra step not only adds flavor but also enhances visual appeal.
Melting the White Chocolate
Proper Methods for Melting Chocolate Without Burning
Melting white chocolate requires careful attention, as it can easily seize or burn. The best methods include using a double boiler or a microwave.
For a double boiler, fill the bottom pot with a small amount of water and bring it to a gentle simmer. Place the white chocolate in the top pot, ensuring it does not touch the water. Stir continuously until melted and smooth.
If using a microwave, place the chopped white chocolate in a microwave-safe bowl. Heat in short bursts of 20 seconds, stirring in between each interval until the chocolate is completely melted and smooth.
Importance of Achieving a Smooth Consistency for Coating
A smooth consistency is crucial for coating the truffles evenly. If the chocolate is too thick, it may not coat the truffles properly, leading to an uneven finish. If needed, you can thin the melted chocolate with a small amount of vegetable oil or shortening to achieve the desired pouring consistency.
Coating the Truffles
Steps to Dip and Coat Truffles in White Chocolate
Once your truffles have been shaped and the white chocolate is melted, it’s time to coat them. Use a fork or a dipping tool to dip each truffle into the melted chocolate. Ensure that the entire truffle is submerged, then lift it out and allow the excess chocolate to drip off.
Gently tap the fork against the edge of the bowl to help remove any excess chocolate. Place the coated truffle back on the parchment-lined sheet. Repeat this process for all truffles, ensuring they are all evenly coated.
Using Crushed Biscoff Cookies for an Appealing Finish
For a visually appealing finish, sprinkle crushed Biscoff cookies over the coated truffles while the chocolate is still wet. This step not only enhances the flavor but also adds a textured element that makes the truffles look delightful and appetizing.
Setting and Garnishing
The Importance of Allowing Truffles to Set Properly
Allowing the truffles to set is crucial for achieving the right texture and flavor. After coating, place the truffles in the refrigerator for about 30 minutes to allow the chocolate to harden completely. This step ensures that the truffles maintain their shape and provides a satisfying bite.
Creative Ideas for Garnishing, Including Sea Salt Flakes
Once the truffles have set, consider garnishing them for an extra touch of elegance. A sprinkle of sea salt flakes can enhance the sweetness of the white chocolate and complement the rich Biscoff flavor. You could also drizzle some melted chocolate over the top or add a small piece of Biscoff cookie for decoration.
Serving Suggestions and Storage Tips
Best Practices for Serving Truffles
For maximum appeal, serve the Biscoff cheesecake truffles on a decorative platter. You can arrange them in a neat row, stack them in tiers, or even place them in individual cupcake liners for a more polished look.
Pair these truffles with a variety of beverages; coffee or espresso complements the richness, while a glass of dessert wine can elevate the experience further. They also pair beautifully with a scoop of vanilla ice cream for a delightful dessert combination.
Storage Guidelines
To keep the truffles fresh, store them in an airtight container in the refrigerator. They will stay delicious for up to one week. If you need to store them for a longer period, you can freeze them. Place the truffles in a single layer on a baking sheet to freeze, then transfer them to a freezer-safe container. They can last up to three months in the freezer.
Tips on Extending the Shelf Life of Your Truffles
To extend the shelf life of your truffles, ensure they are completely cooled and set before storing. Keeping them in a cool and dry place will help prevent them from becoming too soft or developing an unwanted texture. If you notice any condensation in the container, be sure to wipe it down to avoid water affecting the chocolate coating.
Nutritional Insights of Biscoff Cheesecake Truffles
Understanding the Nutritional Profile
While these decadent truffles are a delightful treat, it’s essential to consider their nutritional profile. Each truffle typically contains around 100 calories, with the majority coming from sugar and fat. They do offer a small amount of protein and carbohydrates, making them a sweet indulgence best enjoyed in moderation.
Breakdown of Calories and Key Nutrients Per Serving
A serving of one truffle can be broken down as follows:
– Calories: 100
– Total Fat: 6g
– Saturated Fat: 3.5g
– Carbohydrates: 10g
– Sugars: 9g
– Protein: 1g
For those with dietary restrictions, consider using gluten-free cookies or dairy-free cream cheese alternatives to cater to different needs.
Conclusion: The Joy of No-Bake Biscoff Cheesecake Truffles
Creating No-Bake Biscoff Cheesecake Truffles is a delightful experience that results in a treat that is not only mouthwatering but also easy to make. This indulgent dessert captures the essence of cheesecake while incorporating the signature flavor of Biscoff, making it a crowd-pleaser for any occasion. Whether you’re preparing for a celebration or simply treating yourself, these truffles promise a blissful bite of sweetness that’s hard to resist. Happy baking!

