Introduction
In today’s fast-paced world, the importance of healthy snacking cannot be overstated. With busy schedules often leading to rushed meal choices, many are seeking nutritious alternatives that not only satisfy cravings but also align with their health goals. This is where the appeal of raw desserts comes into play. Among these, Decadent Chocolate Bliss Balls have gained immense popularity, offering a sweet treat that doesn’t compromise on nutrition. These little bites of heaven are not only delicious but also packed with wholesome ingredients that contribute to a balanced diet.
Decadent Chocolate Bliss Balls are a perfect fusion of taste and health, making them an ideal choice for those looking to indulge without the guilt. The combination of natural sweeteners, healthy fats, and nutrient-rich ingredients makes these bliss balls a go-to snack for anyone from busy professionals to active families. The ease of preparation further enhances their appeal, making them an accessible option for anyone wanting to whip up a quick and nourishing treat.
The Appeal of Decadent Chocolate Bliss Balls
One of the primary reasons Decadent Chocolate Bliss Balls have captured the hearts of health-conscious eaters is their exceptional nutritional profile. Each ingredient serves a specific purpose, contributing to an overall health benefit that is hard to find in traditional sweet treats. For instance, Medjool dates, one of the key ingredients, provide natural sweetness while also being rich in dietary fiber, which aids digestion and promotes a feeling of fullness. This means you can satisfy your sweet tooth without the need for refined sugars, which are often linked to energy spikes and crashes.
Additionally, the use of raw almonds in the recipe offers a source of healthy fats, protein, and essential vitamins and minerals. This combination helps to support heart health and maintain energy levels throughout the day. The unsweetened cocoa powder not only enhances the rich chocolate flavor but is also packed with antioxidants, making these bliss balls a guilt-free indulgence.
What makes Decadent Chocolate Bliss Balls even more appealing is their versatility. This recipe caters to various dietary preferences, making it suitable for vegans and those following a gluten-free diet. With just a few simple substitutions, anyone can enjoy these delightful bites, whether they are looking to boost their energy before a workout or satisfy a mid-afternoon craving.
Ingredient Breakdown
Before diving into the preparation of these blissful treats, it’s essential to understand the role each ingredient plays in boosting both flavor and nutrition.
– Medjool Dates: Known for their natural sweetness, Medjool dates are a staple in many raw dessert recipes. They are a fantastic source of fiber, which not only helps regulate digestion but also helps maintain stable blood sugar levels. Their sticky texture acts as a binding agent, holding all the ingredients together beautifully.
– Raw Almonds: These nutrient-dense nuts are packed with healthy monounsaturated fats, protein, and vitamin E, making them an excellent addition to any snack. Their crunchy texture adds a delightful contrast to the smoothness of the bliss balls, while the protein content helps keep you feeling full longer.
– Unsweetened Cocoa Powder: Beyond its rich flavor, unsweetened cocoa powder is a powerhouse of antioxidants known to support heart health and improve mood. It adds depth to the chocolate flavor without the added sugars found in many commercial chocolate products.
– Rolled Oats: Providing a source of complex carbohydrates, rolled oats help sustain energy levels for longer periods. They also contribute a chewy texture that enhances the overall mouthfeel of the bliss balls.
– Almond Butter: This creamy ingredient not only adds a rich flavor to the bliss balls but also boosts their nutritional value. Almond butter is a great source of healthy fats, protein, and various vitamins, making it a perfect complement to the other ingredients.
– Vanilla Extract: A few drops of vanilla extract can elevate the flavor profile of the bliss balls, adding a warm and inviting aroma that enhances the overall experience of enjoying these treats.
– Sea Salt: A pinch of sea salt is essential for balancing the sweetness of the dates and chocolate. It adds depth to the flavors and enhances the overall taste of the bliss balls.
– Optional Ingredients: For an extra touch, consider adding shredded coconut or dark chocolate chips. Shredded coconut adds a tropical flair and additional texture, while dark chocolate chips can provide an indulgent twist, enhancing the chocolate experience.
Preparation Steps
Once you have gathered all your ingredients, you’re ready to embark on the delightful journey of making Decadent Chocolate Bliss Balls. The first step in the process is crucial: preparing your ingredients. This means measuring out the required amounts and ensuring everything is easily accessible. This not only streamlines the cooking process but also allows for a more enjoyable baking experience.
1. Measure and Prepare Ingredients: Start by measuring out your Medjool dates, raw almonds, unsweetened cocoa powder, rolled oats, almond butter, vanilla extract, and sea salt. If you’re using optional ingredients like shredded coconut or dark chocolate chips, prepare those as well. Having everything prepped before you start blending will make the process smoother and more efficient.
2. Process the Almonds: In a food processor, add the raw almonds and pulse until they reach a coarse flour-like consistency. Be careful not to over-process, as you want to maintain some texture.
3. Add the Dates: Next, add the Medjool dates to the food processor. Blend until the mixture becomes sticky and begins to clump together. This will serve as the base for your bliss balls.
4. Incorporate the Dry Ingredients: Once your dates are well combined, add the unsweetened cocoa powder, rolled oats, and a pinch of sea salt. Blend until all the ingredients are evenly distributed and the mixture is cohesive.
5. Add Wet Ingredients: Finally, include the almond butter and vanilla extract to the mixture. Pulse the food processor until everything is thoroughly mixed. The result should be a sticky, moldable dough.
6. Form the Bliss Balls: With clean hands, take small portions of the mixture and roll them into bite-sized balls. You can make them as small or as large as you prefer, but keeping them around one inch in diameter is typically the best size for snacking.
7. Coat (Optional): If desired, roll the bliss balls in shredded coconut or sprinkle some dark chocolate chips for an added touch of flavor and texture.
By following these steps, you will have created a batch of Decadent Chocolate Bliss Balls that are not only delicious but also nourishing. Enjoy them as a quick snack or a post-workout boost, and relish the satisfaction of indulging in a treat that aligns with your health goals.

Creating the perfect Decadent Chocolate Bliss Balls is not just about the ingredients you choose; it’s also about the techniques you employ during preparation. Follow these detailed steps to master the art of crafting these delightful snacks, ensuring the ideal consistency and flavor in every bite.
Blending the Base: Techniques for a Perfect Consistency
The first step in preparing your bliss balls is to blend the base ingredients effectively. This mixture typically includes dates, nuts, cocoa powder, and any additional flavorings you desire. Start by pitting and chopping the dates to make them easier to blend.
Key Techniques:
– Use a High-Powered Blender or Food Processor: This ensures that your ingredients are well-combined and reach the right texture. If you don’t have a high-powered blender, be patient and blend in smaller batches.
– Pulse Before Blending: Start with short pulses to break down the nuts before blending continuously. This prevents the mixture from becoming too pasty and helps achieve a finer texture.
– Add Liquid If Needed: If your mixture seems too dry, add a tablespoon of water or a splash of nut milk. This addition should be done sparingly; you want a thick, moldable mixture, not a runny one.
Processing Until Combined: Tips for Texture
Once your ingredients are blended, it’s essential to process them until they are well combined but still retain some texture. Over-processing can lead to a sticky mixture that won’t roll into balls easily.
Tips for Achieving Ideal Texture:
– Scrape the Sides: Periodically stop the processor to scrape down the sides. This ensures all ingredients are incorporated evenly.
– Check Consistency: The mixture should hold together when pressed between your fingers. If it crumbles, blend a bit longer or add a touch more moisture.
– Incorporate Add-Ins: If you’re using extras like chopped nuts, seeds, or dried fruits, fold them in by hand after processing the primary mixture. This not only keeps them intact but also adds delightful bursts of texture in each bite.
Chilling the Mixture: Why Chilling is Crucial for Ease of Rolling
After blending, it’s time to chill your mixture. Chilling is a crucial step that makes the mixture easier to handle and shape into uniform balls.
Why Chilling is Important:
– Firming Up the Mixture: As the mixture chills in the refrigerator for about 30 minutes, it firms up, making it less sticky and easier to roll.
– Enhancing Flavors: Allowing the mixture to rest also helps the flavors meld together, resulting in a more cohesive taste in the final product.
Forming the Balls: Proper Techniques for Uniformity
Now comes the fun part—rolling your bliss balls! This step is about achieving consistency in size and shape.
Techniques for Uniform Balls:
– Use a Cookie Scoop: A small cookie scoop is perfect for portioning out equal amounts of the mixture. This ensures that all your bliss balls are the same size, making them visually appealing and ensuring even nutrition.
– Wet Your Hands: Lightly wet your hands before rolling can help prevent the mixture from sticking, making the process smoother.
– Roll Firmly but Gently: When rolling, apply enough pressure to form a solid ball without crushing the mixture. Aim for a smooth surface for an appealing finish.
Optional Enhancements
To elevate the flavor and presentation of your Decadent Chocolate Bliss Balls, consider these optional enhancements:
Coating with Shredded Coconut: Benefits and Visual Appeal
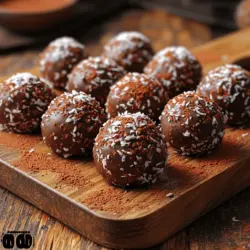
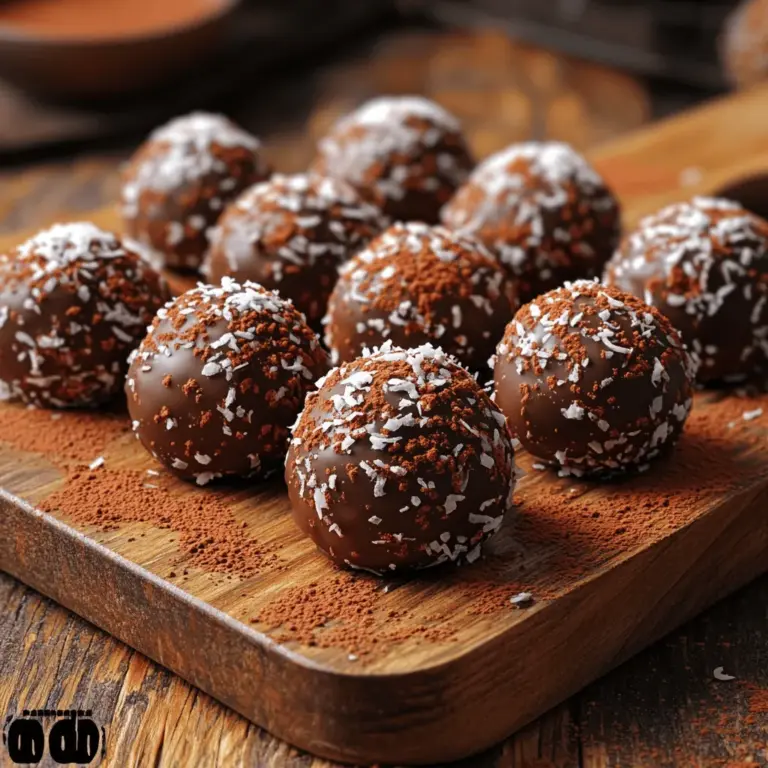
Coating your bliss balls with shredded coconut not only adds a tropical flair but also enhances texture and flavor. Coconut is rich in healthy fats and can provide a satisfying chewiness that complements the chocolate.
– How to Coat: After rolling your bliss balls, roll them in a shallow bowl of shredded coconut until fully coated. This adds a beautiful white exterior and a hint of sweetness.
Melting and Drizzling Dark Chocolate: How It Elevates the Dish
For chocolate lovers, a drizzle of melted dark chocolate can take these bliss balls to the next level. Not only does it enhance the chocolate flavor, but it also adds an elegant finish.
– Melting Chocolate: Melt dark chocolate in a microwave-safe bowl in short bursts, stirring frequently until smooth. Drizzle over the rolled bliss balls using a fork or a piping bag for a decorative touch.
Refrigerating Again: Importance of Setting for the Chocolate Coating
Once coated, it’s a good idea to refrigerate the bliss balls again. This step allows the chocolate to set properly, ensuring that it hardens and doesn’t smudge when handled.
– Setting Time: Allow the chocolate-coated bliss balls to chill in the refrigerator for at least 15 minutes before serving. This ensures they maintain their shape and appearance.
Serving Suggestions
These Decadent Chocolate Bliss Balls are versatile and can be enjoyed in various ways:
– As a Nutritious Snack for Busy Days: Keep a batch in your refrigerator for a quick grab-and-go snack that satisfies sweet cravings without the guilt.
– Pairing with Beverages: They pair beautifully with a cup of tea or coffee, making for a delightful afternoon pick-me-up.
– Using Them as a Healthier Dessert Option for Gatherings: Serve these bliss balls at parties or gatherings as a healthier dessert alternative. Their rich flavor and beautiful presentation will impress your guests.
Nutritional Information
Understanding the nutritional value of your bliss balls can help you appreciate their health benefits. Here’s a breakdown of the nutritional content per serving (assuming one serving equals one bliss ball):
– Calories: Approximately 80-100 calories
– Protein: 2-3 grams
– Fats: 4-5 grams (healthy fats from nuts and coconut)
– Carbohydrates: 10-12 grams
– Fiber: 2-3 grams
Comparison with Traditional Dessert Options
When compared to traditional desserts like cookies or chocolate bars, Decadent Chocolate Bliss Balls are lower in refined sugars and unhealthy fats. They provide a more balanced snack option, combining natural sugars with fiber and healthy fats that promote satiety and energy without the crash.
Conclusion
Choosing to make your own Decadent Chocolate Bliss Balls is a rewarding way to indulge in a delicious treat that’s also good for you. With simple ingredients and easy techniques, you can create a mouthwatering snack that satisfies cravings while supporting your health goals.
Experiment with the recipe by adding your favorite flavors, adjusting the sweetness, or trying different coatings. Homemade snacks like these not only taste better than store-bought options but also allow you to know exactly what goes into your food. So gather your ingredients, roll up your sleeves, and enjoy the process of creating these delectable treats. Your taste buds will thank you!

