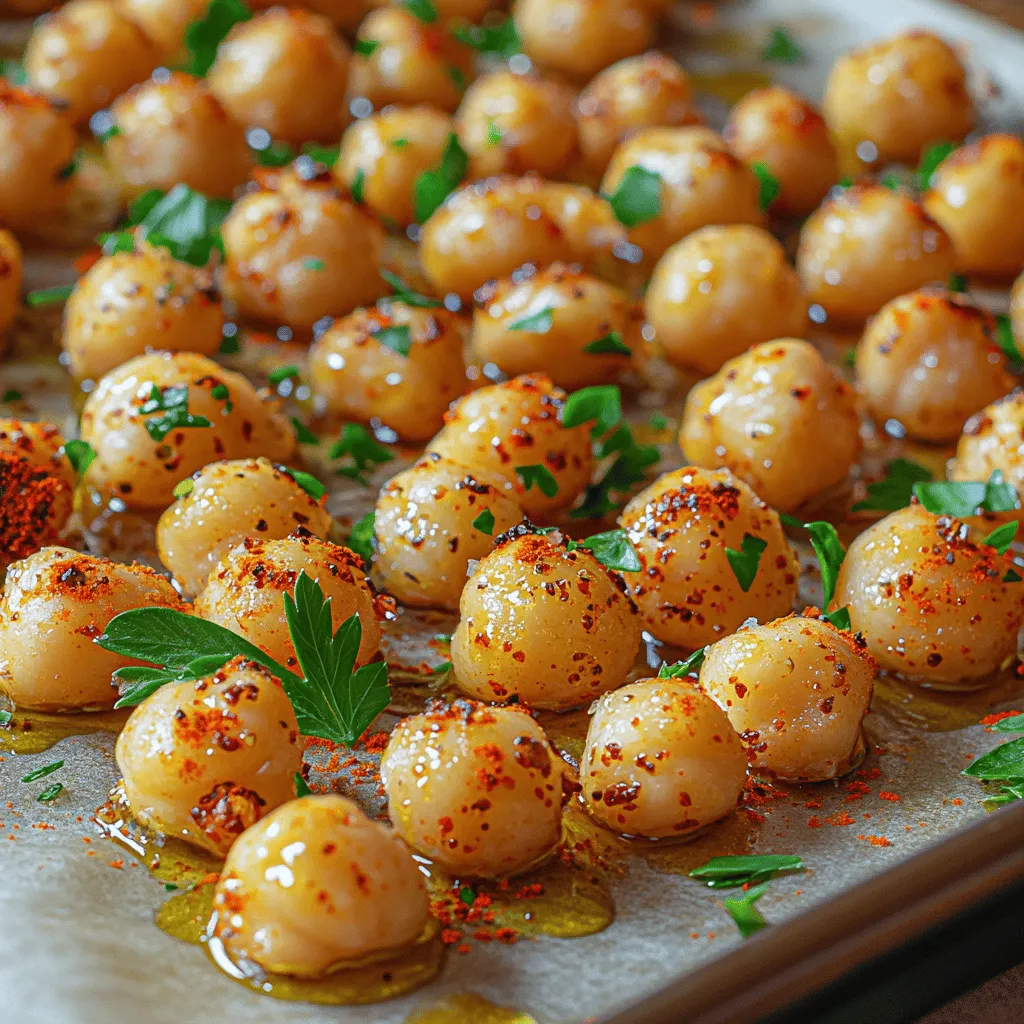
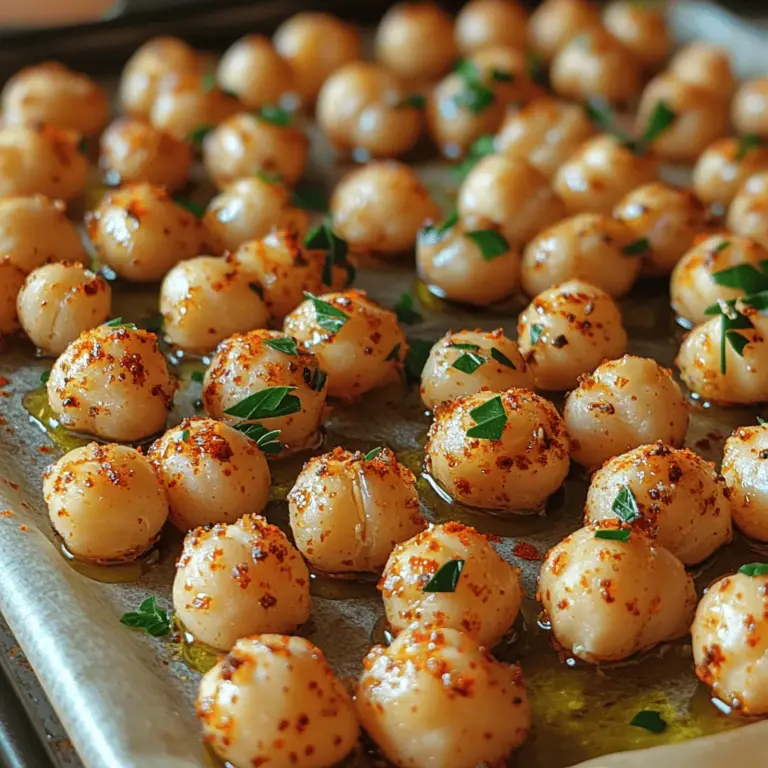
Crunchy Roasted Garlic Chickpeas: A Delicious and Healthy Snack
Chickpeas, also known as garbanzo beans, are a staple ingredient in numerous cuisines around the globe. Their versatility makes them a popular choice for various dishes, ranging from creamy hummus to hearty stews. However, one of the most delightful ways to enjoy chickpeas is by transforming them into a crunchy snack. Roasted chickpeas offer a satisfying crunch, making them an ideal alternative to traditional snacks like chips and crackers. They are not only delicious but also packed with nutrients, making them a guilt-free indulgence.
The recipe for Crunchy Roasted Garlic Chickpeas is a perfect combination of simplicity and flavor. Infused with the rich and aromatic essence of garlic, these chickpeas are seasoned to perfection, resulting in a snack that is both savory and satisfying. The crunchy texture and robust taste make these chickpeas a great option for munching on during movie nights, serving at parties, or simply enjoying as a healthy afternoon pick-me-up.
The Benefits of Chickpeas
Chickpeas are more than just a versatile ingredient; they are also a nutritional powerhouse. Packed with protein and fiber, they provide a feeling of fullness that can help curb cravings and prevent overeating. A single cup of cooked chickpeas contains approximately 15 grams of protein and 12 grams of fiber, making them an excellent choice for anyone looking to increase their protein intake while maintaining a balanced diet.
In addition to their high protein and fiber content, chickpeas are rich in essential vitamins and minerals. They are a good source of folate, iron, magnesium, and phosphorus, all of which play vital roles in supporting overall health. These nutrients contribute to improved energy levels, better digestion, and enhanced immune function.
Incorporating chickpeas into your diet offers numerous health benefits. Their high fiber content supports weight management by promoting feelings of fullness and aiding in digestion. Chickpeas have a low glycemic index, which means they can help regulate blood sugar levels, making them a suitable option for those managing diabetes. Furthermore, the antioxidants present in chickpeas can help reduce inflammation in the body, contributing to overall well-being.
Essential Ingredients for Crunchy Roasted Garlic Chickpeas
To create the perfect batch of Crunchy Roasted Garlic Chickpeas, it’s essential to gather a few key ingredients that will enhance the flavor and texture of the dish. Below is an overview of the main components needed for this recipe.
– Chickpeas: The base of the recipe, chickpeas are the star ingredient. For this recipe, you can use canned chickpeas for convenience, or you can opt for dried chickpeas, which require soaking and cooking beforehand. Either way, the goal is to achieve a crispy texture that makes these roasted chickpeas irresistible.
– Olive Oil: Olive oil is crucial for roasting the chickpeas. It helps achieve that perfect crunch while also adding a rich flavor. Extra virgin olive oil is ideal, as it offers the best taste and health benefits.
– Garlic Powder and Minced Fresh Garlic: These two ingredients are the key flavor components of this recipe. Garlic powder provides a deep, concentrated garlic flavor, while fresh minced garlic adds a fragrant punch that elevates the overall taste of the dish.
– Spices: The right blend of spices can take your roasted chickpeas to the next level. Smoked paprika adds a subtle smokiness, while ground cumin contributes warmth and earthiness. A pinch of salt and pepper enhances the overall flavor profile, making each bite a savory delight.
– Nutritional Yeast: This optional ingredient is perfect for those looking to add a cheesy flavor without using dairy. Nutritional yeast is packed with B vitamins and adds a unique umami flavor to the chickpeas.
– Fresh Herbs: For garnishing, fresh herbs such as parsley or cilantro can add a pop of color and freshness to the finished dish. They not only enhance the visual appeal but also provide an additional layer of flavor.
Getting Started with the Recipe
Now that you have a good understanding of the various ingredients, it’s time to dive into the initial steps of preparing Crunchy Roasted Garlic Chickpeas.
1. Preheat the Oven: Start by preheating your oven to 400°F (200°C). A hot oven is essential for achieving that perfect crunch.
2. Prepare the Chickpeas: If you’re using canned chickpeas, drain and rinse them thoroughly under cold water. This will help remove excess sodium and any canning liquid. If you’re using dried chickpeas, ensure they have been soaked and cooked until tender. Once rinsed or cooked, spread the chickpeas out on a clean kitchen towel or paper towels and pat them dry. Removing excess moisture is crucial for achieving a crispy texture during roasting.
3. Mix Ingredients: In a large mixing bowl, combine the dried chickpeas, olive oil, garlic powder, minced garlic, smoked paprika, ground cumin, salt, and pepper. Toss the chickpeas well to ensure they are evenly coated with the oil and spices. This step is essential for maximizing flavor in every bite. If you’re using nutritional yeast, you can add it at this stage for an extra layer of flavor.
4. Spread on a Baking Sheet: Line a baking sheet with parchment paper for easy cleanup. Spread the seasoned chickpeas evenly on the sheet, making sure they are in a single layer. Overcrowding the chickpeas can lead to steaming instead of roasting, so give them adequate space.
5. Roast: Place the baking sheet in the preheated oven and roast the chickpeas for about 20 to 30 minutes, or until they are golden brown and crispy. Make sure to stir them halfway through to ensure even cooking.
By following these initial steps, you’ll set the foundation for a batch of Crunchy Roasted Garlic Chickpeas that will surely become a favorite snack. The combination of flavors and textures is not only pleasing to the palate but also provides a nutritious option for those looking to enjoy a healthy lifestyle. As you continue with the recipe, the aroma of roasted garlic will fill your kitchen, making it hard to resist diving into this deliciously crunchy treat.

Preparation Steps for Crunchy Roasted Garlic Chickpeas
Preheating the Oven and Preparing the Baking Sheet
Begin your culinary adventure by preheating your oven to 400°F (200°C). A hot oven is crucial for achieving the perfect crunch on your chickpeas. While the oven heats up, line a baking sheet with parchment paper or a silicone baking mat. This not only prevents the chickpeas from sticking but also makes for an easier cleanup post-roasting. If you prefer, you can lightly grease the baking sheet with a non-stick spray or olive oil to enhance crispiness.
Importance of Drying Chickpeas: How Moisture Affects Roasting
Before seasoning, it’s essential to ensure your chickpeas are thoroughly dried. Whether you’re using canned chickpeas or cooked dried ones, moisture is the enemy of crunch. If using canned chickpeas, drain them in a colander and rinse under cold water. Spread the chickpeas on a clean kitchen towel or paper towels and gently pat them dry. Removing moisture allows the chickpeas to roast properly, resulting in a delightful crunch rather than a soggy texture.
Step-by-Step Guide on Seasoning the Chickpeas
Once your chickpeas are dried, transfer them to a large mixing bowl. Add 2 tablespoons of olive oil, which serves as the base for your seasonings and helps in the roasting process. Next, introduce the star of the show: garlic. For this recipe, you will need 4-6 cloves of garlic, minced or finely chopped, depending on your garlic preference.
Sprinkle in 1 teaspoon of salt, 1 teaspoon of smoked paprika for a subtle smokiness, and ½ teaspoon of ground black pepper to enhance the flavor profile further. Feel free to adjust the seasonings to suit your palate—more garlic or a sprinkle of cayenne can bring a delightful kick!
Explanation of the Mixing Process for Even Coating
Now, using a spatula or your hands, mix the chickpeas gently but thoroughly, ensuring each chickpea is well-coated with the oil and spices. This step is crucial for achieving an even flavor throughout your roasted chickpeas. Take your time with this process, as uneven coating can lead to some chickpeas being bland while others are overly seasoned.
Tips for Spreading Chickpeas on the Baking Sheet
After mixing, it’s time to transfer the seasoned chickpeas to the prepared baking sheet. Use a slotted spoon to scoop them out, allowing any excess oil and seasoning to drip back into the bowl. Spread the chickpeas out in a single layer on the baking sheet. This is crucial; overcrowding can lead to steaming rather than roasting, which will compromise the desired crunch.
Importance of Even Spacing for Crispiness
To achieve that delightful crunch, ensure that the chickpeas are evenly spaced apart. This allows hot air to circulate around each chickpea, promoting even cooking and preventing any from becoming soggy. If necessary, use a second baking sheet to ensure they have enough room.
Roasting Process: Time and Temperature Considerations
Place the baking sheet in the preheated oven and roast the chickpeas for about 20 to 30 minutes. Halfway through, around the 15-minute mark, give them a shake or stir with a spatula to ensure even roasting. Keep a close eye on them during the last few minutes as they can go from perfectly crispy to burnt very quickly.
How to Check for Doneness and Avoid Burning
Your chickpeas are done when they are golden brown and crunchy. To check for doneness, take a few chickpeas out and let them cool for a minute before tasting. They should have a satisfying crunch and a rich flavor profile. If they’re not there yet, return them to the oven, checking every 5 minutes until they reach the desired state.
Optional Step: Adding Nutritional Yeast
For an added layer of flavor and a cheesy note, consider incorporating nutritional yeast. This step is purely optional but can elevate your roasted chickpeas. If you decide to include it, add about 2 tablespoons of nutritional yeast directly into the mixing bowl right before spreading them on the baking sheet. Toss the chickpeas again to ensure even coating and proceed to roast.
Timing and Method for Incorporating This Ingredient
If you’re adding nutritional yeast, do so after the initial roasting time of about 15 minutes. Simply remove the baking sheet from the oven, sprinkle the nutritional yeast over the chickpeas, and toss to coat. Then return them to the oven for an additional 5 to 10 minutes to allow the yeast to toast and enhance its flavor.
Serving Suggestions for Crunchy Roasted Garlic Chickpeas
Ideas for Enjoying Roasted Chickpeas as a Snack
Crunchy roasted garlic chickpeas are an excellent standalone snack. They are packed with protein and fiber, making them a satisfying option for those mid-afternoon cravings. Serve them in a bowl for easy snacking or portion them into small containers for on-the-go munching.
Pairing with Dips or Enjoying Plain
These roasted chickpeas can be enjoyed plain, but they also pair wonderfully with various dips. Try serving them alongside hummus, tzatziki, or a spicy harissa dip to add a new flavor dimension. The contrast of the creamy dip with the crunchy chickpeas creates a delightful snack experience.
Using as a Salad Topping for Added Crunch and Nutrition
Elevate your salads by adding a handful of roasted garlic chickpeas on top. They provide a wonderful crunch that contrasts beautifully with the fresh greens and other salad ingredients. Their protein content will also help to make your salad more filling and nutritious.
Incorporating into Wraps or Grain Bowls for a Protein Boost
Roasted chickpeas can be a fantastic addition to wraps and grain bowls. Add them to a whole grain wrap with some fresh veggies and a drizzle of tahini or your favorite dressing. Alternatively, toss them into a grain bowl with quinoa, roasted vegetables, and a sauce of your choice for a hearty meal.
Creative Serving Ideas for Gatherings or Parties
If you’re hosting a gathering or party, consider serving the roasted chickpeas in a creative way. Present them in small cups or mason jars as finger foods. You can also mix them with other roasted nuts for a savory party mix. Their crunchy texture and bold flavor will be a hit among your guests.
Conclusion
Crunchy roasted garlic chickpeas are not only simple to prepare but also offer a plethora of health benefits. Rich in protein and fiber, they make for a nutritious snack that satisfies cravings without compromising your dietary goals. This recipe emphasizes the versatility of chickpeas, showcasing their ability to enhance various dishes, from salads to wraps, and even as a stand-alone snack.
Encouraging you to try this recipe means embracing a healthy, flavorful snack option that is easy to make and delicious to enjoy. With their rich, garlicky flavor and satisfying crunch, roasted chickpeas are sure to become a staple in your kitchen. So gather your ingredients, follow these steps, and relish the delightful crunch of your homemade roasted garlic chickpeas!

