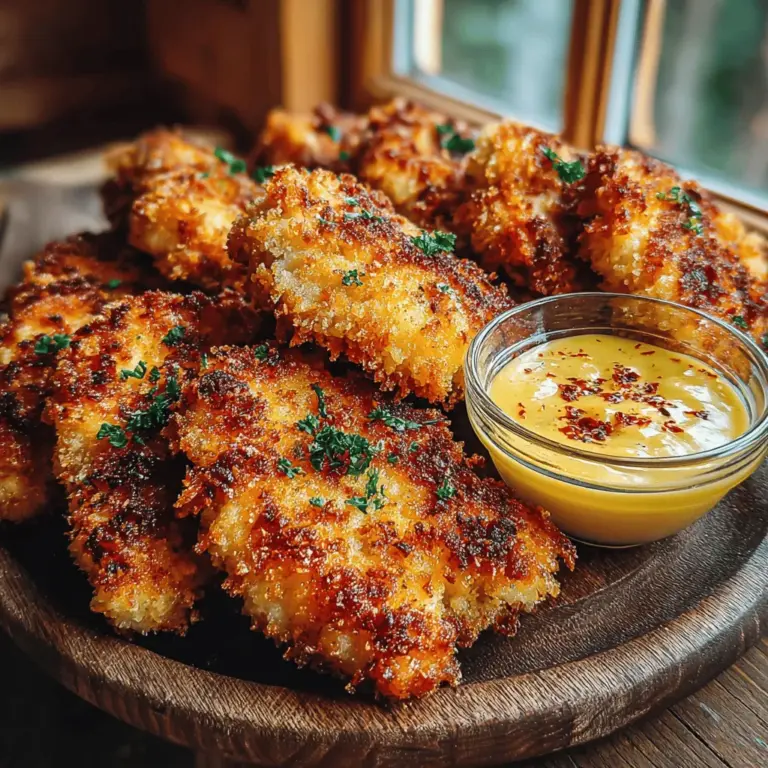
Crispy Baked Chicken Tenders with Honey Mustard: A Delicious and Healthy Twist
Chicken tenders have long held a special place in the hearts (and stomachs) of families and food lovers alike. Their popularity stems from their versatility—perfect for everything from casual weeknight dinners to festive gatherings. Whether you’re serving them as a main dish, a party appetizer, or a lunchbox staple, chicken tenders are a crowd-pleaser that can satisfy both kids and adults. In this article, we’ll explore a delightful recipe for crispy baked chicken tenders paired with a homemade honey mustard sauce, highlighting why this dish stands out and how to prepare it.
The Allure of Crispy Baked Chicken Tenders
The appeal of crispy chicken tenders lies not only in their satisfying crunch but also in their ability to adapt to different occasions and flavor profiles. For parents, chicken tenders are a go-to choice, as they can easily be paired with a variety of sides and dips, making them a hit at family meals. Additionally, the homemade nature of this recipe allows for customization to cater to various dietary preferences, whether you’re looking for a gluten-free option or aiming to reduce sodium intake.
One of the most significant advantages of making your chicken tenders at home is the ability to control the ingredients. Store-bought versions often contain preservatives and additives that can detract from the overall quality of the dish. By preparing your crispy baked chicken tenders from scratch, you can ensure that each bite is not only delicious but also made with wholesome ingredients.
Ingredients Overview
Before diving into the cooking process, let’s take a closer look at the ingredients that contribute to the deliciousness of this dish.
– Chicken Tenders: This cut of chicken is derived from the breast and is known for its tenderness and mild flavor. Chicken tenders are a great source of lean protein, making them a healthy option for any meal. Their small size also means they cook quickly and evenly, ensuring that you get that perfect crispy exterior without overcooking the meat.
– Panko Breadcrumbs: Unlike traditional breadcrumbs, panko is made from crustless bread and is lighter and flakier. This unique texture allows for a crunchier finish that elevates the chicken tenders, providing an irresistible bite. Using panko instead of regular breadcrumbs is a key element in achieving that coveted crispy coating.
– Seasonings: A blend of garlic powder, onion powder, paprika, thyme, salt, and pepper is instrumental in enhancing the flavor of the chicken tenders. Each seasoning adds a layer of depth, ensuring that every bite is packed with flavor. Garlic powder and onion powder offer a savory base, while paprika introduces a mild smokiness and vibrant color. Thyme adds a hint of earthiness, and salt and pepper elevate the overall taste.
– Olive Oil: In this recipe, olive oil plays a crucial role in keeping the breadcrumbs crispy while also adding a touch of richness. The oil helps the panko adhere to the chicken, creating a beautifully golden and crunchy crust once baked.
– Cooking Spray: A light coating of cooking spray on the baking sheet and over the chicken tenders before baking promotes even browning and prevents sticking. This simple step is essential for achieving that restaurant-quality finish at home.
– Honey Mustard Sauce Ingredients: To complement the crispy chicken tenders, we’ll create a homemade honey mustard sauce that is both simple and delicious.
– Mayonnaise: This ingredient adds creaminess to the sauce and helps to balance the sweetness of the honey and the tang of the mustard.
– Honey: Known for its natural sweetness, honey not only enhances the flavor but also brings a touch of health benefits, including antioxidants.
– Dijon Mustard: This variety of mustard contributes a distinct sharpness that balances the sweetness of the honey, creating a well-rounded dipping sauce.
– Apple Cider Vinegar: A splash of apple cider vinegar adds acidity and depth to the sauce, making it more complex and flavorful.
Step-by-Step Instructions
Now that we have our ingredients ready, let’s get started with the preparation of the chicken tenders.
1. Preparing the Chicken Tenders:
Start by preheating your oven to 400°F (200°C). This step is crucial, as a properly heated oven ensures that the chicken cooks evenly and helps achieve that desired crispiness. While the oven preheats, prepare a baking sheet by lining it with parchment paper or greasing it with cooking spray. This will prevent the chicken from sticking and make for easier cleanup later on.
Next, take the chicken tenders and pat them dry with paper towels. Removing excess moisture is key to achieving a crispy texture, as any leftover moisture will create steam during baking, resulting in soggy tenders. Once dried, season the chicken pieces with salt and pepper to taste, ensuring that every piece is evenly coated.
2. Breading the Chicken Tenders:
Set up a breading station with three shallow bowls: one for flour, one for beaten eggs, and one for the panko breadcrumb mixture. In the first bowl, place a cup of flour seasoned with a little salt and pepper. In the second bowl, beat two eggs until well combined. In the third bowl, combine the panko breadcrumbs with garlic powder, onion powder, paprika, thyme, and a pinch of salt.
Take each chicken tender and first coat it in the flour, shaking off any excess. Next, dip it into the beaten eggs, allowing any excess egg to drip off before transferring it to the panko breadcrumb mixture. Press the breadcrumb mixture onto the chicken tenders firmly to ensure an even coating. Place the breaded chicken tenders on the prepared baking sheet, leaving space between each piece for optimal airflow and crispiness.
This step is vital for achieving that crunchy exterior, so make sure each tender is well-coated before moving on to the next. Once all the chicken tenders are breaded, lightly spray the tops with cooking spray to aid in browning and crisping during baking.
3. Baking the Chicken Tenders:
With your oven preheated and the chicken tenders ready, it’s time to bake! Place the baking sheet in the oven and bake the chicken tenders for about 15-20 minutes, flipping them halfway through to ensure even cooking. The tenders are done when they are golden brown and reach an internal temperature of 165°F (75°C).
While the chicken tenders are baking, you can prepare the homemade honey mustard sauce, ensuring everything is ready to enjoy once the tenders are out of the oven.
In the next part of this article, we’ll dive into how to make the delicious honey mustard sauce, along with serving suggestions and tips for storing any leftovers. Stay tuned for a complete guide to enjoying your crispy baked chicken tenders to the fullest!
Why Parchment Paper is Used
When baking chicken tenders, parchment paper serves as a crucial ally in achieving that perfect crispiness. It provides a non-stick surface that not only prevents the chicken from adhering to the baking sheet but also ensures an even distribution of heat during cooking. This leads to an ideal golden-brown finish without the need for excessive oil. Furthermore, using parchment paper simplifies cleanup, allowing you to enjoy your meal without the hassle of scrubbing away at stubborn residues.
Setting Up the Dredging Stations
To achieve the perfect coating on your chicken tenders, it’s essential to set up a well-organized dredging station. This involves creating a three-bowl setup that streamlines the breading process and ensures even coverage for each piece of chicken.
The Three-Bowl Setup
1. Flour Bowl: Fill one bowl with all-purpose flour seasoned with salt and pepper. The flour acts as a base that helps the egg mixture adhere to the chicken.
2. Egg Wash Bowl: In a second bowl, whisk together eggs with a splash of water or milk. This mixture creates a sticky layer that allows the breadcrumbs to cling to the chicken.
3. Panko Breadcrumbs Bowl: The final bowl should contain panko breadcrumbs mixed with your choice of seasonings—garlic powder, onion powder, paprika, or Italian herbs work wonderfully. Panko adds a delightful crunch, which is the hallmark of crispy chicken tenders.
Tips for Even Coating of the Chicken Tenders
To ensure an even coating on your chicken tenders, follow these tips:
– Use One Hand for Wet and One Hand for Dry: To avoid a gooey mess, designate one hand for handling the chicken in the flour and egg, and the other for the panko breadcrumbs.
– Coat Generously: Make sure each tender is well-coated at every stage. Don’t rush through; pressing the chicken into the flour and breadcrumbs ensures that every bite is flavorful and crunchy.
– Allow Rest Time: Once breaded, let the chicken tenders sit for about 10 minutes before baking. This resting period helps the breadcrumbs adhere better during cooking.
Bread the Chicken Tenders
Now that your dredging stations are set up, it’s time to bread the chicken tenders.
Detailed Walk-Through of the Dredging Process
1. Dredge in Flour: Start by taking a chicken tender and lightly dredging it in the seasoned flour. Shake off any excess flour, ensuring a thin, even layer covers the chicken.
2. Dip in Egg Wash: Next, transfer the floured chicken into the egg wash, allowing it to soak for a moment to coat completely. Again, let any excess drip off before proceeding.
3. Coat with Panko: Finally, press the chicken into the panko breadcrumbs, ensuring an even coating. Gently press down to help the breadcrumbs stick effectively.
Importance of Pressing the Panko Mixture
Pressing the panko mixture onto the chicken is crucial for achieving a strong adherence. This technique helps the breadcrumbs stay intact during cooking, ensuring that each tender emerges from the oven with a delightful, crispy exterior. The texture provided by panko is far superior to regular breadcrumbs, giving your chicken tenders that restaurant-quality crunch.
Baking the Chicken Tenders
With your chicken tenders fully coated, it’s time to bake them to perfection.
Ideal Baking Temperature and Time
Preheat your oven to 425°F (220°C) for optimal crispiness. Baking at this high temperature allows the chicken to cook through while also crisping the exterior quickly. Bake the chicken tenders for 15-20 minutes, flipping them halfway through to ensure even cooking.
Importance of Flipping for Even Cooking
Flipping the chicken tenders midway through the baking process is essential for achieving uniform browning on both sides. It prevents one side from becoming overly crispy while the other remains soft, giving you that desirable crunch in every bite.
Indicators of Doneness
To check for doneness, look for the internal temperature of the chicken tenders to reach 165°F (74°C). You can use a meat thermometer for accuracy. Additionally, the chicken should have a golden-brown exterior and be firm to the touch. When cut, the juices should run clear, indicating that the chicken is fully cooked.
Making the Honey Mustard Sauce
No chicken tender is complete without a delicious dipping sauce. The honey mustard sauce is quick and easy to make and adds a zesty kick to your meal.
Step-by-Step of Mixing Ingredients
1. In a small bowl, combine ½ cup of Dijon mustard with ½ cup of honey.
2. Stir in a tablespoon of apple cider vinegar to add tanginess.
3. For added flavor, mix in a pinch of salt and pepper, and whisk until smooth.
Customizing the Sauce
Feel free to customize the honey mustard sauce to suit your taste preferences. If you prefer a sweeter dip, add more honey. For a tangier flavor, increase the amount of mustard or vinegar. You can also experiment with adding spices such as cayenne pepper for a hint of heat or garlic powder for extra depth.
Serving Suggestions
Serving your crispy baked chicken tenders can be as creative as you like, and pairing them with the right sides enhances the overall meal experience.
Ideas for Plating the Chicken Tenders and Sauce
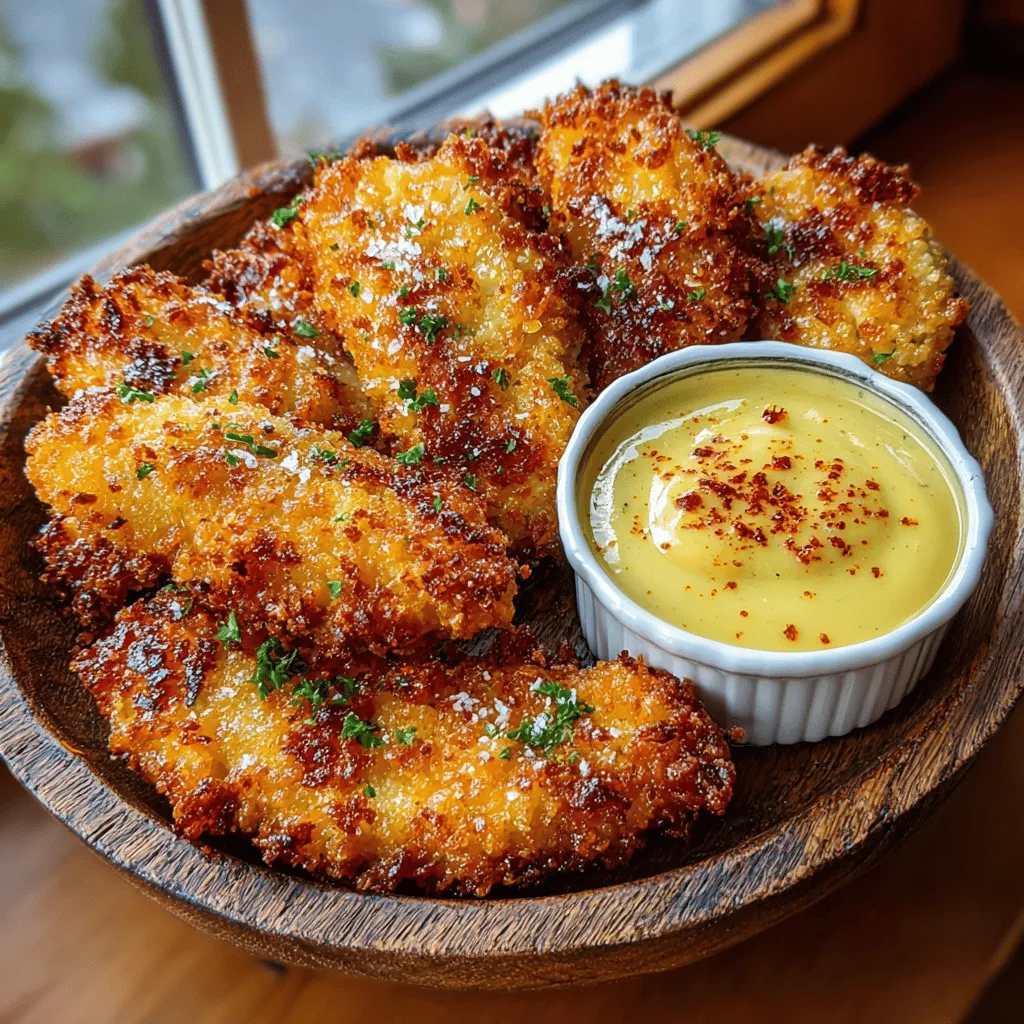
Arrange the chicken tenders on a serving platter and place a small bowl of honey mustard sauce in the center for easy dipping. You can also drizzle the sauce over the chicken for a beautiful presentation.
Suggested Side Dishes
Consider these delicious side dishes that pair exceptionally well with chicken tenders:
– Fresh Salads: A crisp green salad with mixed greens, cherry tomatoes, and cucumbers enhances the meal’s freshness.
– Roasted Vegetables: Oven-roasted carrots, broccoli, or asparagus complement the savory chicken and add nutritional value.
– Classic Fries: Sweet potato fries or regular French fries are always a hit, providing a comforting side that balances the dish.
Ideas for Garnishing
To elevate your presentation, consider garnishing your plate with fresh herbs such as parsley or cilantro. A sprinkle of sesame seeds can add texture and visual appeal. You can also add lemon wedges for a burst of freshness that guests can squeeze over the chicken.
Nutritional Information
Understanding the nutritional content of your meal is essential for maintaining a balanced diet.
Breakdown of Calories and Nutritional Content
Each serving of crispy baked chicken tenders (approximately 4 tenders) contains roughly:
– Calories: 300
– Protein: 28g
– Fat: 10g
– Carbohydrates: 30g
– Fiber: 2g
– Sugars: 5g
Healthier Alternatives
If you’re looking to make this dish a bit lighter, consider these healthier alternatives:
– Use whole wheat flour instead of all-purpose flour for added fiber.
– Substitute low-fat mayonnaise for a portion of the mayonnaise in the honey mustard sauce.
– Opt for baked sweet potato fries instead of regular fries for a nutrient boost.
Conclusion
In summary, making crispy baked chicken tenders at home is not only easy but also incredibly satisfying. This recipe allows you to enjoy a delicious, homemade meal that can be a family favorite or a hit at your next gathering. The combination of perfectly seasoned chicken and the tangy sweetness of honey mustard sauce creates a delightful dish that everyone will love.
Cooking is not just about nourishing the body; it’s about creating memories and sharing moments with loved ones. So roll up your sleeves, gather your ingredients, and enjoy the process of making and sharing these crispy baked chicken tenders. Bon appétit!