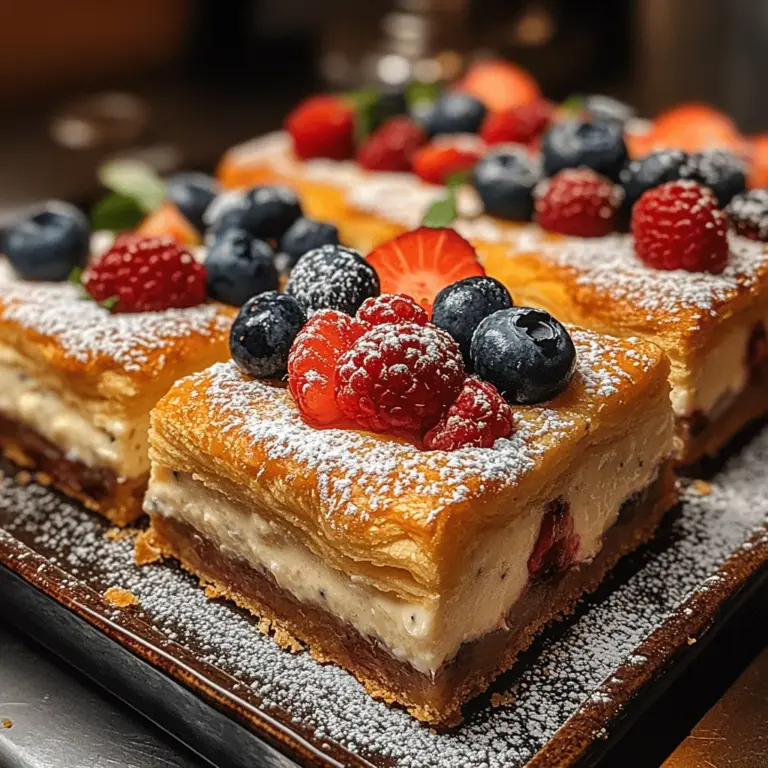
Creamy Crescent Cheesecake Bars: A Deliciously Simple Dessert

WANT TO SAVE THIS RECIPE?

Introduction to Creamy Crescent Cheesecake Bars

Welcome to the delightful world of desserts, where sweet indulgences meet the joy of baking! Today, we are diving into the creation of Creamy Crescent Cheesecake Bars—a dessert that is not only delicious but also incredibly easy to make. These bars beautifully combine the flaky texture of crescent roll dough with a rich, creamy cheesecake filling, making them an instant crowd-pleaser. Whether you are hosting a family dinner, attending a potluck, or simply craving a sweet treat at home, these cheesecake bars are the perfect choice.

What makes these bars even more appealing is their versatility. You can customize them with various toppings and flavors, allowing you to put your own spin on this classic dessert. From fresh fruit to chocolate drizzles, the options are endless. So, get ready to embark on a fun and approachable baking experience that will leave your taste buds singing and your guests asking for seconds!

Understanding the Ingredients

To create the perfect Creamy Crescent Cheesecake Bars, it’s essential to understand the role of each ingredient. By knowing how these components work together, you can achieve the desired texture and flavor that makes this dessert so irresistible.

The Role of Crescent Roll Dough

At the foundation of these cheesecake bars lies the refrigerated crescent roll dough. This convenient ingredient serves as a quick and easy base, eliminating the need for traditional pie crust preparation. The crescent roll dough provides a buttery and flaky texture that complements the creamy filling beautifully. As the dough bakes, it puffs up and develops a golden-brown color, creating a visually appealing and deliciously crispy crust that contrasts perfectly with the smooth cheesecake filling.

Cream Cheese: The Heart of the Cheesecake

When it comes to cheesecake, cream cheese is undoubtedly the star of the show. This ingredient is crucial for achieving that signature creamy consistency and rich flavor that defines a classic cheesecake. It’s important to use softened cream cheese for this recipe, as it blends more easily with the other ingredients, resulting in a smooth and lump-free filling. The cream cheese adds a slight tanginess that balances the sweetness of the dessert, ensuring that each bite is flavorful and satisfying.

Sweetness and Flavor: Sugar and Vanilla Extract

Every dessert needs a touch of sweetness, and for our Creamy Crescent Cheesecake Bars, granulated sugar is the go-to ingredient. The sugar not only sweetens the filling but also helps to enhance the overall flavor profile. In addition to sugar, we’ll also be using vanilla extract, which adds a warm, aromatic quality to the cheesecake. Together, these two ingredients create a well-balanced sweetness that elevates the dessert without overpowering it.

The Binding Agents: Eggs and Flour

Eggs play a vital role in the structure of the cheesecake filling. They provide richness and help bind the ingredients together, ensuring that the bars hold their shape once baked. Moreover, eggs contribute to the creamy texture that we all love in cheesecake. Alongside the eggs, a small amount of flour is added to the mixture. The flour helps stabilize the filling, preventing it from becoming too runny. This combination of binding agents is essential for achieving the perfect creamy consistency.

A Touch of Brightness: Lemon Juice

To elevate the flavor of our Creamy Crescent Cheesecake Bars, we’ll be incorporating a touch of lemon juice. This ingredient adds a subtle tartness that beautifully balances the sweetness of the sugar and cream cheese. The brightness from the lemon juice enhances the overall flavor profile, making each bite refreshing and delightful. It’s a simple addition that can make a world of difference in the final taste of your cheesecake bars.

Toppings: The Finishing Touch

While our Creamy Crescent Cheesecake Bars are delicious on their own, they are also incredibly versatile when it comes to toppings. One of the best ways to customize this dessert is to add fresh mixed berries. Not only do they add a burst of color, but they also provide a refreshing contrast to the rich cheesecake filling. Strawberries, blueberries, raspberries, and blackberries can be used individually or in combination to create a stunning presentation that is sure to impress.

Step-by-Step Instructions for Creamy Crescent Cheesecake Bars

Now that we have a solid understanding of the ingredients, it’s time to dive into the step-by-step instructions for preparing our Creamy Crescent Cheesecake Bars. This process is straightforward, making it accessible for bakers of all skill levels.

Prepping Your Kitchen and Ingredients

Before we start baking, it’s important to prepare our kitchen and gather all the necessary ingredients. Here’s a quick checklist to ensure you have everything you need:

Ingredients: Ensure you have the crescent roll dough, cream cheese, granulated sugar, eggs, flour, vanilla extract, and lemon juice on hand. If you plan to add toppings, gather your choice of fresh mixed berries or any other desired garnishes.

Equipment: Preheat your oven to 350°F (175°C). You’ll need a 9×13-inch baking dish, a mixing bowl, a hand mixer or stand mixer, and a spatula for easy mixing and spreading.

Workspace: Clear and clean your countertop or workspace to make room for the preparation. Having an organized area will help streamline the baking process.

Once you’ve gathered all your ingredients and equipment, it’s time to move on to the next step: creating the base layer for our cheesecake bars.

Creating the Base Layer

1. Prepare the Crescent Roll Dough: Open the package of refrigerated crescent roll dough and carefully unroll it. You will notice that the dough is separated into pre-cut triangles. Instead of rolling them up into traditional crescent shapes, you will lay the dough flat to create a crust.

2. Press the Dough into the Baking Dish: Gently press the crescent roll dough into the bottom of the greased 9×13-inch baking dish. Make sure to cover the entire bottom of the dish, pressing the seams of the triangles together to create an even layer. This will serve as the base for your cheesecake filling.

3. Bake the Base Layer: Place the baking dish in the preheated oven and bake for about 10-12 minutes, or until the dough is lightly golden. This step helps firm up the crust before adding the cheesecake filling, ensuring it holds its shape once baked.

4. Cool the Base: Once the dough is golden and baked, remove the dish from the oven and allow it to cool slightly while you prepare the cheesecake filling. This resting period is essential for achieving the best texture.

With the base layer ready, you are one step closer to creating the delicious Creamy Crescent Cheesecake Bars that will delight your family and friends. Stay tuned for the next part, where we will explore how to make the decadent cheesecake filling and assemble the bars for baking!
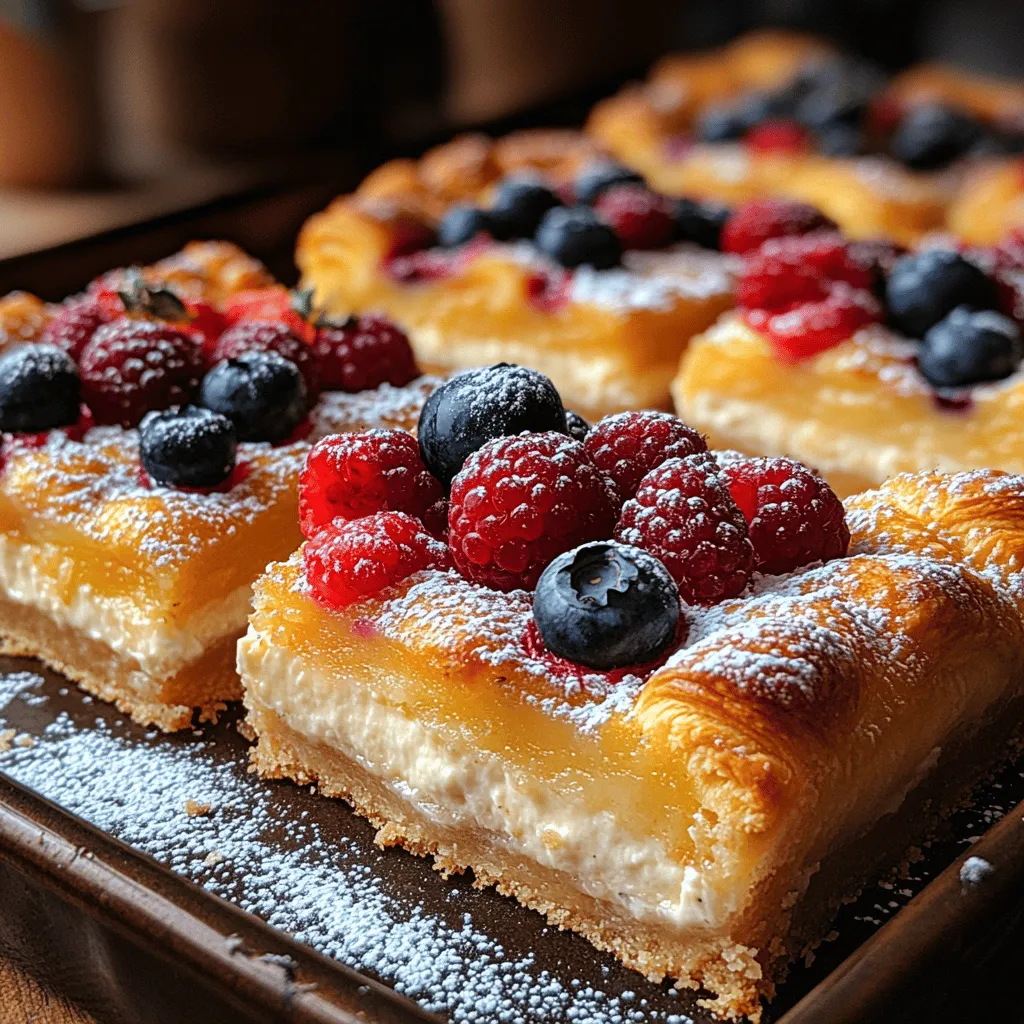
Welcome to the delightful world of desserts, where sweet indulgences meet the joy of baking! Today, we are diving into the creation of <strong>Creamy Crescent Cheesecake Bars</strong>—a dessert that is not only delicious but also incredibly easy to make. These bars beautifully combine the flaky texture of crescent roll dough with a rich, creamy cheesecake filling, making them an instant crowd-pleaser. Whether you are hosting a family dinner, attending a potluck, or simply craving a sweet treat at home, these cheesecake bars are the perfect choice.” /></p>
</p>
<h3>Unrolling and Placing the Crescent Roll Dough</h3>
</p>
<p>To create a solid foundation for your Creamy Crescent Cheesecake Bars, the first step is to unroll the crescent roll dough. Begin by removing one can of crescent roll dough from the packaging. Carefully unroll it on a clean, lightly floured surface. This ensures that the dough does not stick and makes it easier to manage.</p>
</p>
<p>Next, gently press the dough into the bottom of a greased 9×13-inch baking dish. Make sure to cover the entire bottom evenly, sealing any seams that may appear as you lay the dough down. This step is crucial because it creates a consistent base that will hold the cheesecake filling without any gaps. If you find that the dough is sticking, a light dusting of flour on your fingers can help. Use your fingers to press the dough into the corners and sides of the dish, creating a slight ridge if desired. This will also aid in holding the filling while baking.</p>
</p>
<h3>Crafting the Cheesecake Filling</h3>
</p>
<p>Now it’s time to create the luscious cheesecake filling that will make your bars truly irresistible. In a large mixing bowl, combine the cream cheese and granulated sugar. Using an electric mixer on medium speed, beat these two ingredients together for about 2-3 minutes until the mixture is smooth and creamy. It’s important to start with softened cream cheese to avoid any lumps; if your cream cheese is too cold, you may end up with a chunky filling.</p>
</p>
<p>Once the cream cheese and sugar are well-blended, add in the eggs, vanilla extract, and sour cream. Continue mixing on medium speed for another 2-3 minutes. Take care not to overmix, as this can incorporate too much air into the filling, resulting in a less dense texture. The goal is to have a velvety mixture that is well combined but still thick and rich. If you notice any lumps, you can use a spatula to gently fold the mixture, ensuring a smooth consistency.</p>
</p>
<h3>Layering the Cheesecake Bars</h3>
</p>
<p>With the cheesecake filling prepared, it’s time to layer it onto the crescent roll base. Carefully pour the smooth cheesecake filling over the crescent dough, ensuring it covers the entire surface evenly. Using a spatula, gently spread the filling to the edges of the pan, being cautious not to disturb the dough underneath. This even distribution is essential for achieving uniform slices once the bars are baked and cooled.</p>
</p>
<p>Take a moment to check the filling’s level; it should be about an inch high. If you have any leftover filling, consider adjusting the amount of dough used for the base or simply enjoy it as a mini cheesecake in a ramekin! The rich filling paired with the buttery crescent layer will create a delightful treat that everyone will love.</p>
</p>
<h3>Covering with Crescent Roll Dough</h3>
</p>
<p>After evenly spreading the cheesecake filling, it’s time to add the second layer of crescent roll dough. Open the second can of crescent dough and, instead of unrolling it fully, you can lay it over the filling in sections. This method allows for a rustic, homey look if you choose to leave it slightly uneven. Alternatively, for a more polished appearance, you can roll out the dough into one sheet and carefully place it over the filling.</p>
</p>
<p>If you’d like to get creative, consider cutting the dough into strips and weaving them over the filling to create a lattice effect. This not only enhances the visual appeal but also allows for a bit of the cheesecake to peek through, giving a hint of what’s beneath. Whichever method you choose, seal the edges of the top dough to the bottom layer by pressing down gently with your fingers.</p>
</p>
<h3>Baking to Perfection</h3>
</p>
<p>Now that your bars are assembled, it’s time to bake them to golden perfection. Preheat your oven to 350°F (175°C). Place the baking dish in the preheated oven and let the bars bake for 25-30 minutes. Keep an eye on them; the top should become a beautiful golden brown, and the filling should be set but slightly jiggly in the center.</p>
</p>
<p>To determine if they are done, gently shake the pan; if the center appears to be firm and only slightly wobbles, they are ready. Avoid overbaking, as this can lead to a dry texture. Once baked, remove the dish from the oven and set it on a wire rack to cool.</p>
</p>
<h3>Cooling and Setting the Bars</h3>
</p>
<p>Allow the cheesecake bars to cool in the pan for about 30 minutes at room temperature. This cooling period is crucial as it allows the flavors to meld together and the texture to firm up. Once cooled, transfer the pan to the refrigerator and chill for at least 2 hours, or until fully set. Chilling helps create that perfect cheesecake texture that is creamy yet firm enough to slice cleanly.</p>
</p>
<h3>Serving Suggestions for the Cheesecake Bars</h3>
</p>
<p>When it’s finally time to serve your Creamy Crescent Cheesecake Bars, consider the following serving suggestions to elevate the overall experience. First, slice the bars into squares or rectangles for easy serving. Place each square on a dessert plate, and if desired, add a dollop of whipped cream on top for an extra touch of indulgence.</p>
</p>
<p>You can also enhance the flavor profile by garnishing with fresh fruits like strawberries, raspberries, or blueberries. These berries add a refreshing tartness that balances beautifully with the creamy sweetness of the cheesecake. A drizzle of chocolate sauce or caramel can also add a delightful contrast, making each bite an extraordinary experience.</p>
</p>
<h3>Presentation Ideas</h3>
</p>
<p>Presentation is key when it comes to dessert, and these cheesecake bars are no exception. For an impressive display, consider dusting the top of the bars with powdered sugar before serving. This simple step adds a touch of elegance and makes the bars look even more tempting.</p>
</p>
<p>For an added burst of color and freshness, arrange some fresh berries around the bars on the serving platter. You can even create a small fruit compote by simmering berries with a bit of sugar and lemon juice; this can be served alongside the bars for an extra flavor boost.</p>
</p>
<h3>Flavor Variations</h3>
</p>
<p>The beauty of these Creamy Crescent Cheesecake Bars is their versatility. While the classic version is delightful, feel free to experiment with different toppings or flavorings to make this dessert your own. For instance, consider adding a layer of chocolate ganache on top of the cheesecake filling before covering it with the second layer of crescent dough. This will create a rich chocolate flavor that complements the creamy cheesecake beautifully.</p>
</p>
<p>You can also incorporate flavor extracts, such as almond or lemon, into the filling for a unique twist. For those who enjoy fruit flavors, folding in some fresh crushed fruit like strawberries or blueberries into the cheesecake mixture can create a vibrant, fruity filling. The options are endless, allowing you to customize the bars to suit your taste preferences or the occasion.</p>
</p>
<h3>Storing Leftover Cheesecake Bars</h3>
</p>
<p>If you happen to have any leftover cheesecake bars, proper storage is essential to maintain their freshness and flavor. First, allow the bars to cool completely in the pan before cutting them into squares. Once they are cut, transfer them to an airtight container, separating layers with parchment paper to prevent sticking. These bars can be stored in the refrigerator for up to 5 days.</p>
</p>
<p>If you want to enjoy them later, consider freezing them. Wrap each bar tightly in plastic wrap and then place them in a freezer-safe container. They can be frozen for up to 2 months. When you’re ready to enjoy, simply thaw them in the refrigerator overnight before serving.</p>
</p>
<h3>Conclusion: The Perfect Dessert Experience</h3>
</p>
<p>Creating and enjoying Creamy Crescent Cheesecake Bars is an experience that brings joy and satisfaction to both the cook and the guests. Their ease of preparation makes them an ideal choice for gatherings, while their delightful flavors and textures bring a touch of homemade comfort to any occasion.</p>
</p>
<p>Whether you stick to the classic recipe or experiment with different flavors and presentation ideas, these bars are sure to impress. They not only satisfy sweet cravings but also serve as a canvas for your creativity in the kitchen. So gather your ingredients, unleash your inner chef, and relish in the delightful flavors that come together in each bite of these creamy, dreamy cheesecake bars.</p>
</div>

Welcome to the delightful world of desserts, where sweet indulgences meet the joy of baking! Today, we are diving into the creation of Creamy Crescent Cheesecake Bars—a dessert that is not only delicious but also incredibly easy to make. These bars beautifully combine the flaky texture of crescent roll dough with a rich, creamy cheesecake filling, making them an instant crowd-pleaser. Whether you are hosting a family dinner, attending a potluck, or simply craving a sweet treat at home, these cheesecake bars are the perfect choice.

Crescent Cheesecake Bars

Discover the joy of baking with these Creamy Crescent Cheesecake Bars that are both delicious and easy to prepare. This dessert combines flaky crescent roll dough with a rich cheesecake filling for a delightful treat perfect for any occasion. Customize with your favorite toppings like fresh berries or chocolate drizzles to make it uniquely yours. Whether for family gatherings or a simple sweet craving, these bars are sure to impress your guests and satisfy your sweet tooth.

Ingredients
  

2 cans of refrigerated crescent roll dough

16 oz cream cheese, softened

1 cup granulated sugar

1 teaspoon vanilla extract

2 large eggs

1 tablespoon all-purpose flour

1 teaspoon lemon juice

1 cup of mixed berries (blueberries, raspberries, or strawberries) for topping

Powdered sugar, for dusting (optional)

Instructions
 

Preheat the Oven: Preheat your oven to 350°F (175°C).

    Prepare the Base: Unroll one can of crescent roll dough and lay it flat on the bottom of a greased 9x13 inch baking dish. Pinch together any seams to create an even layer.

      Mix the Cheesecake Filling: In a large mixing bowl, beat the softened cream cheese until smooth. Add in the granulated sugar, vanilla extract, and lemon juice. Mix until well incorporated. Then, add the eggs one at a time, mixing well after each addition. Finally, sift in the flour and mix until smooth.

        Layer the Filling: Pour the cheesecake mixture over the crescent roll dough layer in the baking dish, spreading it out evenly with a spatula.

          Top with Dough: Unroll the second can of crescent roll dough and gently lay it over the cheesecake filling. Pinch the seams together to close any gaps. You can also make a lattice pattern if you desire a more decorative look.

            Bake: Place the dish in the preheated oven and bake for 25-30 minutes, or until the top is golden brown and the cheesecake filling is set.

              Cool: Remove from the oven and let it cool in the pan for about 30 minutes. Then transfer to the refrigerator to chill for at least 2 hours, allowing the flavors to meld and the bars to firm up.

                Serve: Once chilled, slice into squares or rectangles. Top with fresh mixed berries and a dusting of powdered sugar if desired before serving.

                  Prep Time, Total Time, Servings: 25 minutes | 3 hours | 12 servings

                    WANT TO SAVE THIS RECIPE?

                    Leave a Comment

                    Recipe Rating