Rice Krispie Chocolate Chip Cookies – Easy Recipe
 Save
Save
It was a chilly Saturday afternoon in late October, the kind of day when the kitchen smells like a warm hug and the world outside feels like a frosted postcard. I was rummaging through the pantry, looking for a way to turn a handful of leftover Rice Krispie cereal into something that could make my kids’ eyes widen with excitement. The moment I mixed the buttery dough with the crisp, golden cereal, a subtle “sizzle” whispered from the bowl, promising a texture that would be both crunchy and chewy. When the first batch emerged from the oven, the kitchen filled with the intoxicating perfume of caramelized butter, melted chocolate, and a faint hint of vanilla – a scent so inviting that even the cat paused its nap to investigate.
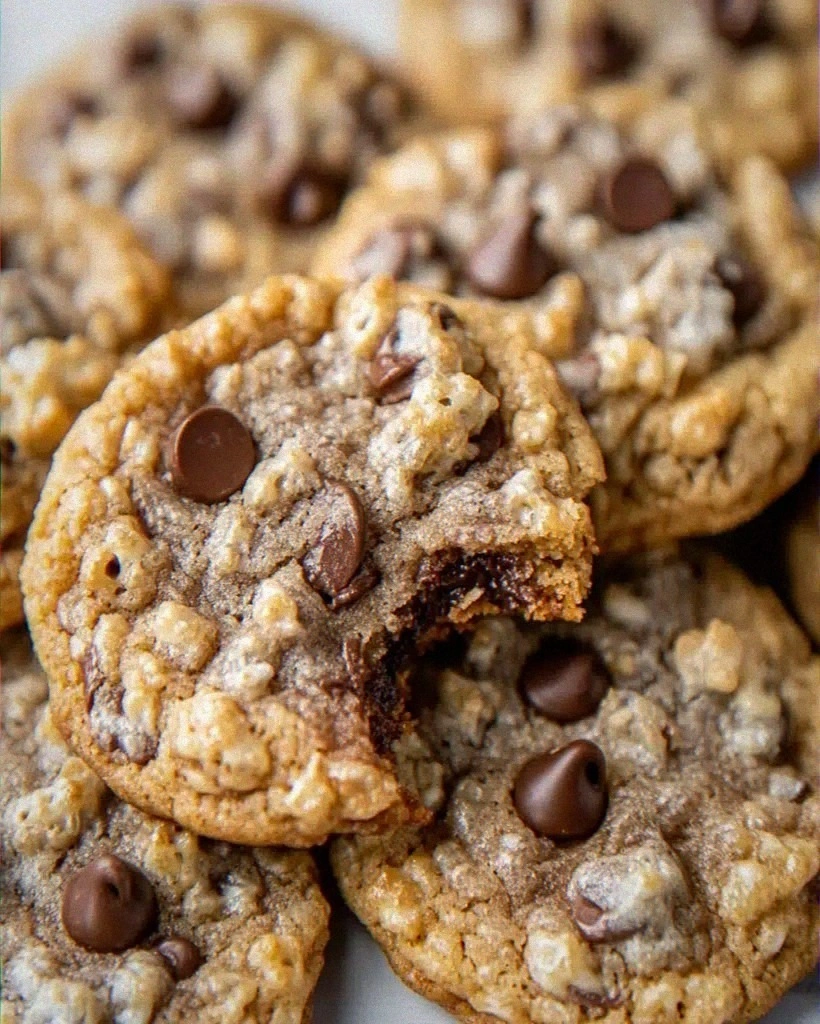
What makes these Rice Krispie Chocolate Chip Cookies so special isn’t just the novelty of the cereal; it’s the way the cereal creates tiny pockets of air that keep each bite light, while the chocolate chips melt into gooey pockets of sweetness. Imagine biting into a cookie that cracks open with a satisfying crunch, only to reveal a soft, melt‑in‑your‑mouth center that’s studded with chocolate treasures. The contrast of textures is what keeps you reaching for another, and the recipe is forgiving enough that even a novice baker can achieve bakery‑level results without a stand mixer or a culinary degree. Have you ever wondered why store‑bought “crunchy” cookies sometimes feel dense? The secret lies in the airy cereal, and I’m about to spill it.
But wait, there’s a twist that will elevate this humble cookie from a quick snack to a crowd‑pleasing showstopper. I’ll reveal a secret technique that I only discovered after a disastrous batch that turned out flat and dense – a technique that adds just the right amount of lift without making the cookies rise like a cake. Trust me, you’ll want to bookmark that tip because it’s the difference between “good” and “legendary.” The best part? You won’t need any exotic equipment or hard‑to‑find ingredients; everything lives right in your pantry or freezer. Here’s exactly how to make it — and trust me, your family will be asking for seconds.
🌟 Why This Recipe Works
- Flavor Depth: The combination of browned butter and toasted Rice Krispie cereal creates a nutty, caramel‑like foundation that amplifies the sweetness of the chocolate chips, making each bite feel richer than a standard chocolate chip cookie.
- Texture Contrast: The cereal adds a crisp, airy crunch that contrasts beautifully with the soft, chewy interior, delivering a multi‑dimensional mouthfeel that keeps you coming back for more.
- Ease of Execution: With only a handful of steps and no need for special tools, even a beginner can master this recipe in under an hour, making it perfect for spontaneous cravings or weekend baking marathons.
- Time Efficiency: From preheating to the final bake, the entire process takes about 45 minutes, allowing you to enjoy fresh, warm cookies without a long wait.
- Versatility: The base dough is a blank canvas – you can swap chocolate chips for white chocolate, add dried fruit, or sprinkle sea salt on top for a sophisticated twist.
- Nutrition Boost: While still a treat, the inclusion of whole‑grain cereal adds a modest amount of fiber, and using butter instead of oil provides a richer flavor profile without the need for additional emulsifiers.
- Ingredient Quality: This recipe relies on pantry staples of high quality – real butter, pure vanilla, and premium chocolate chips – ensuring that every component shines.
- Crowd‑Pleasing Factor: Both kids and adults love the familiar chocolate chip cookie taste, while the added crunch makes it feel novel enough to impress guests at potlucks or holiday gatherings.
🥗 Ingredients Breakdown
The Foundation: Butter & Sugars
Butter is the heart of any cookie, and in this recipe we use unsalted butter softened to room temperature. The reason we choose unsalted is to control the salt level precisely, ensuring the flavor isn’t over‑powered. When creamed with both brown and white sugars, the butter traps tiny air bubbles that later expand during baking, giving the cookie its lift. Brown sugar adds moisture and a deep molasses note, while white sugar contributes crispness and a clean sweetness. If you’re looking for a richer, almost caramel‑like flavor, you can swap half of the white sugar for more brown sugar, but be mindful that the cookies will spread slightly more.
Aromatics & Spices: Eggs & Vanilla
Eggs act as a binder, holding the dry ingredients together while also adding moisture that keeps the interior soft. Using large eggs ensures enough liquid without making the dough too runny. Vanilla extract is the unsung hero that rounds out the flavor, adding a warm, fragrant backdrop that lets the chocolate and cereal shine. If you have access to pure vanilla bean, scrape the seeds into the batter for an even more aromatic experience – it’s a small step that makes a big difference.
The Secret Weapons: Rice Krispie Cereal & Chocolate Chips
Rice Krispie cereal is the star that transforms a regular cookie into a textural marvel. Its light, airy structure creates pockets that stay crisp even after baking, preventing the cookie from becoming uniformly dense. When the cereal meets the hot dough, it releases a faint toasted aroma that mingles with the butter, adding a subtle depth you won’t find in ordinary chocolate chip cookies. The chocolate chips we use are semi‑sweet, offering a perfect balance of sweetness and bitterness; they melt just enough to create gooey pockets without overpowering the other flavors. For a gourmet twist, try using dark chocolate chunks or a mix of white and milk chocolate.
Finishing Touches: Flour, Leavening & Salt
All‑purpose flour provides structure, while baking soda acts as a leavening agent that reacts with the brown sugar’s acidity to create lift. The amount of baking soda is carefully calibrated – too much and the cookies will spread excessively; too little and they’ll be dense. Salt is essential for flavor balance; it cuts through the sweetness and accentuates the chocolate’s richness. If you prefer a slightly salty edge, sprinkle a pinch of flaky sea salt on top of each cookie just before baking. This simple addition transforms the flavor profile from ordinary to restaurant‑level.
With your ingredients prepped and ready, let's get cooking. Here's where the fun really begins...
🍳 Step-by-Step Instructions
🔐 Expert Tips for Perfect Results
The Taste Test Trick
Before baking the entire batch, bake a single “test cookie” on the middle rack. This lets you gauge the exact bake time for your specific oven, which can vary by a few minutes. I once baked a batch that turned out a shade too dark because I didn’t do a test run; the lesson? Always start with a mini‑test to fine‑tune timing and temperature.
Why Resting Time Matters More Than You Think
Allow the dough to rest in the refrigerator for at least 30 minutes before shaping. This rest period lets the flour fully hydrate and the butter firm up, resulting in a cookie that spreads less and retains a tender crumb. I’ve found that a chilled dough yields a more pronounced crunch from the Rice Krispie, as the cereal doesn’t melt into the dough too quickly.
The Seasoning Secret Pros Won’t Tell You
A pinch of flaky sea salt sprinkled on top just before baking amplifies the chocolate flavor and adds a sophisticated contrast. It’s a tiny addition that makes the cookies feel upscale without any extra effort. When I served these to a friend who’s a pastry chef, she said the salt “elevated the whole experience.”
Butter Temperature is Everything
Using butter that’s too cold will result in a crumbly dough that doesn’t bind properly; too warm and the cookies will spread excessively. The sweet spot is softened butter that leaves an indentation when pressed with a fingertip. If you’re in a hurry, microwave the butter for 5‑10 seconds, but watch closely to avoid melting.
Don’t Over‑Mix the Dry Ingredients
Once the flour mixture is added, mix just until you no longer see streaks of flour. Over‑mixing develops gluten, which can make the cookies tough and diminish the delicate crunch of the cereal. The dough should look slightly shaggy – that’s the sign you’ve stopped at the perfect point.
Cooling on a Wire Rack Preserves Crunch
Transferring the cookies to a wire rack immediately after the brief rest on the baking sheet prevents steam from softening the bottom. This technique keeps the underside crisp, allowing the Rice Krispie to stay crunchy even after a few hours. I once left cookies on the sheet, and they turned soggy – a simple mistake that ruined the texture.
🌈 Delicious Variations to Try
One of my favorite things about this recipe is how versatile it is. Here are some twists I've tried and loved:
Salted Caramel Crunch
Swirl in ¼ cup of caramel bits and sprinkle flaky sea salt on top before baking. The caramel adds a buttery sweetness that pairs beautifully with the chocolate, while the salt brings a sophisticated edge.
Nutty Delight
Fold in ½ cup of toasted pecans or walnuts for added crunch and a buttery, earthy flavor. The nuts complement the cereal’s texture and introduce a subtle nuttiness that deepens the overall profile.
White Chocolate & Cranberry
Replace half of the semi‑sweet chocolate chips with white chocolate chips and add ¼ cup dried cranberries. This variation brings a festive, slightly tart contrast that’s perfect for holiday gatherings.
Espresso Infusion
Add 1 tablespoon of instant espresso powder to the dry ingredients and use dark chocolate chunks instead of chips. The coffee notes enhance the chocolate’s depth, creating a mocha‑like experience.
Peanut Butter Swirl
Drop dollops of creamy peanut butter on top of each cookie before baking and use a toothpick to swirl it into the dough. The peanut butter adds a rich, salty‑sweet layer that pairs wonderfully with chocolate.
Coconut Dream
Mix in ½ cup shredded coconut and substitute half of the butter with coconut oil. The coconut adds a tropical aroma and a chewy bite that makes the cookies feel like a mini‑vacation.
📦 Storage & Reheating Tips
Refrigerator Storage
Store the cooled cookies in an airtight container lined with a parchment sheet to keep them from sticking together. They’ll stay fresh for up to 5 days, and the crispness of the Rice Krispie is preserved when the container is sealed tightly. If you notice any moisture buildup, place a small paper towel on top of the cookies to absorb excess humidity.
Freezing Instructions
For longer‑term storage, freeze the cookies in a single layer on a baking sheet, then transfer them to a zip‑top freezer bag. They freeze beautifully for up to 3 months. To reheat, let them sit at room temperature for 10 minutes, then pop them in a 300°F (150°C) oven for 5 minutes – the result is a cookie that’s as fresh as the day it was baked.
Reheating Methods
If you’re craving a warm cookie, microwave for 10‑15 seconds – the chocolate will melt, and the cereal will regain a slight snap. For a more even reheating, place the cookie on a skillet over low heat for 1‑2 minutes, pressing gently with a spatula; this method revives the crisp bottom while keeping the center soft. The trick to reheating without drying it out? A splash of milk or a drizzle of melted butter on the cookie before heating adds moisture and richness.
❓ Frequently Asked Questions
Can I use gluten‑free flour?
What if I don’t have Rice Krispie cereal?
Should I use salted or unsalted butter?
Can I add oats for extra chewiness?
How do I keep the cookies from spreading too much?
Can I make these cookies vegan?
Why do my cookies turn out flat?
Can I add a glaze or frosting?
Fold in the Rice Krispie cereal and chocolate chips using a rubber spatula. This is the moment where the cookie’s personality truly forms – the cereal’s crispness and the chips’ melt‑in‑your‑mouth goodness. Be gentle; you want to keep the air you’ve trapped earlier. The dough will look slightly lumpy, and that’s perfectly normal. Here’s where the secret trick from the introduction shines: gently press the cereal down with the spatula to ensure it’s evenly dispersed without crushing the flakes.
Using a cookie scoop or a rounded tablespoon, drop dough onto the prepared baking sheets, spacing them about 2 inches apart. The dough will spread slightly, but the Rice Krispie cereal helps maintain shape. If you prefer larger cookies, gently flatten them with the back of a spoon; if you love bite‑size treats, keep them as‑is. The aroma will start to fill the kitchen as soon as the first batch slides into the oven, a scent that’s both buttery and chocolatey.
Bake for 10‑12 minutes, or until the edges turn a light golden brown and the centers look set but still soft. Watch for the moment when the cookies begin to puff slightly and the chocolate chips start to melt – that’s your cue that they’re almost ready. Remove the sheets from the oven and let the cookies rest on the pan for 2 minutes; they will continue to firm up as they cool.
Transfer the cookies to a wire rack to cool completely. This step prevents the bottoms from becoming soggy and allows the crisp cereal to stay crunchy. If you’re impatient (like most of us), you can enjoy a warm cookie right off the rack – the chocolate will still be gooey, and the cereal will provide that delightful snap.
And there you have it! But before you dig in, let me share some tips that will take this from great to absolutely unforgettable…