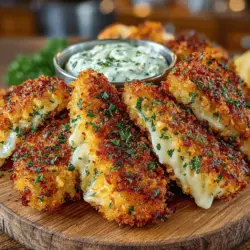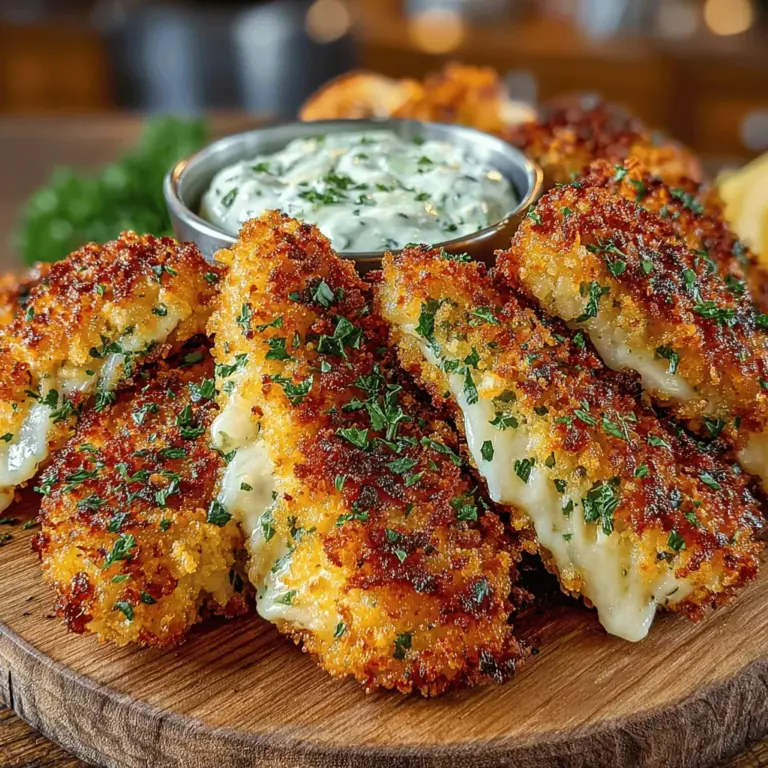
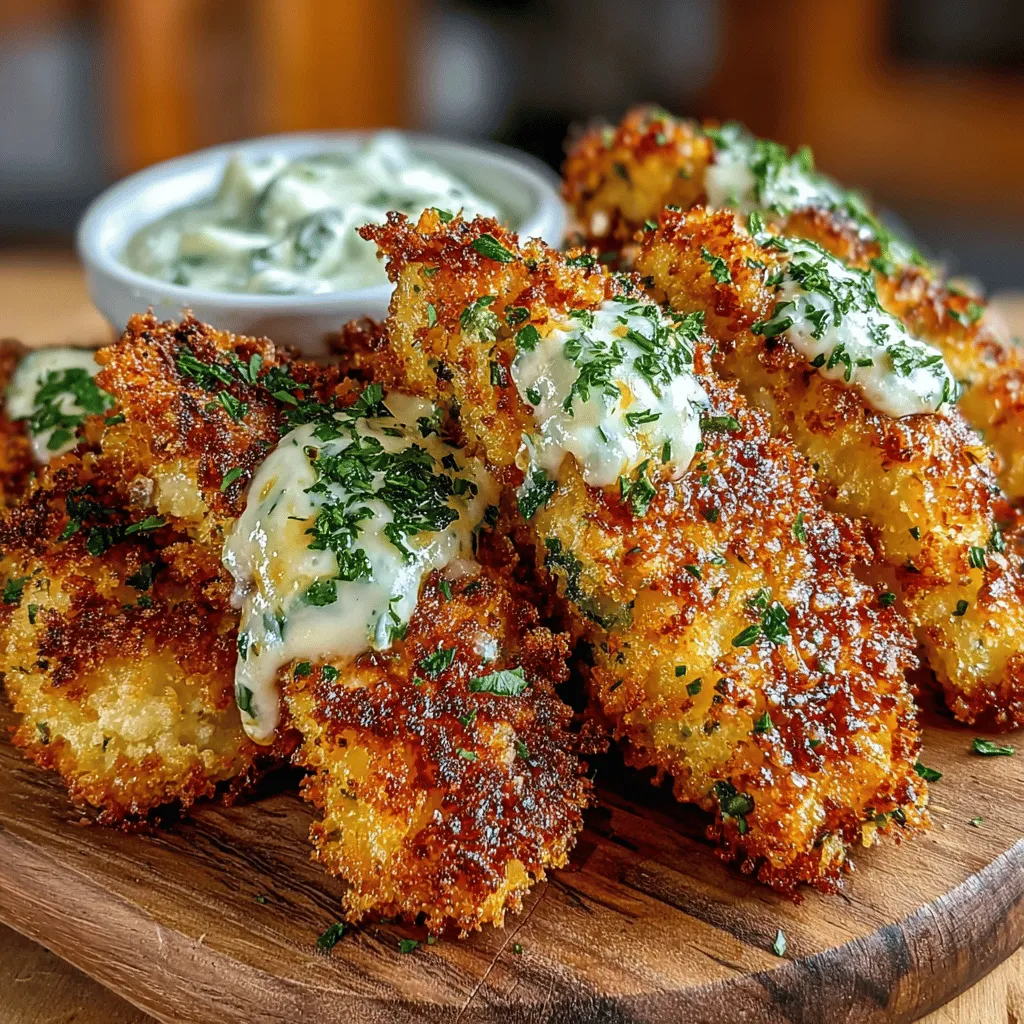
Crispy Oven-Baked Chicken Tenders with Zesty Ranch Dip
When it comes to comfort food, few dishes can rival the allure of crispy oven-baked chicken tenders. This beloved classic has a universal appeal, captivating the taste buds of children and adults alike. Whether served as a main dish for dinner or as a delightful appetizer at gatherings, chicken tenders are a staple that never goes out of style. What makes this recipe even more enticing is the fact that these chicken tenders are baked instead of fried, offering a healthier alternative without sacrificing that coveted crunch.
Baking chicken tenders not only reduces the amount of oil used but also allows for a quicker and cleaner cooking process. In less than an hour, you can whip up a batch of juicy, flavorful chicken tenders that are sure to impress. Paired with a zesty ranch dip, this dish transforms into a culinary experience that enhances the natural flavors of the chicken while also providing a creamy, tangy counterpart that can elevate the simplest of meals.
Understanding the Appeal of Chicken Tenders
Chicken tenders hold a special place in the hearts of many. Their versatility allows them to fit seamlessly into a variety of culinary contexts. Whether you’re enjoying a casual family dinner, serving them at a festive gathering, or packing them in a lunchbox, chicken tenders are a go-to choice. Their ease of preparation and adaptability make them a favorite in both home kitchens and restaurants.
One key advantage of homemade chicken tenders over store-bought options is the ability to control the ingredients. When you make them from scratch, you get to choose the freshest chicken, the right spices, and the perfect coating. This not only enhances the flavor but also offers a healthier profile, as you can avoid unnecessary preservatives and additives often found in pre-packaged varieties. Plus, there’s something truly satisfying about preparing a meal from scratch, knowing exactly what goes into every bite.
Ingredients Breakdown
To create the ultimate crispy oven-baked chicken tenders, you’ll need a few essential ingredients that contribute to both flavor and texture. Here’s a look at what makes this recipe stand out:
– Chicken Breasts: The star of the dish, chicken breasts provide a lean source of protein that is both filling and nutritious. Choosing high-quality, fresh chicken will ensure that your tenders are juicy and flavorful.
– Buttermilk: This ingredient plays a crucial role in marinating the chicken. Not only does buttermilk help to tenderize the meat, making it more succulent, but it also adds a subtle tanginess that enhances the overall flavor of the tenders.
– Spices: A blend of garlic powder, onion powder, and paprika creates a robust flavor profile that elevates the chicken. These spices add depth and warmth, making each bite more exciting.
– Panko Breadcrumbs: For that irresistible crunch, panko breadcrumbs are the ideal choice. They are lighter and crispier than regular breadcrumbs, giving the chicken tenders their signature texture that is both satisfying and addictive.
– Zesty Ranch Dip Ingredients: The accompanying dip is a simple yet vibrant mix of sour cream, mayonnaise, fresh herbs, and spices. Each ingredient is chosen to complement the chicken tenders perfectly, adding a creamy and tangy element that enhances the overall dish.
Preparing the Chicken Tenders
Now that you have a grasp on the ingredients, let’s dive into the preparation process, starting with the crucial marination step that sets the foundation for flavor and tenderness.
Marination Process
1. Prep the Chicken: Start by trimming any excess fat from the chicken breasts and slicing them into strips. Aim for uniform sizes to ensure even cooking. This step is important for achieving that perfect crispy exterior while keeping the inside juicy.
2. Buttermilk Bath: In a large bowl, pour in the buttermilk. The acidity of the buttermilk will help break down the proteins in the chicken, resulting in a tender texture. Add the chicken strips to the bowl, ensuring they are fully submerged. For added flavor, you can also incorporate a pinch of salt and pepper into the buttermilk mixture.
3. Marinate: Cover the bowl with plastic wrap or transfer the chicken and buttermilk mixture into a resealable plastic bag. Allow it to marinate in the refrigerator for at least 30 minutes, although longer (up to overnight) will yield even better results. This step is crucial for infusing the chicken with flavor and ensuring a tender bite.
4. Prepare the Coating: While the chicken is marinating, preheat your oven to 425°F (220°C). Line a baking sheet with parchment paper or lightly grease it to prevent sticking. In a shallow dish, combine the panko breadcrumbs with the spices—garlic powder, onion powder, and paprika. Stir well to ensure the spices are evenly distributed throughout the breadcrumbs.
5. Bread the Chicken: Once the chicken has marinated, remove it from the refrigerator. Shake off any excess buttermilk and dip each chicken strip into the breadcrumb mixture, pressing gently to ensure an even coating. This step is essential for achieving that crispy texture once the tenders are baked.
By following these initial steps, you set yourself up for success in creating delicious crispy oven-baked chicken tenders that everyone will love. The combination of tender chicken, flavorful spices, and a crunchy coating makes this dish a standout option for any occasion. Plus, with the zesty ranch dip ready to accompany your tenders, you’ll soon find that this recipe becomes a staple in your home cooking repertoire.
The Importance of Marinating Chicken in Buttermilk
Marinating chicken tenders in buttermilk is a crucial step that significantly enhances the recipe’s flavor profile and texture. The acidity in buttermilk tenderizes the chicken, allowing it to absorb moisture and spices more effectively. This process not only infuses the chicken with a rich flavor but also helps in creating an incredibly juicy interior once cooked. Additionally, the buttermilk’s thickness allows for a better adherence of the dredging ingredients, resulting in that coveted crispy coating.
For optimal results, allow the chicken to marinate for at least 30 minutes, but if time permits, letting it soak for several hours or even overnight will yield even more flavorful and tender chicken tenders.
Setting Up the Dredging Station
Creating an efficient dredging station is key to achieving perfectly coated chicken tenders. Here’s how to set it up:
1. Ingredients and Utensils: Gather three shallow bowls. In the first bowl, add all-purpose flour seasoned with salt and pepper for the initial coating. The flour helps to absorb excess moisture from the chicken and creates a base layer for the egg mixture.
2. Egg Wash: In the second bowl, whisk together eggs and a splash of water or milk. This egg wash acts as a binding agent, helping the breadcrumbs adhere to the chicken.
3. Breadcrumbs: The third bowl should be filled with seasoned breadcrumbs. You can use plain, panko, or even crushed cornflakes for added crunch. The breadcrumbs are responsible for giving the chicken its crispy exterior.
4. Assembly Line: Arrange the bowls in order: flour → egg wash → breadcrumbs. This layout allows for a smooth flow as you coat each piece of chicken, ensuring an even distribution of the coating.
Coating the Chicken
Now that your dredging station is set up, follow these steps to properly coat the chicken strips:
1. Remove Chicken from Marinade: Take the marinated chicken tenders out of the buttermilk and allow any excess liquid to drip off.
2. Flour Coating: Dredge each chicken tender in the flour mixture, ensuring it is fully coated. Shake off any excess flour to prevent clumping.
3. Egg Wash: Next, dip the floured chicken into the egg wash. Make sure each piece is well-coated to ensure the breadcrumbs stick properly.
4. Breadcrumb Coating: Finally, roll the chicken tender in the breadcrumb mixture, pressing lightly to ensure an even coating. Place the coated chicken tenders on a baking sheet lined with parchment paper or a wire rack.
By following these steps carefully, you’ll achieve a deliciously crispy coating that locks in moisture and flavor.
Baking for Crispy Perfection
To achieve the ultimate crispy texture, it’s essential to bake the chicken tenders properly. Here’s how:
1. Wire Rack: Place a wire rack atop your baking sheet. This allows air to circulate around the chicken tenders, promoting even cooking and preventing sogginess. If you don’t have a wire rack, placing the chicken directly on a parchment-lined baking sheet will work, but it may not be as crispy.
2. Optimal Temperature: Preheat your oven to 425°F (220°C). This high temperature is crucial for achieving a golden-brown crust.
3. Baking Time: Bake the chicken tenders for 15-20 minutes, flipping them halfway through to ensure even browning. The internal temperature should reach 165°F (74°C) for safe consumption. The result will be tender chicken with a crunchy exterior, perfect for dipping.
Making the Zesty Ranch Dip
While your chicken tenders are baking, it’s the perfect time to whip up the zesty ranch dip. This flavorful dip is easy to make and elevates your chicken tenders to the next level:
1. Ingredients: Gather the following ingredients:
– 1 cup of sour cream or Greek yogurt
– 1 tablespoon of mayonnaise
– 1 teaspoon of garlic powder
– 1 teaspoon of onion powder
– 1 teaspoon of dried dill
– 1 teaspoon of dried parsley
– Salt and pepper to taste
– A squeeze of lemon juice for freshness (optional)
2. Mixing: In a bowl, combine all the ingredients and stir until well blended. Taste and adjust seasoning as necessary. If you prefer a thinner consistency, you can add a splash of milk or buttermilk.
3. Chill: Allow the dip to sit in the refrigerator for at least 30 minutes before serving. This resting time allows the flavors to meld beautifully, enhancing the overall taste.
Serving Suggestions
Now that your crispy chicken tenders and zesty ranch dip are ready, it’s time to serve! Here are some delightful serving suggestions:
– Plating: Arrange the chicken tenders on a large platter, accompanied by a bowl of the zesty ranch dip in the center. Garnish with fresh herbs or lemon wedges for a pop of color.
– Side Dishes: Pair the chicken tenders with fresh salads, such as a mixed greens salad with a light vinaigrette, or crunchy vegetable sticks like carrots, celery, and bell peppers. These sides add a refreshing contrast to the crispy chicken.
– Dipping Variations: In addition to the ranch dip, consider offering other dipping sauces, such as honey mustard, barbecue sauce, or a spicy sriracha mayo, to cater to different taste preferences.
Nutritional Benefits
This recipe not only satisfies your taste buds but also provides valuable nutritional benefits:
– Protein-Rich: Chicken tenders are a great source of lean protein, essential for muscle repair and growth.
– Healthy Fats: The dip can be customized to include Greek yogurt, which adds healthy fats while also increasing the protein content.
– Customizable: You can adjust the dip ingredients to cater to dietary preferences. For instance, using dairy-free yogurt or vegan mayonnaise makes the dip suitable for lactose-intolerant individuals or those following a vegan diet.
– Balanced Meal: When served with vegetables or a salad, this dish creates a balanced meal rich in nutrients, making it suitable for various eating occasions.
Conclusion
In summary, making crispy oven-baked chicken tenders with zesty ranch dip at home is not only easy but also a rewarding culinary experience. The buttermilk marinade ensures tender, flavorful chicken, while the dredging process delivers a perfectly crispy coating. The homemade ranch dip adds a zesty touch that complements the chicken beautifully.
This dish is perfect for family dinners, game day gatherings, or casual get-togethers with friends. The joy of sharing these delicious tenders, along with the ability to customize the meal to fit your preferences, makes it a versatile addition to your cooking repertoire. So gather your ingredients, set up your dredging station, and enjoy the delightful crunch and flavor of homemade chicken tenders that everyone will love.