Introduction
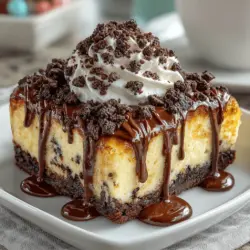
Indulging in a dessert that combines the rich flavors of chocolate with the iconic taste of Oreos is a treat that many cherish. The Choco-Oreo Dream Bars is a no-bake cheesecake recipe that not only satisfies sweet cravings but also impresses with its delightful layers and creamy texture. This dessert is perfect for gatherings, special occasions, or simply as a personal indulgence after a long day. In this blog post, we’ll guide you through the process of creating these delectable bars, exploring the ingredients, preparation steps, and storage tips to ensure you enjoy every bite.
Understanding the Ingredients
Oreo Cookies
At the heart of our Choco-Oreo Dream Bars lies the beloved Oreo cookie. These chocolate sandwich cookies, with their distinct creamy filling, have been a staple in American households since their introduction in 1912. Originally created by the Nabisco company, Oreos have become synonymous with indulgence and nostalgia, often inspiring a plethora of dessert recipes. Their crunchy texture and rich flavor make them the perfect foundation for our dessert, providing both a flavorful crust and a delightful contrast to the creamy filling.
In addition to their taste, Oreos are incredibly versatile. They can be used in various forms—crushed for crusts, whole as decorative elements, or even blended into the filling. Understanding the pivotal role Oreos play in our dessert will enhance your appreciation of the final product.
Unsalted Butter
Unsalted butter is another essential ingredient in our Choco-Oreo Dream Bars, primarily used to bind the crust together and add richness to the dessert. When baking, using unsalted butter is recommended for several reasons. First, it allows you to control the amount of salt in your recipe, ensuring that the flavors of the dessert shine through without being masked by saltiness. Second, unsalted butter typically has a fresher taste, which can contribute to the overall flavor profile of your dessert.
It’s important to note that butter should be at room temperature for optimal incorporation during the crust-making process. This will ensure a smooth mixture that holds together well when pressed into the pan.
Cream Cheese
The star of the filling, cream cheese, is what gives the Choco-Oreo Dream Bars their signature creamy texture. This ingredient is crucial for achieving that rich, cheesecake-like consistency that makes these bars so irresistible. There are several types of cream cheese available, including regular, reduced-fat, and even vegan options, each with its own unique properties.
For our recipe, standard cream cheese is preferred due to its rich flavor and creamy texture. Be sure to let it come to room temperature before mixing, as this will prevent lumps and ensure a smooth filling. Additionally, understanding the differences among cream cheese varieties can help you choose the best one for your personal taste and dietary preferences.
Granulated Sugar
Granulated sugar plays a vital role in sweetening the cheesecake filling while also contributing to its overall texture. Sugar not only provides sweetness but also helps to stabilize the filling by interacting with the cream cheese and creating a smooth, creamy consistency. The science behind sugar in baking is fascinating; it affects everything from moisture retention to browning reactions.
In our Choco-Oreo Dream Bars, the right amount of sugar is crucial for balancing the flavors. Too much sugar can overwhelm the other ingredients, while too little can lead to a bland dessert. Finding the perfect balance is key to creating a dessert that is both enjoyable and memorable.
Vanilla Extract
To elevate the flavor profile of our Choco-Oreo Dream Bars, we will incorporate vanilla extract. This ingredient adds a warm, sweet note that complements the chocolate and cream cheese beautifully. When selecting vanilla extract, it’s essential to differentiate between natural and artificial varieties. Pure vanilla extract, derived from vanilla beans, offers a depth of flavor that artificial vanilla, made from synthetic compounds, simply cannot replicate.
Using high-quality vanilla extract can make a significant difference in the final taste of your dessert. For those who wish to experiment, vanilla bean paste or even fresh vanilla pods can be used for an extra touch of elegance.
Whipped Cream
Whipped cream is the finishing touch that adds lightness and volume to the filling. It creates a fluffy texture that contrasts beautifully with the denser elements of the cheesecake. You have the option to use either homemade whipped cream or store-bought varieties; however, homemade is often preferred for its freshness and ability to customize sweetness levels.
When making whipped cream at home, it’s important to use heavy cream, as it whips up better and holds its shape longer compared to lighter creams. Additionally, a touch of sugar can be added to enhance sweetness, while vanilla extract can provide complementary flavor notes.
Mini Chocolate Chips
While optional, mini chocolate chips are a delightful addition to the Choco-Oreo Dream Bars. They provide extra texture and bursts of chocolate flavor that enhance the overall experience. When selecting chocolate chips, you have a variety of options, including semi-sweet, dark, and even white chocolate. Each type can influence the final taste, so choose according to your preference.
Adding mini chocolate chips not only elevates the dessert but also makes it visually appealing, offering a beautiful contrast to the creamy layers of the cheesecake.
Preparation Steps for Choco-Oreo Dream Bars
Creating the Oreo Crust
The first step in crafting your Choco-Oreo Dream Bars is creating the perfect Oreo crust. This process is simple but requires attention to detail for the best results. Start by gathering your ingredients: approximately 24 Oreo cookies and ½ cup of unsalted butter.
1. Crushing the Oreos: Place the Oreo cookies in a food processor and pulse until they resemble fine crumbs. If you don’t have a food processor, you can place the cookies in a zip-top bag and crush them with a rolling pin. The goal is to achieve a uniform crumb that will hold together when mixed with the butter.
2. Melting the Butter: In a microwave-safe bowl, melt the unsalted butter until fully liquid. Be careful not to overheat it, as melted butter can burn easily.
3. Combining Ingredients: In a mixing bowl, combine the crushed Oreos with the melted butter. Stir until the crumbs are evenly coated and the mixture resembles wet sand. This step is crucial, as the butter acts as a binding agent, ensuring the crust holds together.
4. Pressing into the Pan: Transfer the Oreo mixture into a 9×9-inch square baking pan (or a similar size). Using your hands or the bottom of a measuring cup, press the mixture firmly into the bottom of the pan, creating an even layer. This step is vital for a sturdy crust that can support the layers of filling above.
5. Chilling the Crust: Once the crust is pressed into place, cover the pan with plastic wrap or aluminum foil and place it in the refrigerator for at least 30 minutes. Chilling the crust will help it set and firm up, making it easier to cut into bars later.
By following these steps, you’ll create a solid foundation for your Choco-Oreo Dream Bars, setting the stage for the creamy filling and delightful layers that will follow. As you prepare the crust, take a moment to appreciate the process, knowing that you’re on your way to creating a dessert that will impress family and friends alike. Stay tuned for the next part of this recipe, where we’ll dive into crafting the luscious filling and assembling our dream bars.
Making the Cream Cheese Filling
Creating the perfect cream cheese filling is crucial to the success of your Choco-Oreo Dream Bars. To begin, ensure your cream cheese is at room temperature to facilitate easy mixing. In a large mixing bowl, combine 8 ounces of cream cheese with ½ cup of granulated sugar and 1 teaspoon of vanilla extract. Using an electric mixer, beat the mixture on medium speed until it becomes smooth and fluffy, which should take about 2-3 minutes.
It’s important to scrape down the sides of the bowl occasionally to ensure all ingredients are fully incorporated. The goal is to create a light, airy mixture that will serve as the decadent filling for your bars. If desired, you can add a pinch of salt to enhance the flavors further. This step not only balances the sweetness but also elevates the overall taste of your dessert.
Folding in the Whipped Cream
Once your cream cheese mixture is fluffy, it’s time to fold in the whipped cream. Start with 1 cup of heavy whipping cream, which should be whipped to stiff peaks in a separate bowl. This is where the magic happens; the whipped cream will add a light texture to the filling.
To fold in the whipped cream, use a spatula to gently lift the cream from the bottom of the bowl and fold it over the cream cheese mixture. This technique is essential because it maintains the airiness of the whipped cream, ensuring your filling is both fluffy and creamy. Be careful not to overmix; you want to keep as much volume as possible.
Assembling the Bars
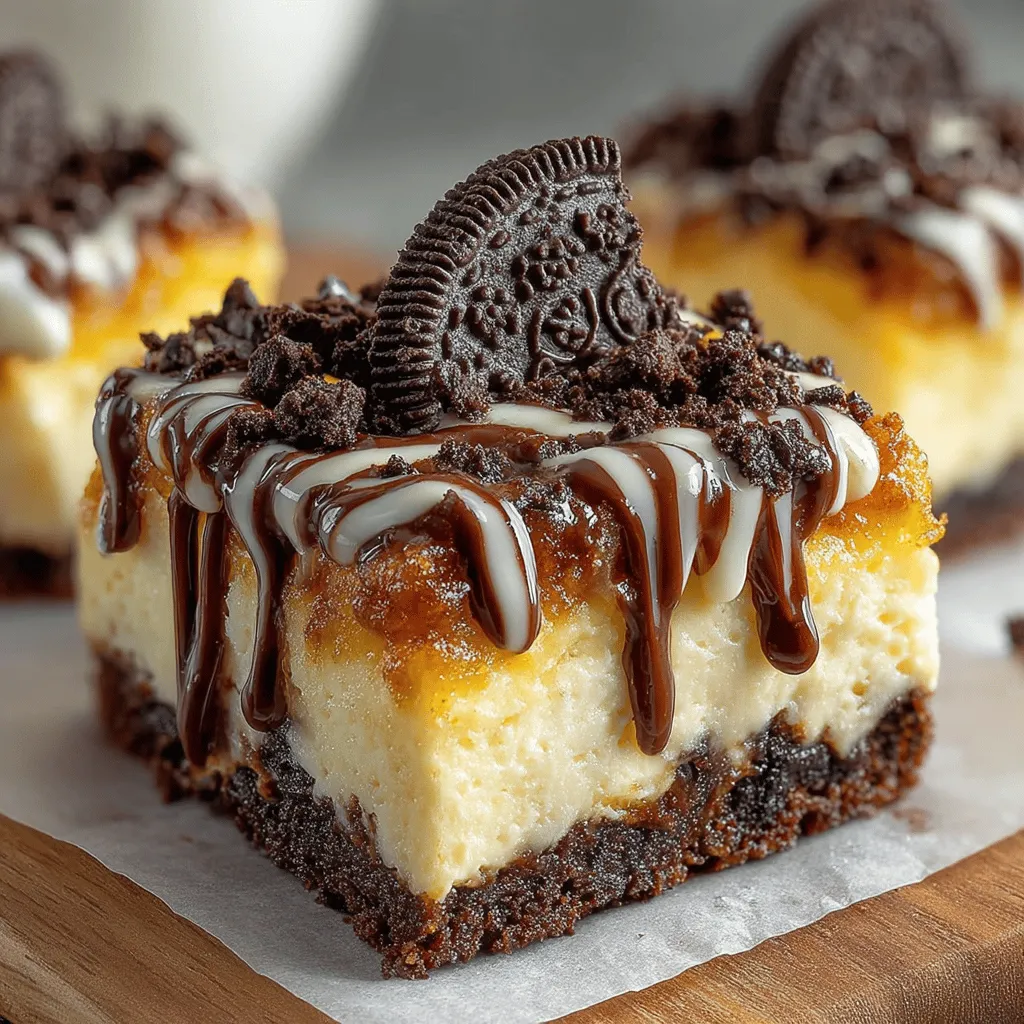
With your cream cheese filling prepared, it’s time to assemble the Choco-Oreo Dream Bars. Carefully spread the cream cheese mixture over the chilled chocolate Oreo crust, ensuring an even layer across the entire surface. For added visual appeal, consider sprinkling ¼ cup of crushed Oreos over the top of the cheesecake layer. This not only enhances the presentation but also provides a delightful crunch that complements the creamy texture.
Once assembled, gently tap the pan on the counter to help settle the filling and eliminate any air bubbles. This step is crucial for achieving a smooth, even top for your bars.
Chilling and Setting the Bars
Importance of Chilling
Chilling is a vital step in the preparation of Choco-Oreo Dream Bars. When desserts are chilled, the fats in the cream cheese filling firm up, resulting in a more cohesive texture. Additionally, chilling allows the flavors to meld, enhancing the overall taste of the dessert. Ideally, your bars should chill in the refrigerator for at least 4 hours, though overnight is best for optimal texture and flavor.
Time Management
To ensure your Choco-Oreo Dream Bars are ready when you need them, plan accordingly. If you’re preparing these for a special occasion, consider making the crust and filling the day before. This way, all that’s left to do on the day of serving is to cut and present the bars. By allowing the dessert to chill overnight, you’ll achieve a firmer texture and deeper flavors, making it well worth the wait.
Serving Suggestions
Presentation Ideas
When it comes to serving your Choco-Oreo Dream Bars, presentation can elevate the experience. Consider cutting the bars into neat squares or rectangles and placing them on a decorative platter. You can garnish each bar with a dollop of whipped cream, a sprinkle of crushed Oreos, or a drizzle of chocolate sauce for an extra touch of indulgence.
Pair your bars with a glass of cold milk or a hot cup of coffee to create a delightful contrast in flavors. The rich, creamy filling pairs beautifully with the bitterness of coffee, while the cold milk complements the chocolate and Oreo flavors perfectly.
Storage Tips
To ensure your Choco-Oreo Dream Bars stay fresh, store them in an airtight container in the refrigerator. They can be kept for up to 5 days, allowing you to enjoy them throughout the week. If you have leftovers, consider wrapping individual pieces in plastic wrap for a quick grab-and-go dessert option. For longer storage, you can freeze the bars. Just be sure to layer them with parchment paper and place them in a freezer-safe container. They will maintain their quality for up to 3 months in the freezer.
Nutritional Information
Understanding the nutritional content of your Choco-Oreo Dream Bars can help you enjoy them mindfully. Each bar is a rich indulgence, offering a delightful combination of creamy, sweet, and chocolatey flavors. A standard serving (approximately 1 bar) contains around 300 calories, with a breakdown of approximately 18g of fat, 30g of carbohydrates, and 4g of protein.
While these bars are undoubtedly a treat, moderation is key. It’s easy to indulge, especially with such a delicious dessert, but be mindful of portion sizes to enjoy without overindulging. They are perfect for sharing during gatherings or as a special dessert for yourself.
Conclusion
Choco-Oreo Dream Bars are not only a delightful treat but also a testament to the joy of simple ingredients coming together to create something special. Whether for a family gathering, a party, or simply a sweet indulgence at home, this recipe offers a foolproof way to enjoy a rich, creamy dessert. With their easy preparation and impressive results, you’ll find yourself making these bars time and again. Each bite delivers a blissful combination of chocolate and Oreo goodness, making them an irresistible addition to any dessert table. Enjoy the experience of creating and sharing these bars, and savor the deliciousness that comes from your kitchen!