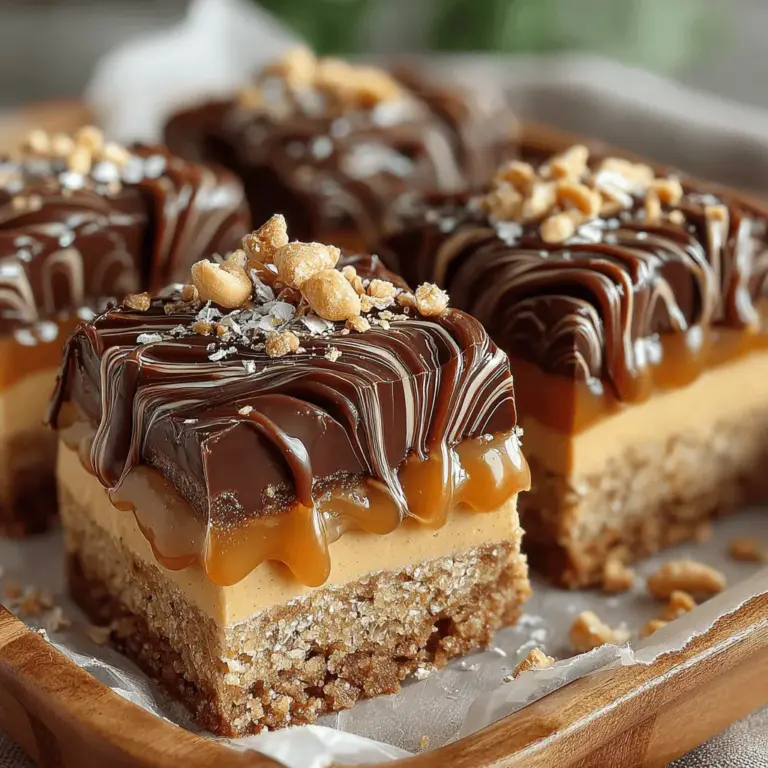
Frozen Chocolate Peanut Butter Swirl Bars: A Delicious and Healthy Treat
In the world of desserts, frozen treats hold a special place in our hearts, especially during the warm months or after a hearty meal. The combination of chocolate and peanut butter is a timeless classic that transcends generations, delighting taste buds with its rich, creamy, and indulgent flavors. Enter the Frozen Chocolate Peanut Butter Swirl Bars, a decadent yet healthy dessert that merges the best of both worlds. These bars are not only a feast for the senses but also a guilt-free indulgence that you can easily whip up in your own kitchen.
The appeal of Frozen Chocolate Peanut Butter Swirl Bars lies in their ability to cater to various dietary preferences. Whether you are gluten-free, dairy-free, or simply looking for a healthier dessert option, this recipe has got you covered. Made with wholesome ingredients, these bars are a perfect way to satisfy your sweet tooth without compromising on nutrition. With their creamy peanut butter layer and luscious chocolate topping, they are sure to become a favorite among family and friends.
Understanding the Ingredients
Before diving into the step-by-step instructions, it’s essential to understand the key ingredients that make up these delightful bars. Each component plays a significant role in not only the flavor but also the nutritional benefits of this recipe.
Base Ingredients
The foundation of the Frozen Chocolate Peanut Butter Swirl Bars is composed of almond flour and rolled oats. Almond flour is an excellent gluten-free option that is rich in healthy fats, protein, and vitamin E, making it a nutritious alternative to traditional flour. Rolled oats, on the other hand, add fiber and help create a satisfying texture, providing a wholesome base for the bars.
Coconut sugar is another crucial ingredient in this recipe. Unlike regular white sugar, coconut sugar has a lower glycemic index, making it a better choice for those looking to maintain stable blood sugar levels. It also contains small amounts of nutrients such as iron, zinc, and calcium, giving it a slight edge over refined sugars.
Coconut oil and maple syrup are used to bind the mixture and add a touch of flavor. Coconut oil not only aids in achieving a smooth consistency but also brings its own health benefits, including medium-chain fatty acids that can support energy levels and metabolism. Maple syrup, a natural sweetener, complements the flavors of the dessert while providing antioxidants and minerals.
Key Components of the Peanut Butter Layer
Peanut butter is the star of the show when it comes to the creamy layer of these bars. Different types of peanut butter can be used, ranging from natural, unsweetened varieties to creamy or crunchy styles. Each type offers its own unique texture and flavor profile, allowing you to customize your dessert according to your preference. Natural peanut butter, which typically contains only peanuts and salt, is a great option as it is free from added sugars and hydrogenated oils.
When it comes to sweetness for the peanut butter layer, you can choose between honey and maple syrup. Both options work well, but maple syrup is often favored for its vegan-friendly status and subtle flavor that pairs beautifully with peanut butter.
Chocolate Layer Essentials
No chocolate dessert would be complete without a rich chocolate layer, and the Frozen Chocolate Peanut Butter Swirl Bars are no exception. Dark chocolate chips are recommended for their intense flavor and health benefits, as they are rich in antioxidants and lower in sugar than their milk chocolate counterparts. If you’re following a dairy-free diet, there are plenty of dairy-free chocolate options available that ensure you won’t miss out on the indulgence.
Coconut oil plays a vital role in the chocolate layer as well, helping to achieve a smooth texture that coats the bars perfectly. The combination of dark chocolate and coconut oil not only creates a decadent topping but also enhances the overall mouthfeel of the dessert.
Step-by-Step Instructions
Now that we’ve covered the essential ingredients, let’s get started with the step-by-step instructions for creating your Frozen Chocolate Peanut Butter Swirl Bars.
Preparing the Base
1. Gather Your Ingredients: Start by collecting all the necessary ingredients for the base. This includes almond flour, rolled oats, coconut sugar, coconut oil, and maple syrup.
2. Mix the Dry Ingredients: In a mixing bowl, combine the almond flour, rolled oats, and coconut sugar. Use a whisk or a fork to ensure that these dry ingredients are well blended.
3. Combine with Wet Ingredients: In a separate bowl, melt the coconut oil and mix it with the maple syrup. Once melted, pour this mixture into the dry ingredient bowl and stir until you achieve a crumbly texture. The mixture should hold together when pressed between your fingers.
4. Press into a Pan: Line an 8×8-inch baking dish with parchment paper for easy removal. Transfer the mixture into the pan and press it down firmly to create an even layer. This will be the crust of your bars.
5. Chill the Base: Place the pan in the refrigerator for about 30 minutes. Chilling the base is crucial as it helps solidify the mixture, ensuring that your bars have the right structure once they are fully assembled.
Crafting the Peanut Butter Layer
1. Prepare the Peanut Butter Layer: While the base is chilling, you can start preparing the peanut butter layer. In a mixing bowl, combine peanut butter with your choice of sweetener (honey or maple syrup). For a smoother consistency, you can slightly warm the peanut butter in the microwave for a few seconds.
2. Mix Until Smooth: Stir the peanut butter and sweetener combination until it reaches a creamy texture. If you prefer a bit of added richness, you can mix in a small amount of melted coconut oil.
3. Spread Over the Base: Once the base has chilled and set, carefully spread the peanut butter layer over the top, ensuring an even distribution. This layer should be thick enough to hold its shape but not so thick that it overpowers the chocolate topping.
4. Swirl the Layers: For that signature swirl effect, you can lightly use a knife or a toothpick to create swirls between the peanut butter and the upcoming chocolate layer. This not only enhances the visual appeal of your bars but also allows the flavors to meld beautifully.
Melting the Chocolate Layer
1. Melt the Chocolate Chips: In a microwave-safe bowl, combine dark chocolate chips with a tablespoon of coconut oil. Heat in the microwave in 30-second increments, stirring in between, until the chocolate is completely melted and smooth.
2. Pour Over the Peanut Butter Layer: Once melted, pour the chocolate mixture over the peanut butter layer, spreading it evenly with a spatula. The chocolate should cover the entire surface for a beautiful finish.
3. Final Chill: Return the pan to the refrigerator and let it chill for at least 2 hours. This will allow the layers to set properly, making it easier to cut into bars later.
With these foundational steps completed, you are on your way to creating a delightful frozen dessert that combines the rich flavors of chocolate and peanut butter with a healthy twist. Stay tuned for the next part of the article, where we will explore the final touches and how to serve these delectable Frozen Chocolate Peanut Butter Swirl Bars!
Best Practices for Melting Chocolate Safely
Melting chocolate is an art that requires attention to detail to achieve a smooth and glossy finish without burning. Here are some best practices to keep in mind:
1. Use Quality Chocolate: Choose high-quality dark chocolate with a cocoa content of at least 70% for the best flavor and melting properties.
2. Chop Evenly: Chop your chocolate into small, uniform pieces. This ensures that it melts evenly and reduces the risk of burning.
3. Double Boiler Method: The safest way to melt chocolate is using a double boiler. Fill a saucepan with a few inches of water and bring it to a simmer. Place a heat-proof bowl over the top, making sure it doesn’t touch the water. Add the chopped chocolate to the bowl and stir until melted.
4. Microwave Method: If you prefer using a microwave, place the chopped chocolate in a microwave-safe bowl. Heat it in short bursts of 15-20 seconds, stirring in between until fully melted. This method requires careful attention as chocolate can burn quickly in the microwave.
5. Avoid Moisture: Ensure that all utensils and bowls are completely dry. Even a small amount of water can cause chocolate to seize, turning it grainy instead of smooth.
Techniques for Creating an Appealing Chocolate Layer
Creating an appealing chocolate layer involves both aesthetics and texture. Follow these techniques for the best results:
– Tempering Chocolate: For a glossy finish that snaps when bitten into, consider tempering your chocolate. This involves melting it to a specific temperature and then cooling it while stirring. This technique stabilizes the chocolate, improving its texture.
– Layering: When spreading the melted chocolate over the peanut butter layer, use a spatula for an even distribution. This ensures that every bite contains a perfect balance of chocolate and peanut butter.
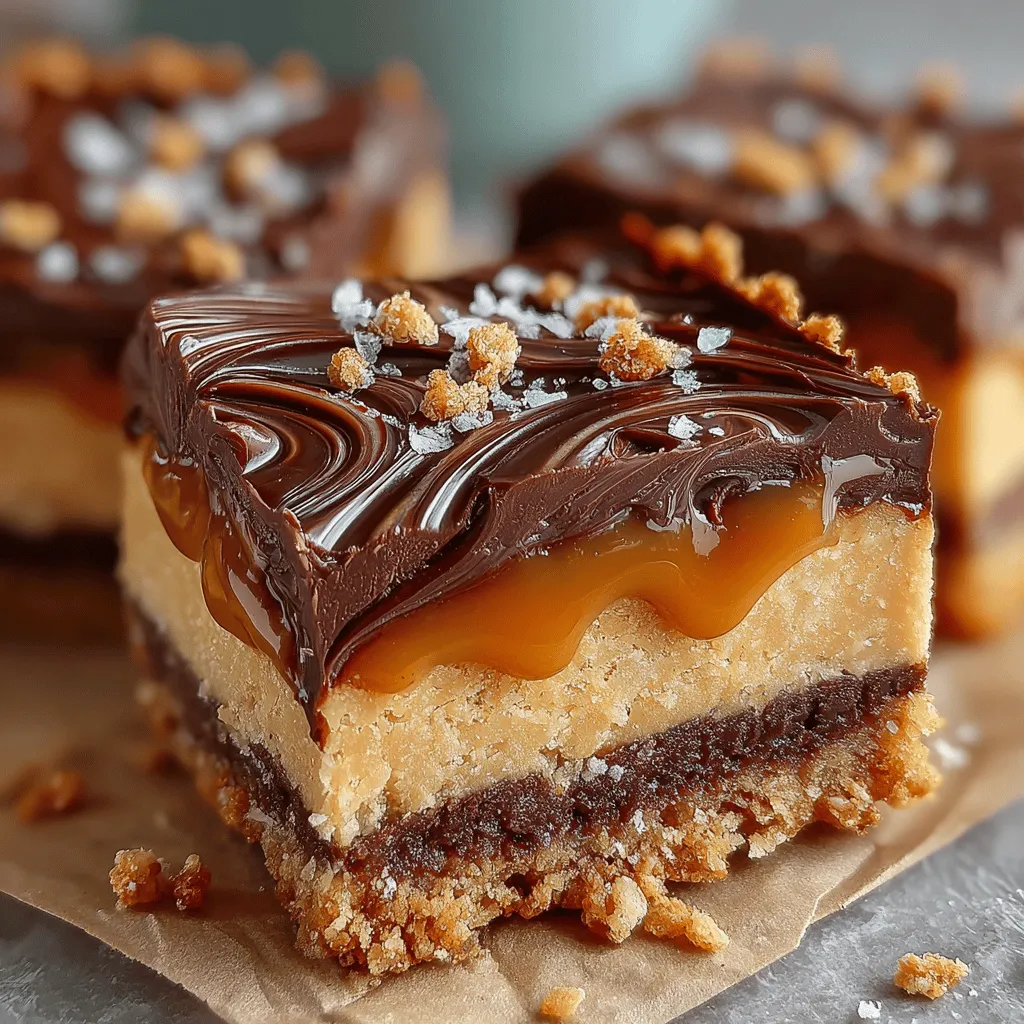
– Garnishing: Before the chocolate sets, sprinkle some crushed nuts or a pinch of sea salt on top for added texture and visual appeal.
Assembling the Bars
Once you’ve melted your chocolate and prepared the peanut butter layer, it’s time to assemble the bars.
1. Spread the Peanut Butter Layer: After preparing the crust and pouring the peanut butter mixture over it, use a spatula to evenly spread it across the base. This ensures that every piece of the bar will have the rich peanut butter flavor.
2. Pour the Chocolate Layer: Gently pour the melted chocolate over the peanut butter layer. Use a spatula to spread it evenly across the surface.
3. Swirl Technique: To create a beautiful swirl effect, use a toothpick or the tip of a knife to gently swirl the chocolate and peanut butter layers together. This not only enhances the visual appeal but also ensures that the flavors are intermingled.
Freezing the Bars
Freezing is a critical step in achieving the perfect texture for your Frozen Chocolate Peanut Butter Swirl Bars.
1. Freezing Time: Place the assembled bars in the freezer for at least 2-3 hours. This allows the layers to set properly, creating a firm and cohesive treat that holds its shape upon slicing.
2. Covering the Bars: To prevent freezer burn, wrap the bars tightly in plastic wrap or aluminum foil. Alternatively, place them in an airtight container. This preserves their flavor and texture during storage.
Slicing and Serving
Once the bars are fully frozen, it’s time to slice and serve. Here are some ideas to elevate your presentation:
1. Cutting Techniques: Use a sharp knife warmed under hot water for clean cuts. This creates smooth edges and prevents the layers from separating. You can cut the bars into squares, rectangles, or even fun shapes using cookie cutters for a playful presentation.
2. Serving Suggestions: Serve the bars as a delightful dessert, a post-workout snack, or a midday pick-me-up. Pair them with fresh fruit, a dollop of yogurt, or a drizzle of additional melted chocolate for an extra treat.
3. Storage Tips: Keep the bars stored in the freezer in an airtight container. They can last for up to two months, although they are likely to be enjoyed long before then!
Nutritional Benefits of Frozen Chocolate Peanut Butter Swirl Bars
These bars not only satisfy your sweet tooth but also contribute to a balanced diet. Let’s explore the nutritional benefits:
1. Almond Flour and Oats: Almond flour is rich in healthy fats, fiber, and protein, making it a nutritious alternative to traditional flour. Oats are a great source of complex carbohydrates and are high in fiber, promoting digestive health.
2. Peanut Butter: This creamy spread is packed with protein and healthy fats, making it a filling ingredient. It provides energy and can help with muscle recovery, making these bars a great post-workout snack.
3. Dark Chocolate: Rich in antioxidants, dark chocolate is known for its heart-healthy benefits. It can aid in improving cholesterol levels and promoting healthy blood flow, making it a guilt-free indulgence when consumed in moderation.
4. Balanced Diet: These bars fit seamlessly into a balanced diet. They provide essential nutrients while satisfying cravings for sweets, making them an excellent choice for health-conscious individuals.
Variations and Customizations
These Frozen Chocolate Peanut Butter Swirl Bars can be easily customized to suit various dietary needs and taste preferences.
1. Vegan or Nut-Free Options: For a vegan version, use a plant-based butter substitute and ensure your chocolate is dairy-free. If nut allergies are a concern, consider substituting peanut butter with sunflower seed butter or tahini.
2. Additions and Flavors: Experiment by adding ingredients like chopped nuts, seeds, or dried fruits for added texture and flavor. You can also enhance the chocolate layer with a hint of espresso powder or cinnamon for a unique twist.
3. Different Nut Butters: While peanut butter is a classic choice, feel free to experiment with other nut butters such as almond, cashew, or even pumpkin seed butter. Each will impart its own flavor profile to the bars.
Conclusion
In conclusion, the Frozen Chocolate Peanut Butter Swirl Bars are a delightful treat that combines simplicity with deliciousness. They cater to a variety of dietary preferences, making them a perfect choice for any occasion. The joy of creating these homemade bars lies not only in their rich flavors but also in knowing exactly what ingredients are included.
By following the detailed steps and tips provided, you can easily whip up a batch of these bars that are both satisfying and nourishing. So, gather your ingredients, unleash your creativity, and enjoy this guilt-free indulgence that will surely become a favorite in your household. Try making these bars today and discover the joy of homemade treats that cater to your taste buds and dietary needs!
