Introduction
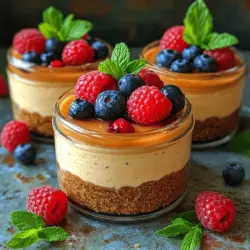
No-bake desserts have taken the culinary world by storm, captivating the hearts of home bakers and dessert enthusiasts alike. Their appeal lies in the promise of indulgence without the hassle of turning on the oven. Among the myriad of no-bake recipes, the Creamy Dreamy No-Bake Cheesecake Jars stand out as a delightful treat that combines simplicity with elegance. These jars of rich, velvety cheesecake are not only a feast for the taste buds but also a visual delight, making them perfect for any occasion.
Imagine hosting a gathering where guests are greeted with these charming jars filled with creamy goodness. Or picture a quiet evening at home, where you indulge in a personal serving of this luscious dessert. Whether it’s a birthday party, a summer barbecue, or simply a moment of self-care, these no-bake cheesecake jars are versatile enough to shine in any setting.
The Allure of No-Bake Desserts
No-bake desserts offer several advantages that make them a favored choice for many. First and foremost, they save time. With no need for baking, you can whip up a delicious treat in a fraction of the time it would take to bake a traditional cheesecake. This convenience is especially appealing for those with busy lifestyles who still want to enjoy homemade desserts.
Moreover, no-bake cheesecakes are incredibly versatile. They can be customized in countless ways, allowing you to experiment with flavors and presentations. From fruity variations to decadent chocolate twists, the possibilities are endless. Additionally, these desserts often require fewer ingredients and tools, making them accessible even to novice bakers.
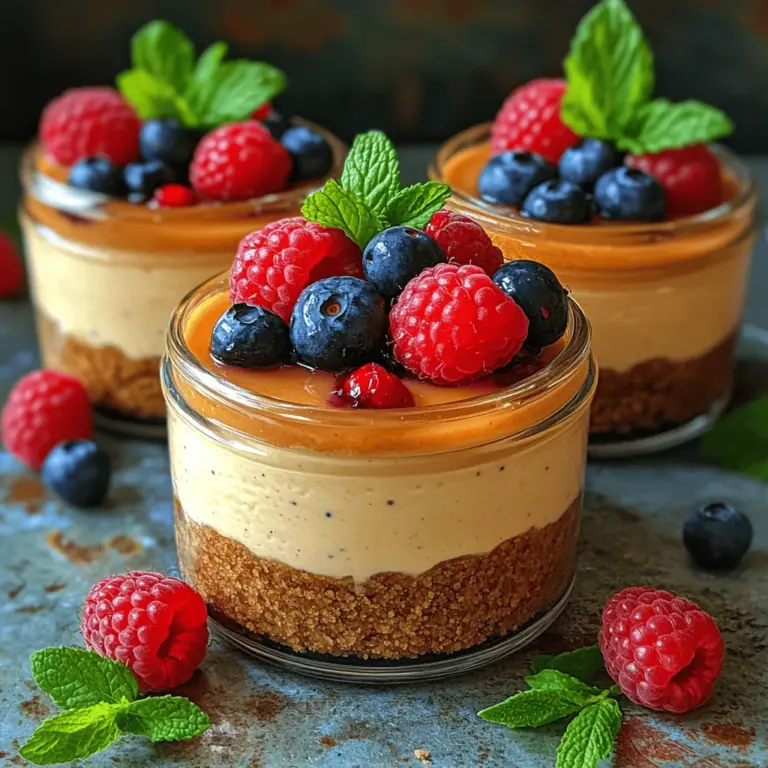
The presentation of no-bake cheesecakes is another alluring aspect. Serving them in jars not only adds a touch of sophistication but also allows for individual portions that are easy to serve and enjoy. The transparent glass showcases the layers of crust, filling, and toppings, creating a visually stunning dessert that is sure to impress your guests.
Ingredients Breakdown
Crust Ingredients
The foundation of any cheesecake is its crust, and for our Creamy Dreamy No-Bake Cheesecake Jars, we utilize graham cracker crumbs. These crumbs are essential, providing a sweet and slightly crunchy texture that complements the creamy filling beautifully. The buttery flavor of graham crackers adds richness to the dessert, making it even more delightful.
To achieve the perfect crust, we combine the graham cracker crumbs with melted butter and a touch of sugar. The melted butter binds the crumbs together, creating a cohesive texture that holds up well in the jars. Meanwhile, the sugar enhances the sweetness of the crust, balancing the rich flavors of the cheesecake filling.
Cheesecake Filling Ingredients
The cheesecake filling is the star of the show, and using high-quality ingredients is crucial for achieving that creamy, dreamy consistency. The base of our filling is softened cream cheese, which provides the characteristic richness and smooth texture of cheesecake. It’s important to allow the cream cheese to soften at room temperature before mixing, as this ensures a lump-free and velvety filling.
Next, we add powdered sugar to sweeten the mixture. The fine texture of powdered sugar dissolves easily, providing a smooth sweetness that complements the cream cheese. The balance of sweetness is further enhanced by the addition of vanilla extract, which adds a warm, aromatic flavor to the filling. A splash of fresh lemon juice brightens the overall taste, cutting through the richness and adding a refreshing note that elevates the dessert.
Topping Ingredients
To finish off our Creamy Dreamy No-Bake Cheesecake Jars, we turn to fresh toppings that not only add flavor but also a pop of color. Mixed berries—such as strawberries, blueberries, and raspberries—are an excellent choice for this dessert. They provide a burst of sweetness and tartness that contrasts beautifully with the creamy filling. Nutritionally, berries are packed with antioxidants and vitamins, making them a healthful addition to your dessert.
For those who prefer an extra layer of sweetness, a sprinkle of sugar can be used to macerate the berries. This process enhances their natural flavors and creates a syrupy fruit topping that drizzles beautifully over the cheesecake. Fresh mint leaves serve as an aesthetic touch, adding a hint of color and a refreshing aroma that enhances the overall presentation.
Step-by-Step Instructions
Preparation of the Crust
To begin crafting our Creamy Dreamy No-Bake Cheesecake Jars, we first need to prepare the crust. Start by gathering the graham cracker crumbs, melted butter, and sugar in a mixing bowl. Using a spatula or fork, combine the ingredients until the crumbs are fully coated with the butter and the mixture resembles wet sand. This step is crucial, as it ensures that the crust will hold together when pressed into the jars.
Once the mixture is well combined, it’s time to distribute it into the jars. Use a tablespoon to scoop the crust mixture into the bottom of each jar, pressing it down firmly to create an even layer. A flat-bottomed glass or measuring cup can help achieve an even distribution and a compact crust. Make sure to press the crumbs down well, as this will help the crust maintain its shape once the cheesecake filling is added.
Crafting the Cheesecake Filling
With the crust prepared, it’s time to turn our attention to the cheesecake filling. Begin by placing the softened cream cheese in a mixing bowl. Using an electric mixer or a whisk, beat the cream cheese until it’s smooth and creamy. This process is essential to eliminate any lumps and achieve a velvety texture.
Next, gradually add the powdered sugar while continuing to mix. This will help incorporate the sweetness evenly throughout the filling. Once the sugar is fully mixed in, add the vanilla extract and lemon juice. Beat the mixture again until everything is well combined and the filling is light and fluffy. The mixture should be thick but spreadable, perfect for layering in the jars.
Once the filling is ready, carefully spoon it over the prepared crust in each jar, filling them to about three-quarters full. Use a spatula or the back of a spoon to smooth the tops of the filling, creating a clean and polished look. If desired, you can even use a piping bag to add a decorative touch to the filling, making your cheesecake jars even more visually appealing.
Stay tuned for the next part of our article, where we will delve into the finishing touches, including assembling the jars and serving suggestions, ensuring your Creamy Dreamy No-Bake Cheesecake Jars are not only delicious but also stunningly presented.
Importance of Beating Cream Cheese to the Right Consistency
When making a no-bake cheesecake, the first step to achieving that perfectly creamy texture lies in the way you beat the cream cheese. It’s essential to start with softened cream cheese, which not only makes it easier to blend but also prevents any lumps in your final mixture. To reach the ideal consistency, beat the cream cheese on medium speed using an electric mixer until it’s smooth and creamy, about 2-3 minutes. This step is vital because if the cream cheese isn’t properly beaten, it can lead to a dense or grainy texture in your cheesecake.
Explanation of Folding Whipped Cream for a Light Texture
After achieving the right consistency with your cream cheese, it’s time to introduce whipped cream to the mixture. This is where folding comes into play. Folding is a gentle technique used to combine whipped cream with the cream cheese mixture without deflating the air that was incorporated into the whipped cream. To fold in your whipped cream, use a spatula or a large spoon and gently scoop from the bottom of the bowl, lifting the mixture over itself. Rotate the bowl as you go to ensure an even blend. This step is crucial for giving your cheesecake jars their characteristic light and airy texture, making each bite feel indulgent yet not overly heavy.
The Role of Lemon Juice in Balancing Flavors
Adding lemon juice to your cheesecake mixture serves a dual purpose: it enhances the flavor and helps to balance the sweetness of the cream cheese and sugar. The acidity of the lemon juice brightens the overall taste profile, providing a refreshing contrast to the rich, creamy elements of the cheesecake. It’s important to use fresh lemon juice for the best flavor; bottled varieties may lack the vibrant taste that fresh citrus provides. Typically, about one tablespoon of lemon juice is sufficient, but feel free to adjust according to your personal preference.
Layering the Jars
Achieving beautiful layers in your cheesecake jars is as much about technique as it is about aesthetics. Start by spooning a layer of the crust mixture into the bottom of each jar, pressing it down gently to create a solid base. Next, add a generous layer of the cheesecake filling, smoothing it out with the back of a spoon. Continue layering until you reach the top of the jar, ensuring that you finish with a layer of cheesecake filling for a clean and polished appearance.
For added flair, consider alternating the crust and filling layers to create a striped effect. You can also use a piping bag to add the cheesecake filling, which allows for more precision and can elevate the presentation of your dessert.
Suggestions for Presentation and Visual Appeal
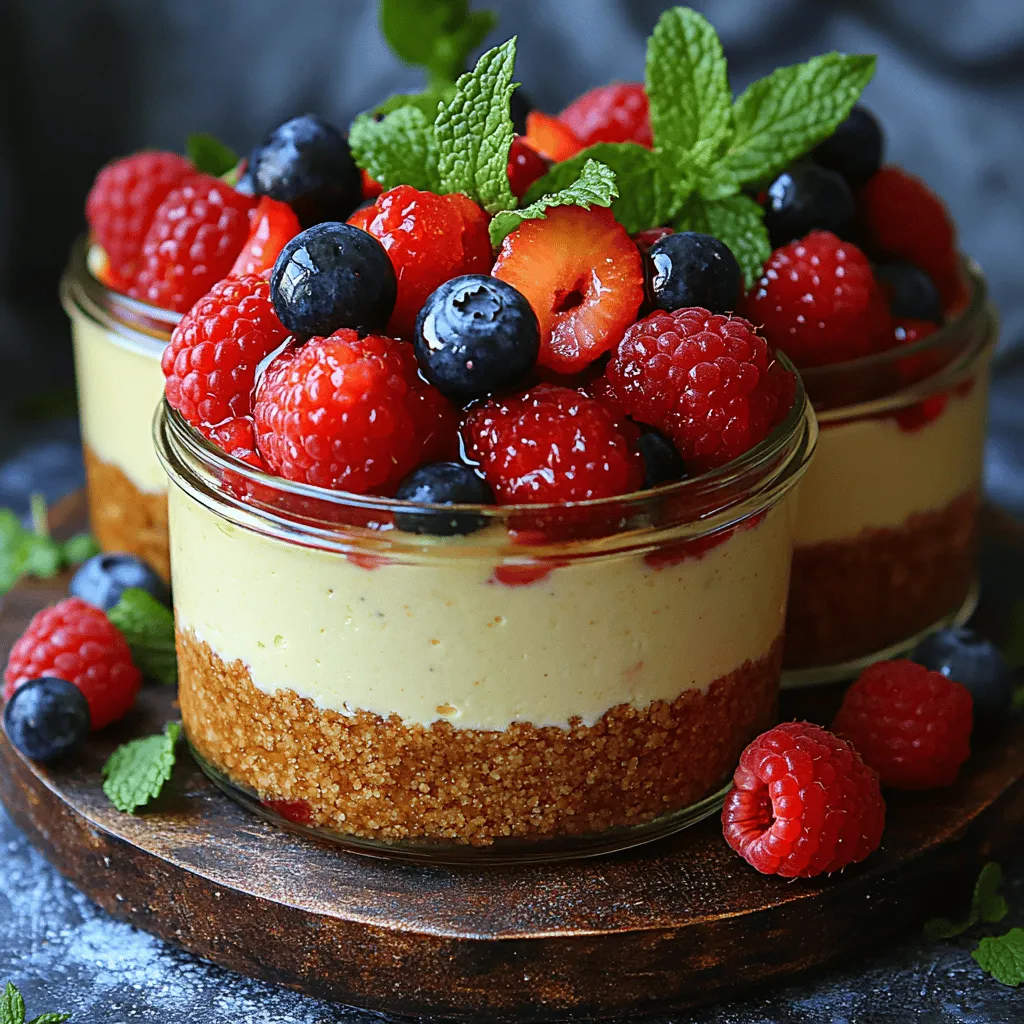
Presentation can make a significant difference in the enjoyment of your dessert. To enhance the visual appeal of your cheesecake jars, consider using clear glass jars to showcase the beautiful layers. You can also add fresh mint leaves or edible flowers on top for a pop of color. Drizzling a little berry coulis or caramel sauce around the inside rim of the jar before adding the filling can create an impressive effect. Finally, using colorful spoons or decorative napkins can further elevate the presentation, making it a delightful treat for any occasion.
Preparing the Topping
The Process of Macerating Berries and Its Impact on Taste
Macerating berries is a simple yet effective technique that enhances the flavor and texture of your fruit topping. To macerate berries, simply combine them with a bit of sugar and allow them to sit for at least 15 minutes. The sugar draws out the natural juices, creating a syrupy mixture that intensifies the flavor of the berries. This not only adds a sweet and tangy balance to the creamy cheesecake but also provides a beautiful, glossy topping that enhances the visual appeal of your jars.
Ideas for Arranging Berries for a Stunning Finish
When it comes time to top your cheesecake jars, presentation is key. Arrange your macerated berries artfully on top of the cheesecake filling, considering a mix of colors and sizes for a dynamic look. You might place whole strawberries around the edge, a few blackberries in the center, and drizzle some of the macerating syrup over the top. This thoughtful arrangement not only looks impressive but also elevates the flavor experience as each spoonful captures a bit of the creamy cheesecake, the sweet syrup, and the juicy berries.
Chilling the Cheesecake Jars
Explanation of Why Chilling is Crucial for Texture
Chilling your cheesecake jars is a critical step in the no-bake cheesecake preparation process. As the jars chill in the refrigerator, the cheesecake filling sets up, allowing the flavors to meld beautifully while achieving the desired texture. The chilling process helps firm up the whipped cream and cream cheese mixture, resulting in a cheesecake that holds its shape when served, making it easier to enjoy.
Tips for Timing and Flavor Enhancement Through Overnight Chilling
While chilling for at least four hours is necessary, letting your cheesecake jars rest overnight is highly recommended. This extra time allows the flavors to develop fully, resulting in a more balanced and harmonious taste. If you’re short on time, aim for the minimum chill time, but plan ahead for future occasions where you can allow the jars to set overnight for the best results.
Serving Suggestions
Creative Ideas for Serving and Enjoying the Jars
These creamy dreamy no-bake cheesecake jars are not only delicious but also incredibly versatile when it comes to serving. Consider serving them as individual desserts at a dinner party, or make a larger batch for a casual gathering. You can also prepare mini jars for a sweet addition to a brunch buffet. To add a fun twist, try serving them with different toppings or crust variations for guests to customize their desserts.
Pairing Suggestions with Beverages or Additional Desserts
For a delightful pairing, serve your cheesecake jars with a light herbal tea or a refreshing glass of lemonade. If you’re hosting a more indulgent dessert spread, consider accompanying the jars with coffee or hot chocolate. These pairings can enhance the overall experience of enjoying your cheesecake jars, making them feel even more special.
Flavor Variations and Customizations
Exploring Different Types of Crusts
While the traditional graham cracker crust is a classic choice for cheesecake, consider experimenting with different crust types to suit your taste. For a chocolatey twist, try using crushed chocolate cookies or Oreos. If you prefer a nut-based crust, finely ground almonds or pecans mixed with a bit of butter can create a crunchy and flavorful base. The key is to ensure that your crust complements the cheesecake filling while adding its unique flair.
Suggestions for Alternative Cheesecake Flavors
If you want to switch things up, there are endless possibilities for cheesecake flavors. Incorporate melted chocolate into your filling for a rich chocolate cheesecake, or add matcha powder for a unique twist. You can also mix in flavored extracts, such as vanilla bean or almond, to create a customized taste experience. The beauty of no-bake cheesecakes is their adaptability to various flavors, allowing you to cater to your preferences or seasonal ingredients.
Ideas for Different Fruit Toppings
While berries are a popular topping choice, don’t be afraid to get creative with your fruit selections. Consider tropical options like mango or pineapple for a sunny, refreshing twist. Citrus fruits like orange or grapefruit can add a bright and zesty flavor that pairs well with the creamy cheesecake. You may even experiment with compotes made from caramelized apples or pears for a comforting fall dessert. The possibilities are endless, enabling you to create a dessert that reflects your tastes and the seasons.
Health and Nutritional Insights
Discussion on the Nutritional Aspects of the Ingredients Used
When it comes to indulging in desserts, understanding their nutritional profile can help you enjoy them more mindfully. The main ingredients in your cheesecake jars—cream cheese, sugar, and whipped cream—do contain calories and fat, but they also provide some nutritional benefits. Cream cheese, for instance, offers calcium and protein, while the fruit toppings provide vitamins and antioxidants.
Potential for Healthier Substitutes
If you’re looking to lighten up your dessert, there are several substitutions you can make without sacrificing flavor. Consider using low-fat cream cheese or Greek yogurt in place of regular cream cheese to reduce fat content while still achieving a creamy texture. Natural sweeteners like honey or maple syrup can replace granulated sugar, adding a touch of wholesome sweetness. For those looking to boost fiber, using whole grain or nut-based crusts can enhance the nutritional value of your dessert.
The Balance of Indulgence and Health in Dessert Choices
Desserts are often seen as indulgent treats, but with a few thoughtful adjustments, they can also fit into a balanced lifestyle. The key is moderation and mindful enjoyment. By incorporating fruits and exploring healthier alternatives, you can create a dessert that feels indulgent while still being a better choice for your overall health.
Conclusion
The Creamy Dreamy No-Bake Cheesecake Jars are not just a feast for the palate but also a delight for the eyes, with their beautiful layers and vibrant toppings. Their simplicity and versatility make them perfect for any occasion, whether it be a casual family dinner or an elegant gathering. This recipe invites creativity, allowing you to experiment with flavors, crusts, and toppings to make it your own.
Embrace the joy of creating and sharing these delightful desserts with friends and family, knowing that each jar is a unique expression of your culinary creativity. So grab your ingredients, gather your jars, and let the delightful adventure of no-bake cheesecake-making begin!