Dreamy No-Bake Strawberry Cheesecake Cups: A Sweet Escape

WANT TO SAVE THIS RECIPE?

Introduction: The Allure of No-Bake Desserts

In the world of desserts, few things can rival the freshness and vibrancy of a strawberry cheesecake. With its luscious, creamy texture and the bright, sweet-tart flavor of strawberries, this classic treat has earned a beloved spot in the hearts of dessert enthusiasts everywhere. However, the process of baking can often be a daunting task, especially during the warm summer months when the last thing you want to do is turn on the oven. Enter the Dreamy No-Bake Strawberry Cheesecake Cups—a delightful twist on the traditional recipe that allows you to indulge without the hassle of baking.

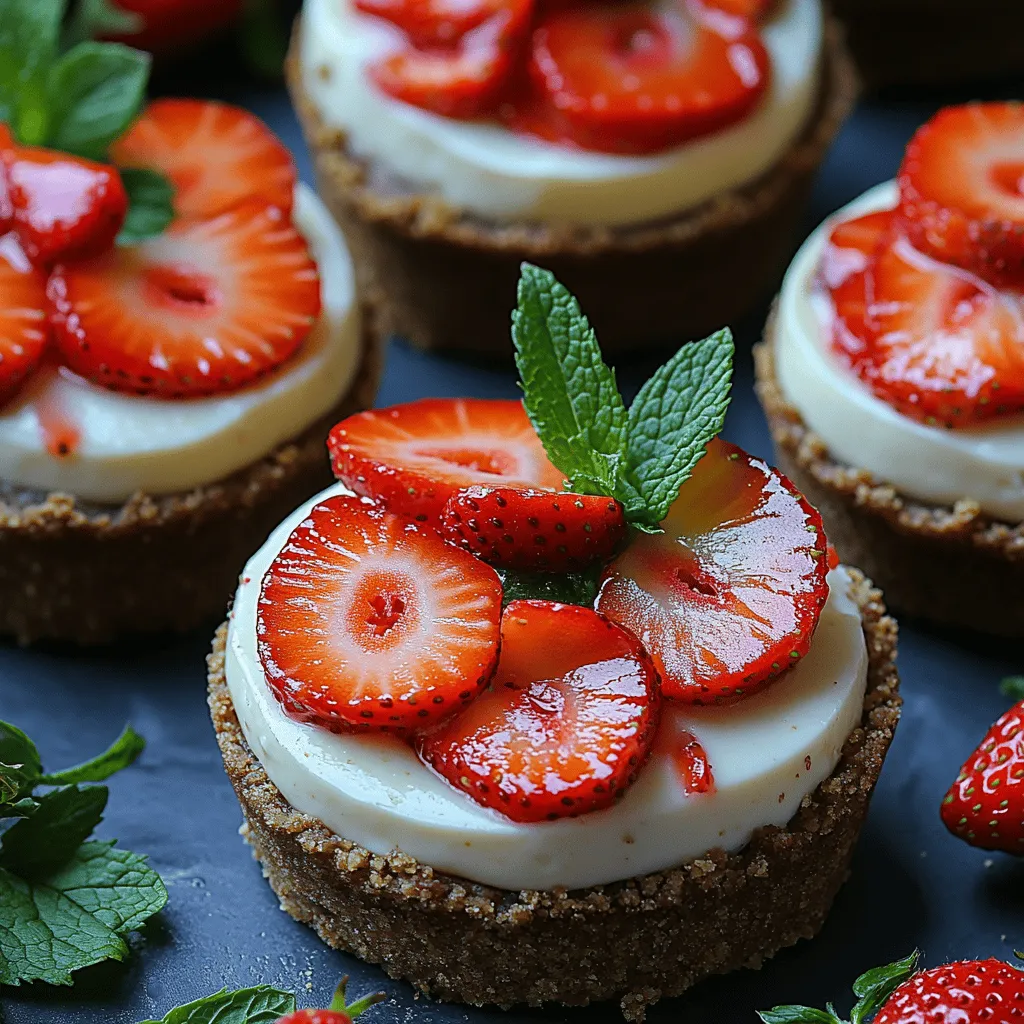
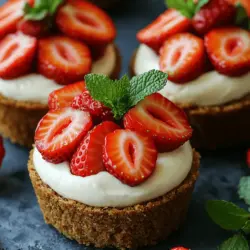
These individual cups not only provide a visually appealing presentation, ideal for gatherings and celebrations, but they also offer a light and refreshing alternative to heavier desserts. With a rich cheesecake filling layered over a crunchy graham cracker crust and topped with fresh strawberries, these cups are as much a feast for the eyes as they are for the palate. Whether you’re a novice baker or a seasoned chef, this recipe promises an easy yet impressive way to satisfy your sweet tooth.

In this article, we will guide you through every aspect of making these Dreamy No-Bake Strawberry Cheesecake Cups—from the essential ingredients that define this dessert to the step-by-step instructions that will lead you to cheesecake perfection. Get ready to embark on a culinary adventure that will leave your guests asking for seconds!

Understanding the Ingredients: A Closer Look at What Makes This Dessert Special

The foundation of any great recipe lies in its ingredients. For the Dreamy No-Bake Strawberry Cheesecake Cups, each component plays a crucial role in creating the perfect balance of flavors and textures. Let’s delve deeper into the ingredients that make this dessert so special.

The Crust: A Crunchy Base

The crust is the unsung hero of any cheesecake, providing a crunchy and flavorful base that complements the creamy filling above.

Graham Cracker Crumbs: These crumbs form the backbone of the crust, offering a subtle sweetness and a hint of nuttiness. The texture of graham crackers adds a satisfying crunch that contrasts beautifully with the smooth cheesecake filling. When selecting graham crackers, opt for the plain variety to avoid overpowering the delicate flavors of the cheesecake.

Granulated Sugar: A small amount of granulated sugar is added to the crust mixture to enhance its sweetness. This sugar balances the flavors and contributes to the overall richness of the dessert.

Unsalted Butter: Using unsalted butter is essential for achieving the perfect texture in your crust. Salted butter can introduce an unintended savory flavor, which may clash with the sweetness of the cheesecake. The butter also acts as a binding agent, helping the crust hold its shape while providing richness and moisture.

The Cheesecake Filling: Creamy Indulgence

The cheesecake filling is the star of this dessert, contributing its creamy indulgence and rich flavor profile.

Softened Cream Cheese: The key to a smooth and velvety cheesecake filling is using softened cream cheese. Cold cream cheese can lead to lumps and an uneven texture, so it’s important to allow it to come to room temperature before mixing. This creates a luscious filling that spreads easily and sets beautifully.

Powdered Sugar: In this recipe, powdered sugar is preferred over granulated sugar for the filling. Powdered sugar dissolves quickly, eliminating any graininess and contributing to a silkier texture. It also adds a light sweetness without overwhelming the other flavors.

Vanilla Extract: A splash of pure vanilla extract is essential for enhancing the flavor of the cheesecake filling. It adds warmth and depth, rounding out the taste profile and making each bite more delicious.

The Topping: Fresh and Flavorful

No cheesecake is complete without a fresh topping, and for our no-bake version, strawberries shine as the star ingredient.

Fresh Strawberries: The importance of using fresh strawberries cannot be overstated. Their natural sweetness and vibrant color make them the perfect complement to the rich cheesecake filling. Strawberries provide a refreshing contrast and elevate the overall taste of the dessert. When selecting strawberries, choose ripe, fragrant berries for the best flavor.

Optional Garnishes: For an added touch of elegance, consider garnishing your cheesecake cups with fresh mint leaves. Not only do they enhance the visual appeal, but they also add a hint of freshness that pairs beautifully with the strawberries.

Step-by-Step Instructions: Crafting Your Cheesecake Cups

Now that we’ve explored the ingredients, it’s time to roll up our sleeves and get started on crafting these delightful Dreamy No-Bake Strawberry Cheesecake Cups. Follow these comprehensive instructions to ensure success in your dessert-making journey.

Preparing the Crust: Building the Base

The first step in creating your no-bake cheesecake cups is preparing the crust. This crunchy base is essential for providing structure and flavor.

1. Mixing the Ingredients: In a medium-sized mixing bowl, combine 1 and ½ cups of graham cracker crumbs with ¼ cup of granulated sugar. Stir the two dry ingredients together until they are evenly distributed.

2. Adding Butter: Melt ½ cup of unsalted butter in a microwave-safe bowl or on the stovetop. Once melted, pour the butter into the graham cracker crumb mixture. Use a spatula or wooden spoon to mix until the crumbs are fully coated and the consistency resembles wet sand.

3. Achieving the Right Texture: It’s crucial to ensure that your crust mixture holds together well. When you pinch a small amount between your fingers, it should clump together without falling apart. If it’s too dry, add a little more melted butter, one tablespoon at a time, until the desired texture is achieved.

Assembling the Crust: Creating Layers

With your crust mixture ready, it’s time to assemble it into your individual serving cups.

1. Dividing the Mixture: Depending on the size of your cups, you can make anywhere from 6 to 12 servings. For even distribution, use a measuring cup or a tablespoon to scoop the crust mixture into each cup. Aim for about 3 tablespoons of the mixture per cup.

2. Pressing Techniques: To create an even layer, use the back of a small measuring cup or your fingers to press the mixture firmly into the bottom of each cup. Make sure the crust is compact and evenly distributed, as this will ensure a stable base for the cheesecake filling.

Making the Cheesecake Filling: Achieving Creaminess

With the crust in place, it’s time to create the star of the show: the cheesecake filling.

1. Beating the Cream Cheese: In a large mixing bowl, add 16 ounces of softened cream cheese. Using an electric mixer, beat the cream cheese on medium speed until it becomes smooth and creamy, which should take about 2-3 minutes.

2. Incorporating the Sugar and Vanilla: Gradually add ½ cup of powdered sugar and 1 teaspoon of vanilla extract to the cream cheese. Continue to mix until everything is well combined and the mixture is fluffy and light.

Whipping the Cream: The Key to Lightness

The final step in creating the cheesecake filling is to whip the cream, which adds a light and airy texture.

1. Whipping Heavy Cream: In a separate bowl, pour in 1 cup of heavy cream. Using a hand whisk or electric mixer, whip the cream on high speed until it forms stiff peaks. This means that when you lift the whisk or mixer out of the bowl, the cream should hold its shape.

2. Folding the Cream: Once your cream is whipped, gently fold it into the cream cheese mixture. Use a spatula, and be careful not to deflate the whipped cream. The goal is to combine the mixtures without losing the lightness that the whipped cream provides.

With the crust prepared, the filling mixed to perfection, and the whipped cream folded in, you’re well on your way to creating the Dreamy No-Bake Strawberry Cheesecake Cups. In the next section, we will cover the final steps to assemble these delightful desserts and present them beautifully for your enjoyment. Stay tuned for the continuation of this sweet adventure!

In the world of desserts, few things can rival the freshness and vibrancy of a strawberry cheesecake. With its luscious, creamy texture and the bright, sweet-tart flavor of strawberries, this classic treat has earned a beloved spot in the hearts of dessert enthusiasts everywhere. However, the process of baking can often be a daunting task, especially during the warm summer months when the last thing you want to do is turn on the oven. Enter the <strong>Dreamy No-Bake Strawberry Cheesecake Cups</strong>—a delightful twist on the traditional recipe that allows you to indulge without the hassle of baking.” /></p>
</p>
<h3>Folding Techniques to Maintain Airiness in the Mixture</h3>
</p>
<p>Achieving a light and fluffy texture in your cheesecake filling is essential for a successful no-bake strawberry cheesecake. The key to maintaining that airy quality lies in the folding technique used when combining the whipped cream with the cream cheese mixture.</p>
</p>
<p>1. <strong>Use a Rubber Spatula</strong>: Start by using a rubber spatula, which allows for gentle folding without deflating the whipped cream. Avoid using a whisk or electric mixer at this stage, as they can introduce too much air and break down the cream.</p>
</p>
<p>2. <strong>Folding Method</strong>: Begin by adding a small amount of whipped cream to the cream cheese mixture. Gently stir this in to lighten the cream cheese. Once combined, add the remaining whipped cream in three additions. For each addition, use an “up and over” motion: dip the spatula into the mixture, lift it over, and fold it back down into the center. Rotate the bowl as you fold to ensure thorough mixing while preserving airiness.</p>
</p>
<p>3. <strong>Check Consistency</strong>: The final mixture should be smooth and creamy but still fluffy. Avoid over-mixing, as it can cause the filling to become dense.</p>
</p>
<h3>Layering the Components: The Assembly</h3>
</p>
<p>Once your cheesecake filling is ready, it’s time to assemble your dreamy no-bake strawberry cheesecake cups. Layering is an art that enhances both the visual appeal and flavor distribution of the dessert.</p>
</p>
<h4>Methods for Spooning or Piping the Filling</h4>
</p>
<p>You can either spoon or pipe the cheesecake filling into your serving cups, depending on your desired presentation style.</p>
</p>
<p>– <strong>Spoon Method</strong>: For a casual approach, simply use a spoon to scoop the filling into each cup. Start by adding a couple of tablespoons of filling at the bottom, then use the back of the spoon to smooth it out evenly before adding the next layer.</p>
</p>
<p>– <strong>Piping Method</strong>: For a more refined look, use a piping bag fitted with a large star tip. Fill the bag with your cheesecake mixture and pipe it into the cups, swirling the tip as you go to create decorative peaks. This method not only looks professional but also makes serving easier.</p>
</p>
<h4>Strategies for Evenly Distributing Strawberries on Top</h4>
</p>
<p>For the final touch, it’s essential to evenly distribute your strawberry topping for both aesthetics and taste.</p>
</p>
<p>– <strong>Fresh Strawberries</strong>: Slice strawberries into even quarters or halves, depending on their size. Begin by placing a layer of strawberries after the first layer of cheesecake filling. You can either scatter them evenly over the surface or arrange them in a circular pattern for a more organized look.</p>
</p>
<p>– <strong>Strawberry Sauce</strong>: If you prefer a sauce, drizzle it generously over the top after layering the cheesecake. Use a spoon to create a marbled effect by lightly swirling it into the cheesecake filling.</p>
</p>
<h3>Chilling the Cups: Setting the Cheesecake</h3>
</p>
<p>The chilling process is crucial for setting the cheesecake cups, allowing the flavors to meld and the texture to firm up.</p>
</p>
<h4>Understanding the Chilling Process for Optimal Texture</h4>
</p>
<p>Chilling not only helps the filling set but also enhances the overall flavor. The cooling time allows the ingredients to blend seamlessly, creating a harmonious taste.</p>
</p>
<p>1. <strong>Covering the Cups</strong>: Once assembled, cover each cup with plastic wrap or a lid to prevent moisture loss and odors from the fridge.</p>
</p>
<p>2. <strong>Temperature Control</strong>: Ensure your refrigerator is set at the right temperature, ideally below 40°F (4°C), to facilitate proper chilling.</p>
</p>
<h4>Recommended Chilling Time for the Best Results</h4>
</p>
<p>For optimal results, allow your cheesecake cups to chill for at least 4 hours, though overnight is recommended. This extended time will help the filling firm up completely and improve the texture, making it easier to enjoy each layer without collapsing.</p>
</p>
<h3>Presentation and Serving Suggestions: The Perfect Finish</h3>
</p>
<p>Presentation is key to making any dessert enticing, and your no-bake strawberry cheesecake cups are no exception. The right finishing touches can elevate your dessert from simple to spectacular.</p>
</p>
<h4>Garnishing Ideas: Enhancing Visual Appeal</h4>
</p>
<p>– <strong>Extra Strawberries and Mint Leaves</strong>: Top each cup with a fresh strawberry or two, and add a sprig of mint for a pop of color. This not only enhances the visual appeal but also adds a refreshing aroma.</p>
</p>
<p>– <strong>Creative Serving Suggestions for Different Occasions</strong>: Consider using decorative cups or jars for serving, such as mason jars for a rustic feel or elegant dessert cups for formal gatherings. You can also create a layered dessert parfait by alternating layers of cheesecake and crushed graham crackers in a larger trifle dish.</p>
</p>
<h4>Serving Tips: Making the Most of Your Dessert</h4>
</p>
<p>– <strong>Ideal Serving Temperature and Portion Sizes</strong>: Serve the cheesecake cups cold directly from the fridge. Each portion should be about 1/2 cup, which is perfect for a light dessert that won’t leave your guests feeling heavy.</p>
</p>
<p>– <strong>Pairing Ideas with Beverages for a Complete Experience</strong>: Complement your cheesecake cups with a cup of refreshing herbal tea or a glass of bubbly sparkling water. For an adult gathering, consider pairing them with a light dessert wine or a fruity cocktail.</p>
</p>
<h3>The Benefits of No-Bake Desserts: Why This Recipe is a Winner</h3>
</p>
<p>No-bake desserts hold a special place in the culinary world, and this recipe exemplifies the benefits of this approach.</p>
</p>
<h4>Time-Saving: A Quick and Easy Option</h4>
</p>
<p>One of the main advantages of no-bake desserts is their convenience.</p>
</p>
<p>– <strong>Preparing in Just 20 Minutes Plus Chilling Time</strong>: With a preparation time of only 20 minutes, you can have these delicious cheesecake cups ready to chill while you tackle other party preparations or simply relax.</p>
</p>
<p>– <strong>Perfect for Last-Minute Gatherings or Busy Weeknights</strong>: Whether you’re hosting an impromptu dinner or looking for a quick weekday treat, this recipe is ideal for those who want something special without the hassle of baking.</p>
</p>
<h4>Versatility: Customization Options</h4>
</p>
<p>No-bake desserts are incredibly versatile, allowing for numerous variations to suit personal tastes.</p>
</p>
<p>– <strong>Substitutions for Different Flavor Profiles</strong>: Feel free to experiment with different fruits, such as blueberries or raspberries, or even swap out the strawberry for a tropical flavor like mango or passion fruit. You can also try different flavored extracts to elevate the cheesecake filling.</p>
</p>
<p>– <strong>Adjusting Sweetness Levels for Personal Preferences</strong>: If you prefer a less sweet dessert, adjust the sugar in the cream cheese mixture or use a sugar substitute that suits your dietary needs.</p>
</p>
<h4>Healthier Alternatives: Making It Your Own</h4>
</p>
<p>This recipe can easily be adapted to meet various dietary preferences while still being delicious.</p>
</p>
<p>– <strong>Suggestions for Using Healthier Ingredients</strong>: Opt for low-fat cream cheese or Greek yogurt to reduce the fat content, or use whole grain graham crackers for the crust to increase fiber.</p>
</p>
<p>– <strong>Adapting the Recipe for Dietary Restrictions</strong>: For gluten-free options, substitute the graham cracker crust with crushed gluten-free cookies or a nut-based crust. You can also find dairy-free cream cheese alternatives for a vegan version of this cheesecake.</p>
</p>
<h3>Conclusion: Savoring the Sweetness of No-Bake Strawberry Cheesecake Cups</h3>
</p>
<p>The Dreamy No-Bake Strawberry Cheesecake Cups are not only a treat for the taste buds but also a celebration of simplicity and creativity in dessert making. With their rich flavors and stunning presentation, these cups are sure to impress anyone at your table. Whether enjoyed on a sunny afternoon or as a delightful conclusion to a special dinner, they offer a taste of summer that can be relished year-round.</p>
</p>
<p>Embrace the joy of no-bake desserts and savor every spoonful of this luscious creation, knowing that it was crafted with love and care. By following this easy-to-make recipe, you can bring smiles to the faces of friends and family, proving that deliciousness can be simple and delightful at the same time. Enjoy the sweetness of life one cheesecake cup at a time!</p>
</div>

In the world of desserts, few things can rival the freshness and vibrancy of a strawberry cheesecake. With its luscious, creamy texture and the bright, sweet-tart flavor of strawberries, this classic treat has earned a beloved spot in the hearts of dessert enthusiasts everywhere. However, the process of baking can often be a daunting task, especially during the warm summer months when the last thing you want to do is turn on the oven. Enter the Dreamy No-Bake Strawberry Cheesecake Cups—a delightful twist on the traditional recipe that allows you to indulge without the hassle of baking.

No-Bake Strawberry Cheesecake Cups

Discover the joy of making Dreamy No-Bake Strawberry Cheesecake Cups, the perfect summer treat. This simple, hassle-free recipe features a creamy cheesecake filling layered with fresh strawberries atop a crunchy graham cracker crust. Whether you're hosting a gathering or enjoying a quiet day at home, these individual cups are sure to impress. Follow our step-by-step guide to create these delightful desserts that are as beautiful as they are delicious. Treat yourself and your loved ones to this refreshing, no-bake indulgence today!

Ingredients
  

1 cup graham cracker crumbs

1/4 cup granulated sugar

1/2 cup unsalted butter, melted

1 (8 oz) package cream cheese, softened

1/2 cup powdered sugar

1 tsp vanilla extract

1 cup heavy whipping cream

1 cup fresh strawberries, hulled and sliced

Extra strawberries for garnish

Mint leaves for garnish (optional)

Instructions
 

Prepare the crust: In a medium bowl, mix together graham cracker crumbs and granulated sugar. Pour in the melted butter and combine until the mixture resembles wet sand.

    Assemble the crust: Divide the mixture evenly into the bottom of serving cups or ramekins, pressing it down gently to create an even layer. Set aside.

      Make the cheesecake filling: In a large bowl, beat the softened cream cheese with an electric mixer until smooth. Gradually add the powdered sugar, followed by the vanilla extract, mixing until well combined.

        Whip the cream: In a separate bowl, whip the heavy cream until stiff peaks form. Carefully fold the whipped cream into the cream cheese mixture until fully incorporated.

          Layer the filling: Spoon or pipe the cheesecake filling over the crust in each cup, smoothing the tops as needed.

            Add strawberries: Layer sliced strawberries on top of the cheesecake filling in each cup, pressing them gently into the filling.

              Chill: Refrigerate the cheesecake cups for at least 2 hours to allow them to set properly.

                Serve: Before serving, garnish with additional strawberry slices and mint leaves if desired. Enjoy!

                  Prep Time, Total Time, Servings: 20 minutes | 2 hours (plus chilling) | 4 servings

                    WANT TO SAVE THIS RECIPE?

                    Leave a Comment

                    Recipe Rating