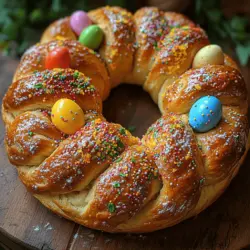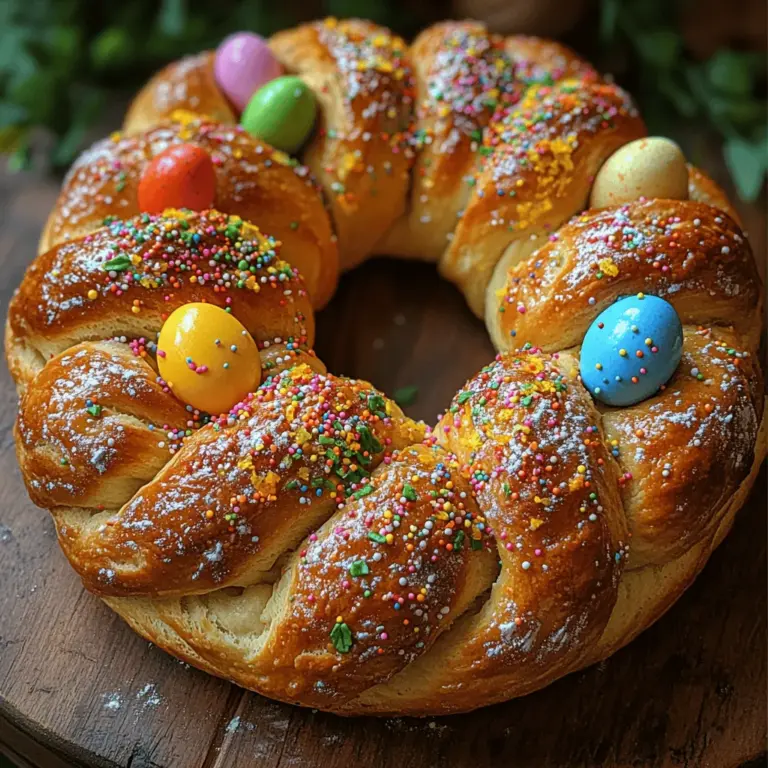
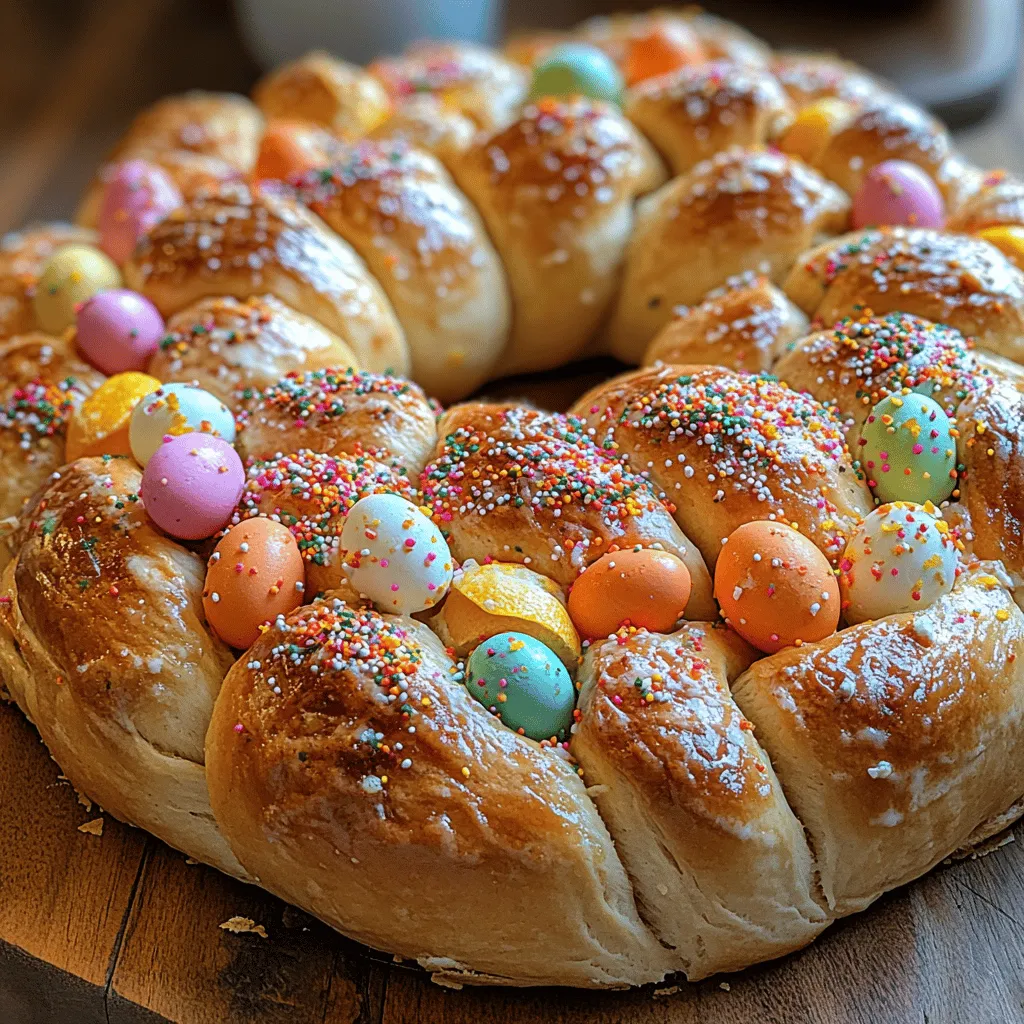
Easter is a time of celebration, renewal, and rich culinary traditions, especially in Italy. One of the most beloved recipes that embodies these sentiments is Italian Easter Bread, or “Pane di Pasqua.” This sweet, braided bread is not only a delicious treat but also a vibrant symbol of rebirth and new beginnings, making it a perfect centerpiece for your holiday table. The bread is often adorned with colorful eggs, which add a festive touch and represent the joy of spring. In this article, we will explore the history and significance of Italian Easter Bread, break down its key ingredients, and guide you through the initial steps of preparing this delightful pastry.
The Cultural Significance of Italian Easter Bread
Understanding Easter Traditions in Italy
Easter, or “Pasqua,” is one of the most important holidays in Italy, marked by a wealth of traditions that vary from region to region. Food plays a central role in these celebrations, with families gathering to enjoy special meals that often include a variety of baked goods. Italian Easter Bread is made to celebrate the arrival of spring and the resurrection of Christ, reflecting the themes of hope and renewal.
In many Italian households, preparing Easter bread is a cherished tradition passed down through generations. The process of making and sharing this bread brings families together, often accompanied by stories of past Easters and the memories associated with this festive time. The act of braiding the dough and decorating it with colored eggs fosters a sense of creativity and togetherness, making the bread not just a culinary delight but also a work of art.
Symbolism of the Ingredients
The ingredients used in Italian Easter Bread are steeped in symbolism. At the heart of the recipe is the egg, a powerful symbol of new life and rebirth, which is why it is often included in many Easter traditions worldwide. In Italian Easter Bread, eggs are typically boiled and dyed, then nestled into the braided dough before baking. This adds a colorful and festive touch to the bread, while also reinforcing the themes of Easter.
The other ingredients, such as flour, sugar, and yeast, also carry their own meanings. Flour represents the body of Christ, while sugar symbolizes the sweetness of life and the joy of the resurrection. Yeast, essential for leavening the bread, signifies the miraculous nature of life and growth. Together, these ingredients create a delicious and meaningful dish that embodies the spirit of Easter.
Ingredients Breakdown for Italian Easter Bread
To successfully create Italian Easter Bread, it’s essential to gather the right ingredients. Each component plays a crucial role in achieving the perfect texture and flavor. Here’s a detailed breakdown of the key ingredients you’ll need:
Key Components of the Recipe
1. All-Purpose Flour: The foundation of your bread, all-purpose flour provides structure and texture. It’s important to choose a high-quality flour to ensure your bread has the right elasticity and chewiness.
2. Granulated Sugar: Sugar not only sweetens the dough but also helps in browning the crust during baking. It contributes to the overall flavor profile, creating a delightful balance between sweetness and the other savory elements.
3. Active Dry Yeast: This is a crucial ingredient for leavening your bread. Yeast ferments the sugars in the dough, producing carbon dioxide that causes the bread to rise. Using fresh yeast ensures your bread will have a light and airy texture.
4. Milk: Typically used in Italian Easter Bread, milk adds richness and tenderness to the dough. You can use whole milk for a creamier texture or opt for non-dairy alternatives if you have dietary restrictions.
5. Eggs: Eggs add flavor, richness, and moisture to the dough. They also help bind the ingredients together, contributing to the soft, tender crumb of the bread.
6. Butter: Softened butter enriches the dough and enhances its flavor. It also provides a tender crumb and contributes to the overall decadence of the bread.
7. Salt: A small amount of salt is essential for balancing flavors and enhancing the overall taste of the bread. It also helps strengthen the dough structure.
8. Zest of Orange or Lemon: The addition of citrus zest provides a fresh, aromatic flavor that complements the sweetness of the bread. It’s a traditional component that adds a lovely fragrance to the final product.
Variations and Substitutions
While traditional Italian Easter Bread is beloved for its classic ingredients, there are plenty of ways to customize the recipe to suit your dietary needs or preferences. Here are some variations and substitutions you might consider:
– Gluten-Free Flour: For those with gluten sensitivities, a gluten-free flour blend can be used as a substitute for all-purpose flour. Make sure to select a blend that is designed for baking to ensure the best results.
– Dairy-Free Milk: If you prefer to avoid dairy, you can replace milk with almond milk, soy milk, or oat milk. Just be sure to choose an unsweetened variety to maintain the flavor balance.
– Sweeteners: For a healthier alternative, consider using honey or maple syrup in place of granulated sugar. Keep in mind that this may affect the dough’s texture and rising time.
– Add-Ins: Feel free to add dried fruit, such as raisins or cranberries, or nuts for added texture and flavor. You can also incorporate spices like cinnamon or nutmeg for a warm, aromatic twist.
Step-by-Step Instructions for Making Italian Easter Bread
Now that you have an understanding of the rich history and key components of Italian Easter Bread, it’s time to dive into the preparation process. Here are the initial steps to get you started on your baking journey.
Activating the Yeast
The first crucial step in making Italian Easter Bread is activating the yeast. This process is essential to ensure that your bread rises properly and achieves a light, fluffy texture. Here’s how to do it:
1. Warm the Milk: Begin by gently warming your milk until it’s lukewarm (around 100°F or 37°C). It should feel warm to the touch but not hot, as excessive heat can kill the yeast.
2. Add Sugar: Stir in a tablespoon of granulated sugar with the warm milk. The sugar will feed the yeast and help it activate.
3. Sprinkle the Yeast: Sprinkle the active dry yeast over the surface of the milk mixture. Allow it to sit for about 5-10 minutes. You’ll know it’s ready when the mixture becomes foamy, indicating that the yeast is alive and active.
Mixing and Combining Ingredients
Once your yeast is activated, it’s time to combine the dry and wet ingredients. Follow these steps for a smooth and well-integrated dough:
1. Combine Dry Ingredients: In a large mixing bowl, whisk together the all-purpose flour and salt. This ensures that the salt is evenly distributed and prevents any clumping.
2. Add Wet Ingredients: Create a well in the center of the flour mixture and add the activated yeast mixture, softened butter, eggs, and citrus zest.
3. Mix the Dough: Using a wooden spoon or your hands, start mixing the ingredients together until they begin to form a shaggy dough. It’s normal for the mixture to be slightly sticky at this stage.
Kneading for Perfection
Kneading is an essential step in developing the gluten structure of your bread, which contributes to its chewiness and overall texture. Here’s how to knead your dough effectively:
1. Transfer to a Floured Surface: Lightly flour your work surface and turn the dough out onto it.
2. Knead the Dough: Using your hands, begin to knead the dough by folding it in half, pressing it down with the palms of your hands, and then rotating it a quarter turn. Repeat this process for about 8-10 minutes, or until the dough becomes smooth and elastic.
3. Check for Doneness: To test if your dough is ready, perform the “windowpane test.” Take a small piece of dough and stretch it gently. If it forms a thin, translucent membrane without tearing, it’s properly kneaded.
Following these steps will set a solid foundation for creating your stunning Italian Easter Bread. Stay tuned for the next part, where we will continue with the process of shaping and baking this beautiful bread, along with tips for achieving the perfect finish.
Kneading Process and Its Significance
Kneading is a crucial step in making Italian Easter Bread, as it plays a significant role in developing gluten. Gluten is the protein found in wheat flour that, when activated through moisture and movement, creates a stretchy and elastic network within the dough. This network is essential for trapping air bubbles produced by yeast during fermentation, giving the bread its structure, chewiness, and overall texture.
To knead the dough effectively, start by turning it out onto a lightly floured surface. Use the palms of your hands to push the dough away from you, fold it back over itself, and then rotate it a quarter turn. Repeat this process for about 8-10 minutes until the dough is smooth, elastic, and slightly tacky to the touch. If you notice the dough sticking excessively, sprinkle a little more flour on the surface, but be careful not to add too much, as this can alter the bread’s final texture. Kneading not only develops the gluten but also helps integrate the ingredients thoroughly, resulting in a uniform dough that rises beautifully.
The Importance of Rising
The rising process of Italian Easter Bread is equally important and consists of two distinct rises: the first and the second. Each rise serves a unique purpose in developing flavor and texture.
The first rise, known as fermentation, allows the yeast to consume the sugars in the dough, producing carbon dioxide gas that causes the dough to expand. This initial rise typically takes about 1 to 2 hours, depending on the temperature of your kitchen. To create an ideal environment for rising, place the dough in a warm, draft-free area. You can turn on your oven for a few minutes, then turn it off and place the covered bowl inside, or use a proofing setting if your oven has one.
After the first rise, gently punch down the dough to release any trapped air and redistribute the yeast. The second rise, which occurs after shaping the dough, is essential for achieving a light and airy texture. This rise usually lasts around 30 to 45 minutes. Again, ensure a warm environment for optimal yeast activity. Cover the dough with a clean kitchen towel or plastic wrap to prevent it from drying out.
Shaping and Braiding
Once the dough has risen sufficiently, it’s time to shape and braid it, giving the bread its traditional appearance. Start by turning the dough out onto a floured surface and dividing it into three equal parts. Roll each part into long strands, about 12-14 inches in length. The goal is to create three strands that are uniform in size and shape.
To braid, place the three strands side by side and pinch the top ends together. Begin by taking the right strand and crossing it over the middle strand, then take the left strand and cross it over the new middle strand. Continue this pattern, alternating sides until you reach the end. Pinch the ends together to secure the braid, tucking them underneath for a neat finish. This traditional braiding technique not only enhances the bread’s visual appeal but also creates a lovely texture.
Preparing for Baking
Before baking, it is essential to prepare the dough for the oven properly. Start by preheating your oven to 350°F (175°C) for even baking. While the oven heats up, you can give your braided bread a final rise for about 15-20 minutes.
Next, prepare an egg wash by whisking one egg with a tablespoon of milk or water. This mixture will give the bread a beautiful golden-brown crust as it bakes. Using a pastry brush, gently apply the egg wash over the entire surface of the braid, ensuring even coverage. At this stage, you can also sprinkle decorative colored sugar or nonpareils on top for that festive touch, which is a hallmark of Italian Easter Bread.
Baking the Bread to Golden Perfection
Understanding Oven Temperatures
Preheating the oven is crucial for achieving the best results. An adequately heated oven ensures that the bread rises quickly and evenly, preventing it from becoming dense. Baking at the right temperature also allows the crust to form beautifully, providing that desirable contrast between the soft interior and the crusty exterior.
Recognizing When the Bread is Done
To determine when your Italian Easter Bread is perfectly baked, look for a few visual cues. The bread should be a rich golden-brown color, and the crust should feel firm to the touch. You can also perform a toothpick test: insert a toothpick or skewer into the center of the bread; if it comes out clean, the bread is done. Another method is to tap the bottom of the loaf; a hollow sound indicates that it’s ready to be removed from the oven.
Serving Suggestions for Italian Easter Bread
Italian Easter Bread isn’t just a treat for the eyes; it’s also incredibly versatile when it comes to serving options. Here are several ways to enjoy this delightful bread:
1. Breakfast Delight: Serve slices toasted with butter or cream cheese for a delicious breakfast option. Pair it with a side of fresh fruit or a steaming cup of coffee for a well-rounded meal.
2. Dessert Option: Enjoy it as a dessert by slicing it and drizzling a touch of honey or maple syrup over the top, or serve it alongside your favorite ice cream for a delightful contrast of flavors and textures.
3. Pairing Ideas: Italian Easter Bread pairs well with a variety of beverages. A glass of fresh-squeezed orange juice or a light sparkling wine complements the bread’s sweetness perfectly. For a cozy evening, consider serving it with a warm cup of tea.
Storing and Reheating
To keep your Italian Easter Bread fresh, store it in an airtight container or wrap it tightly in plastic wrap. It can be kept at room temperature for up to three days. If you want to extend its shelf life, consider freezing the bread. Wrap it tightly in plastic wrap and then in aluminum foil before placing it in the freezer. It can be frozen for up to three months.
When you’re ready to enjoy it again, simply remove it from the freezer and let it thaw at room temperature. To refresh the bread, you can warm it in the oven at 350°F (175°C) for about 10-15 minutes, which will help restore its soft texture and enhance its flavor.
Conclusion: The Joy of Baking Italian Easter Bread
Creating Italian Easter Bread is more than just a culinary endeavor; it is a heartfelt expression of tradition, family, and the spirit of renewal that Easter embodies. The process of kneading, rising, shaping, and baking not only results in a beautiful and delicious bread but also serves as a reminder of the joy of sharing homemade food with loved ones.
As you gather around the table to enjoy this delightful bread, you partake in a time-honored ritual that connects generations and nurtures community spirit. Whether you serve it fresh from the oven or share it with friends and family, Italian Easter Bread is a symbol of celebration, love, and the joy of togetherness during the Easter season. Embrace the experience of making this cherished recipe, and let it bring warmth and happiness to your home.