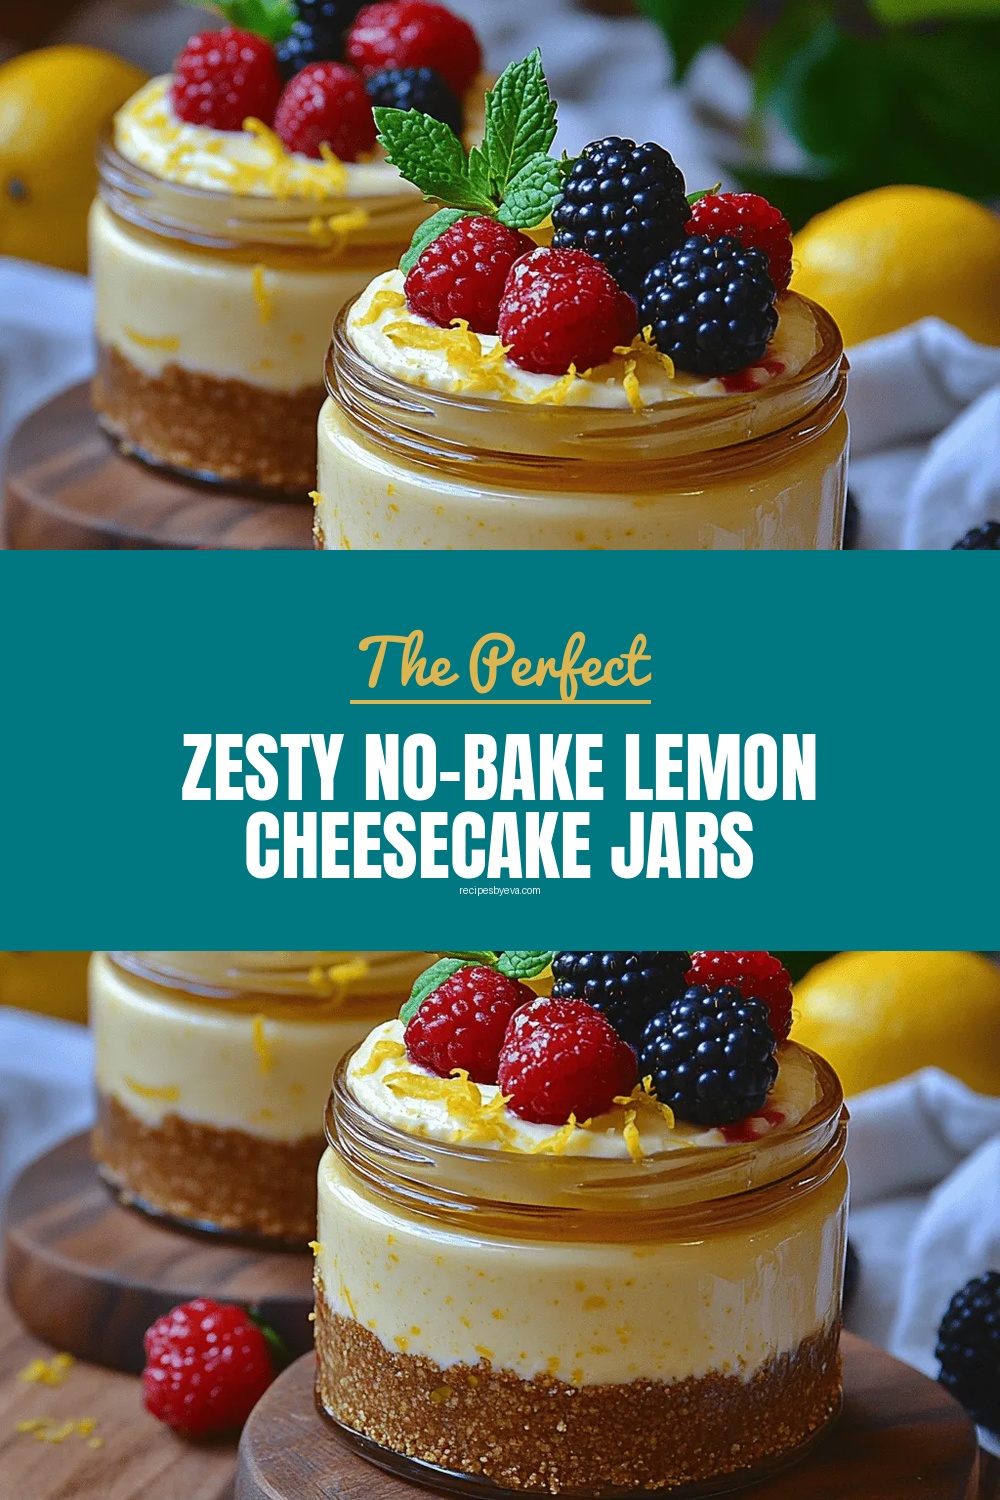
Zesty No-Bake Lemon Cheesecake Jars
 Save
Save
Imagine a dessert that looks as elegant as a patisserie treat yet requires no oven, no fuss, and delivers a burst of bright, tangy flavor with every spoonful. Zesty No‑Bake Lemon Cheesecake Jars capture that magic in a portable, glass‑jar presentation that’s perfect for picnics, potlucks, or a quick after‑dinner indulgence.
What makes this recipe truly special is the balance of creamy, slightly sweet cheesecake filling with a zingy lemon curd that cuts through the richness, all nestled on a buttery graham‑cracker crust. The result is a harmonious blend of textures and flavors that feels both sophisticated and comfortingly familiar.
This dessert will win over anyone who loves citrus, fans of cheesecake, and those who appreciate a make‑ahead treat. Serve it at brunch gatherings, summer garden parties, or as a personal pick‑me‑up after a long day.
The process is straightforward: crush the crust, whisk the filling, layer, chill, and garnish. No baking, no complicated techniques—just a few simple steps that let the fresh lemon shine.
Why You'll Love This Recipe
Bright Citrus Punch: Fresh lemon zest and juice give the cheesecake a lively, refreshing tang that awakens the palate without overwhelming sweetness.
No‑Bake Simplicity: Skip the oven entirely—just chill the jars, making this dessert ideal for hot weather or kitchens without a reliable bake setting.
Portable Presentation: Individual jars look polished, are easy to transport, and eliminate the need for cutting and serving a large cake.
Customizable Layers: Swap crusts, add fresh berries, or drizzle caramel for endless variations that keep the recipe fresh and exciting.
Tips & Tricks
Perfecting the Recipe
Room‑Temp Cream Cheese: Soften the cheese for at least 15 minutes before mixing; it blends more smoothly and prevents lumps in the filling.
Press the Crust Firmly: Use the back of a spoon or a small glass to compact the crumbs. A tight crust holds up better when the jar is moved.
Don’t Over‑Heat the Curd: Keep the heat low and stir constantly; once the mixture thickens, remove it immediately to avoid a grainy texture.
Chill Overnight for Depth: Allowing the jars to rest overnight intensifies the lemon flavor and yields a firmer, slice‑able texture.
Flavor Enhancements
Add a teaspoon of finely grated ginger to the lemon curd for a subtle heat, or stir in a splash of high‑quality vanilla bean paste into the cheesecake filling for extra depth. A drizzle of honey‑infused olive oil over the finished jar adds a floral note that pairs beautifully with citrus.
Common Mistakes to Avoid
Avoid using cold cream cheese straight from the fridge—it creates a grainy filling. Also, never skip the plastic‑wrap step on the curd; a skin will form and change the smooth mouthfeel. Finally, don’t over‑fill the jars; leave a small gap for the garnish to sit without spilling.
Pro Tips
Use a Food Processor for Crust: Pulse the graham crackers for an even, fine crumb that binds more uniformly.
Strain the Lemon Curd: After cooking, push the curd through a fine‑mesh sieve to eliminate any tiny cooked‑egg bits for a silkier finish.
Seal Jars Tightly: A proper seal prevents the cheesecake from absorbing fridge odors and keeps the texture pristine.
Garnish Just Before Serving: Add fresh berries and whipped cream right before plating to maintain their brightness and prevent sogginess.
Variations
Ingredient Swaps
Replace the graham‑cracker crust with crushed shortbread cookies or almond flour for a gluten‑free base. Swap heavy cream for coconut cream to add a tropical note. For a sweeter curd, substitute honey with maple syrup or a low‑calorie agave nectar. Each swap changes texture and flavor while keeping the no‑bake method intact.
Dietary Adjustments
Use a plant‑based cream cheese (such as almond or soy) for a vegan version, and replace the egg yolk in the curd with 1 Tbsp cornstarch mixed with water as a thickener. For a low‑sugar option, cut the powdered sugar in half and use a sugar substitute that measures cup‑for‑cup.
Serving Suggestions
Serve the jars on a rustic wooden board for a brunch buffet, or pair them with a glass of chilled Prosecco for an elegant dessert. Mini mint leaves tucked into the garnish add a fresh aroma, while a drizzle of raspberry coulis offers a contrasting tartness that brightens the lemon flavor.
Storage Info
Leftover Storage
Allow any leftover jars to cool completely, then seal them tightly with their original lids. Store in the refrigerator for up to 4 days. For longer keeping, transfer the cheesecake layers to a freezer‑safe container, cover with plastic wrap, and freeze for up to 3 months. Thaw overnight in the fridge before serving.
Reheating Instructions
Because this is a no‑bake dessert, reheating is rarely needed. If you prefer a slightly softened texture, let the jar sit at room temperature for 15 minutes before serving. For a warm twist, gently microwave the jar (without the lid) for 20‑30 seconds, then top with fresh berries.
Frequently Asked Questions
Can I make these jars ahead of time?
What if I don’t have fresh lemons?
Can I use a different sweetener for the curd?
How long can the lemon curd be stored separately?
This Zesty No‑Bake Lemon Cheesecake Jar recipe delivers a bright, creamy dessert with minimal effort and maximum visual impact. You’ve learned how to craft a flawless crust, a silky filling, and a glossy lemon curd, plus a suite of tips, variations, and storage tricks to keep the dish fresh and adaptable. Feel free to experiment with toppings, crusts, or sweeteners—making it truly your own. Enjoy every spoonful of sunshine in a jar!
Zesty No-Bake Lemon Cheesecake Jars
Delicious Zesty No-Bake Lemon Cheesecake Jars
Ingredients
Crust
- 1 ½ cups graham‑cracker crumbs
- 3 Tbsp unsalted butter, melted
- 2 Tbsp granulated sugar
Cheesecake Filling
- 8 oz cream cheese, softened
- ¼ cup powdered sugar
- ¼ cup heavy cream
- 2 tsp vanilla extract
Lemon Curd Topping
- ¼ cup fresh lemon juice (about 2 lemons)
- Zest of 1 lemon
- 2 Tbsp honey or agave syrup
- 1 egg yolk
Optional Garnish
- Fresh berries (raspberries, blueberries)
- Whipped cream
- Additional lemon zest for dusting
Instructions
Cooking the Lemon Curd
- Whisk the Base. In a small saucepan, whisk together lemon juice, lemon zest, honey, and the egg yolk until the mixture is smooth and slightly frothy. This prevents the yolk from curdling later.
- Heat Gently. Place the saucepan over low‑medium heat, stirring constantly with a silicone spatula. The curd will thicken after 3–4 minutes; you’ll notice it coat the back of the spoon. Do not let it boil—once it reaches a gentle simmer, remove it from heat to avoid scrambling the egg.
- Cool Slightly. Transfer the curd to a shallow bowl and press a piece of plastic wrap directly onto the surface. This stops a skin from forming and speeds cooling. Let it reach room temperature before layering.
Similar Recipes
 Desserts
Decadent Delight: Guilt-Free Greek Yogurt Brownies
Delicious Decadent Delight: Guilt-Free Greek Yogurt Brownies
 Desserts
Delightful Chocolate Dipped Strawberries: A Perfect Treat for Any Occasion
Delicious Delightful Chocolate Dipped Strawberries: A Perfect Treat for Any Occasion
 Desserts
Crispy Baked Cinnamon Apple Chips
Delicious Crispy Baked Cinnamon Apple Chips
 Desserts
Choco-Peanut Butter Paradise Dump Cake Recipe
Delicious Choco-Peanut Butter Paradise Dump Cake Recipe
 Desserts
Delicious Churro Cheesecake Bars: A Sweet Fusion of Flavors
Delicious Delicious Churro Cheesecake Bars: A Sweet Fusion of Flavors
 Desserts
Pumpkin Spice Energy Bites: A Deliciously Healthy Snack
Delicious Pumpkin Spice Energy Bites: A Deliciously Healthy Snack
 Desserts
Frozen Yogurt Oatmeal Jam Bites: A Healthy Snack Delight
Delicious Frozen Yogurt Oatmeal Jam Bites: A Healthy Snack Delight
 Desserts
Pineapple Coconut Panna Cotta: A Tropical Delight
Delicious Pineapple Coconut Panna Cotta: A Tropical Delight

Eva
I cook these recipes at home before they ever land here — simple ingredients, clear steps.