Introduction
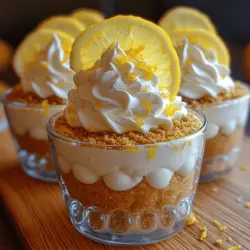
No-bake desserts have gained immense popularity, and it’s easy to see why. They offer the perfect solution for those who want to indulge in something sweet without the hassle of baking. Among these delightful treats, the zesty no-bake lemon cheesecake cups stand out, combining the refreshing flavors of lemon with the creamy richness of cheesecake. This dessert is not only easy to prepare, but it also appeals to all palates, making it an excellent choice for any occasion.
In this article, we will walk you through everything you need to know to make these delectable lemon cheesecake cups. You can expect a comprehensive recipe, tips for achieving the perfect texture, and creative serving suggestions that will impress your guests. Whether it’s a summer barbecue, a birthday party, or just a simple family gathering, these cheesecake cups will be a hit.
The Allure of No-Bake Desserts
One of the main attractions of no-bake recipes is their convenience. With little to no cooking required, these desserts save you time and energy, allowing you to focus on enjoying your gathering rather than stressing in the kitchen. No-bake desserts are also versatile; they can be prepared ahead of time, leaving you free to mingle with guests or simply relax and enjoy the moment.
No-bake lemon cheesecake cups specifically shine in the world of desserts. The bright, zesty flavor of lemon is refreshing, making it an ideal choice for warm weather and festive occasions alike. The creamy texture of the cheesecake filling paired with the crumbly crust creates a delightful contrast that satisfies any sweet craving. While traditional cheesecakes require baking and cooling time, these no-bake cups are quick and easy to assemble, ensuring you can whip up a delicious dessert in no time.
Whether it’s a sunny picnic or a cozy dinner party, no-bake lemon cheesecake cups are perfect for various occasions. Their individual servings make them both appealing and practical, allowing for easy portioning and minimal mess. As a standout dessert, they leave a lasting impression on your guests, making any gathering feel special.
Ingredients Breakdown
To create the perfect no-bake lemon cheesecake cups, you’ll need to gather a few key ingredients. Each component plays a vital role in achieving the right flavor and texture for this delightful dessert.
For the Crust
1. Graham Cracker Crumbs: The foundation of your cheesecake cups, quality graham cracker crumbs are essential for a flavorful and crunchy crust. Opt for finely crushed crumbs to ensure a smooth texture that holds together well. You can easily crush your own graham crackers in a food processor or purchase pre-packaged crumbs for convenience.
2. Unsalted Butter: Used to bind the crumbs together, unsalted butter adds richness to the crust. Make sure to melt it before mixing it with the graham cracker crumbs for even distribution.
3. Sugar: A small amount of granulated sugar enhances the sweetness of the crust and balances the tanginess of the cheesecake filling. It’s important to mix the sugar thoroughly with the crumbs and melted butter to create a cohesive mixture.
For the Cheesecake Filling
1. Softened Cream Cheese: This is the star of the show! Using softened cream cheese is crucial for achieving a smooth and creamy filling. Be sure to set the cream cheese out at room temperature for about 30 minutes before you begin, as cold cream cheese can lead to a lumpy filling.
2. Powdered Sugar: This ingredient adds sweetness and helps to create a silky texture in the filling. Unlike granulated sugar, powdered sugar dissolves easily, preventing any grittiness in your cheesecake cups.
3. Fresh Lemon Juice and Zest: The zest and juice of fresh lemons provide the bright, zesty flavor that makes these cheesecake cups refreshing. The zest contains essential oils that enhance the lemon flavor, while the juice adds acidity and brightness, balancing the richness of the cream cheese.
Garnishing Options
To elevate your no-bake lemon cheesecake cups, consider garnishing them with:
– Whipped Cream: A dollop of whipped cream on top not only adds a touch of elegance but also enhances the creaminess of the dessert.
– Lemon Slices or Zest: A slice of lemon or a sprinkle of zest on top can add visual appeal and a burst of flavor.
– Fresh Berries: Strawberries or blueberries complement the lemon flavor beautifully and add a pop of color.
These garnishes not only enhance the presentation but also contribute additional flavor dimensions that will delight your taste buds.
Step-by-Step Instructions
Preparing the Crust
1. Combine Ingredients: In a mixing bowl, combine the graham cracker crumbs and sugar. Stir until well mixed. Next, add the melted unsalted butter and mix until the crumbs are fully coated. The mixture should have a damp, sand-like consistency.
2. Pressing into Cups: Using your fingers or the back of a spoon, press the crumb mixture firmly into the bottom of your serving cups. Ensure an even layer across the base, making it compact enough to hold together when serving. If you’re using larger cups, you may want to create a thicker crust.
3. Chill the Crust: Once the crust is pressed into the cups, place them in the refrigerator to set while you prepare the cheesecake filling. Chilling will help the crust firm up, making it easier to layer the filling on top.
Making the Cheesecake Filling
1. Prepare the Cream Cheese: In a large mixing bowl, add the softened cream cheese. Using an electric mixer, beat the cream cheese on medium speed until it’s smooth and creamy, free of lumps. This step is vital for ensuring that your cheesecake filling has a velvety texture.
2. Incorporate Sugar: Gradually add the powdered sugar to the cream cheese while mixing on low speed. Beat until well combined and fluffy. Taste the mixture and adjust the sweetness according to your preference.
3. Add Lemon Juice and Zest: With the mixer still running, slowly add in the fresh lemon juice and zest. Beat until everything is well incorporated. The filling should be light and airy, with a vibrant lemon flavor that shines through.
4. Assemble the Cups: Carefully spoon or pipe the cheesecake filling into each cup, over the chilled crust. Fill them generously but avoid overfilling to prevent spills. Smooth the tops with a spatula for a polished look.
5. Chill Again: Once all the cups are filled, return them to the refrigerator to chill for at least 2-4 hours, or until the filling is set. This step is crucial for achieving the right consistency and flavor development.
With these steps completed, your zesty no-bake lemon cheesecake cups will be well on their way to becoming a standout dessert at your next gathering. Stay tuned for more tips and serving suggestions in the next part of this article!
Techniques for Achieving a Smooth Filling
Creating a smooth and creamy filling for your Zesty No-Bake Lemon Cheesecake Cups is crucial for the overall texture and mouthfeel of the dessert. Start by ensuring all your ingredients, particularly the cream cheese, are at room temperature. This step helps to achieve a lump-free mixture that blends seamlessly. Use a hand mixer or stand mixer to beat the cream cheese until it is light and fluffy, usually about two to three minutes. Gradually incorporate the sugar, lemon juice, and zest, continuing to mix until fully integrated.
For an ultra-smooth consistency, consider sifting the powdered sugar before adding it to the cream cheese mixture. This will prevent any graininess and enhance the creaminess of your cheesecake filling. If you notice lumps while mixing, stop and use a spatula to break them up before continuing.
Importance of Folding Whipped Cream to Maintain Fluffiness
One of the key elements that make no-bake cheesecakes light and airy is the incorporation of whipped cream. Once you whip the heavy cream to soft peaks, it’s vital to fold it gently into the cream cheese mixture. This technique preserves the airiness of the whipped cream, ensuring your cheesecake cups are fluffy rather than dense.
To fold, use a rubber spatula to lift the whipped cream from the bottom of the bowl and gently incorporate it into the cream cheese mixture. Repeat this motion, rotating the bowl as you go, until the mixture is fully combined. Be cautious not to over-mix, as this can deflate the whipped cream and lead to a heavier texture.
Assembling the Cups
Now that you have your smooth cheesecake filling ready, it’s time to assemble your no-bake lemon cheesecake cups. Start with your base layer. If you opted for crushed graham crackers or cookies, spoon a generous amount into the bottom of each serving cup. Using the back of a spoon, gently press the crumbs down to create a firm base.
Next, take your cheesecake filling and spoon it on top of the crust, filling each cup about three-quarters full. For a clean and polished look, you can use a piping bag fitted with a wide round tip to fill the cups. This method not only looks professional but also ensures even distribution of the filling.
Presentation Tips for Layering
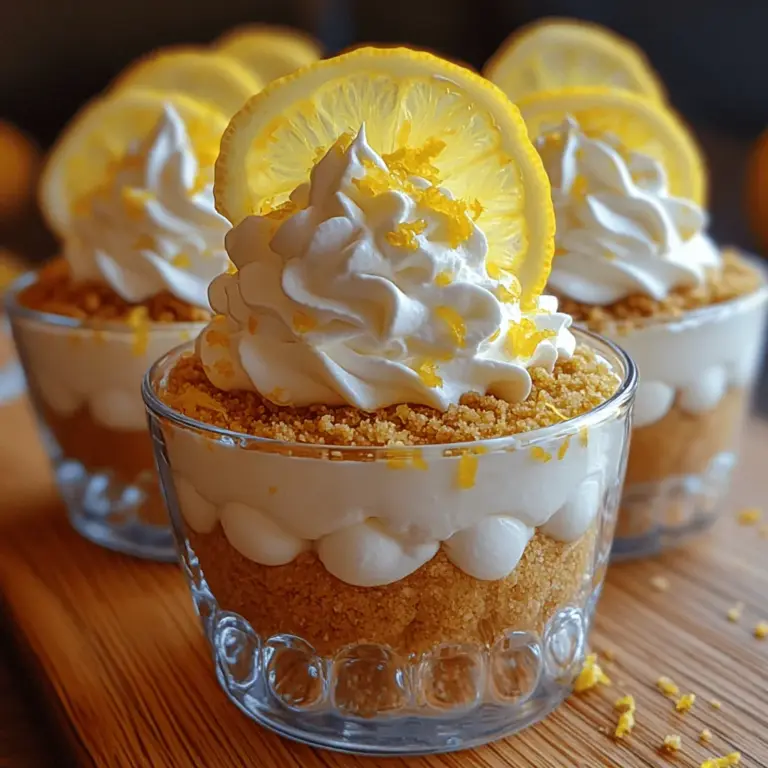
When presenting your Zesty No-Bake Lemon Cheesecake Cups, the layering is as significant as the taste. Consider using clear cups or jars to showcase the beautiful layers of crust and filling. For an added touch, you can create multiple layers by alternating between the crust and the cheesecake filling.
To enhance the visual appeal, use a spatula or the back of a spoon to smooth the top of the filling before adding any garnishes. You can also top each cup with a dollop of whipped cream and a sprinkle of lemon zest or a few edible flowers for an elegant finish.
Suggestions for Serving Size and Portion Control
When it comes to serving no-bake lemon cheesecake cups, portion control is essential, especially if you’re serving at a larger gathering. These cups are rich and flavorful, so smaller portions can be more satisfying than large servings. Aim for 4 to 6-ounce cups, which provide just the right amount of cheesecake without overwhelming your guests.
If you’re preparing for a special occasion, consider creating a variety of desserts and using the cheesecake cups as one of several options. This way, guests can sample different flavors and textures, making for an enjoyable dessert experience.
Chilling and Setting the Cheesecake
Chilling is a vital step in the no-bake cheesecake process. It allows the filling to firm up, ensuring that your cheesecake cups have the perfect texture. After assembling the cups, cover them with plastic wrap or a lid and place them in the refrigerator.
Recommended Chilling Times for Optimal Results
For best results, chill your cheesecake cups for at least 4 hours, though overnight is ideal. This extended chilling time allows the flavors to meld and the filling to set properly. The longer you chill the cups, the easier they will be to serve and the more pronounced the lemon flavor will become.
How Chilling Enhances Flavors and Makes Servings Easier
The chilling process not only helps with the texture but also enhances the overall flavor profile of your cheesecake. As it sits, the acidity of the lemon juice balances with the sweetness, creating a harmonious taste that’s refreshing and delightful. Additionally, once set, the cups will hold their shape better during serving, making them less likely to collapse or spill.
Garnishing Your Cheesecake Cups
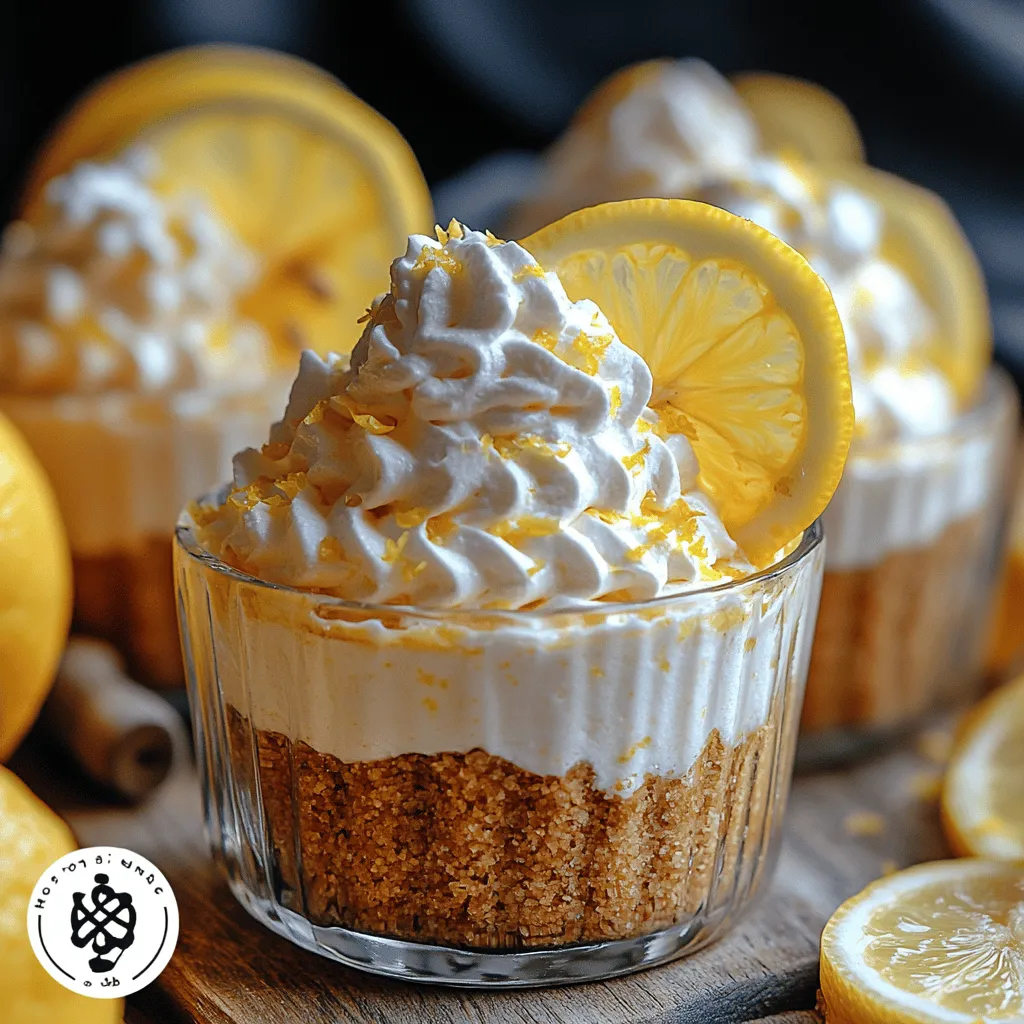
Garnishing is where you can let your creativity shine! While a simple dollop of whipped cream and a sprinkle of lemon zest is perfect, there are plenty of ways to elevate your presentation further.
Creative Garnishing Ideas Beyond Basic Suggestions
Consider adding fresh berries like blueberries, raspberries, or strawberries on top of each cheesecake cup. Not only do they add bursts of color, but they also provide a complementary tartness that pairs well with the lemon flavor. For a more decorative touch, try edible flowers, such as pansies or nasturtiums, which can add a beautiful pop of color and a touch of sophistication.
Importance of Visual Appeal in Dessert Presentation
Visual appeal is crucial for desserts, as people often eat with their eyes first. A beautifully garnished cheesecake cup can entice your guests even before they take their first bite. The vibrant colors from the fruits and the bright lemon zest create an inviting presentation that’s sure to impress.
Seasonal Variations for Garnishes
You can easily adapt your garnishing based on the seasons. In spring and summer, opt for fresh fruits and edible flowers. In the fall, consider garnishing with spiced nuts or a drizzle of caramel sauce. Winter gatherings can benefit from toppings like chocolate shavings or a dusting of cocoa powder for a festive touch.
Serving Suggestions and Pairings
Understanding when and how to serve your Zesty No-Bake Lemon Cheesecake Cups can enhance your dining experience.
Ideal Occasions for Serving No-Bake Lemon Cheesecake Cups
These cheesecake cups are versatile and perfect for various occasions, from casual family dinners to elegant gatherings. They’re an ideal dessert for summer barbecues, holiday celebrations, or even as a light treat after a heavy meal. Their refreshing lemon flavor makes them particularly suitable for warm weather, where a light dessert is preferred.
Beverage Pairings That Complement the Dessert
When it comes to beverage pairings, consider serving your cheesecake cups with refreshing drinks that enhance their flavor. Iced tea, sparkling lemonade, or a crisp white wine like Sauvignon Blanc can complement the zesty notes of the cheesecake. For a non-alcoholic option, try pairing with flavored sparkling water or herbal teas, which can provide a refreshing contrast.
How to Incorporate These Cheesecake Cups into a Dessert Table at Events
If you’re hosting a gathering, consider incorporating these cheesecake cups into a dessert table alongside other sweet treats. Their elegant presentation will stand out, and their individual servings make them easy for guests to grab and enjoy. Mix and match with other desserts like fruit tarts, mini cupcakes, or chocolate mousse for a delightful spread that caters to various tastes.
Storage and Shelf Life
Proper storage is essential to ensure your Zesty No-Bake Lemon Cheesecake Cups remain delicious and fresh for as long as possible.
Best Practices for Storing Leftovers
If you have any leftover cheesecake cups, cover them tightly with plastic wrap or store them in an airtight container. This will help prevent them from absorbing any odors from the refrigerator and keep them fresh.
How Long the Cheesecake Cups Can Be Kept in the Refrigerator
Stored properly, your cheesecake cups can last in the refrigerator for up to 5 days. However, for the best flavor and texture, it’s recommended to enjoy them within 3 days of making them.
Tips for Freezing and Thawing if Applicable
If you want to make your cheesecake cups in advance, you can freeze them. To do this, make sure to freeze them before garnishing. Once they are set, you can wrap each cup tightly in plastic wrap and place them in an airtight container. They can be frozen for up to 2 months.
When you’re ready to enjoy them, remove the cups from the freezer and let them thaw in the refrigerator overnight. Garnish just before serving to ensure the toppings remain fresh and visually appealing.
Conclusion
In summary, Zesty No-Bake Lemon Cheesecake Cups are a refreshing and delightful dessert that brings a taste of sunshine to any occasion. With their creamy filling, buttery crust, and bright lemon flavor, these cheesecake cups are sure to impress family and friends.
We encourage you to try this easy recipe and experience the joy of creating a simple yet delicious dessert at home. Whether it’s a warm summer evening or a festive gathering, these cheesecake cups are the perfect way to end any meal on a high note. Enjoy making them, and don’t hesitate to get creative with your flavors and presentations!