Introduction
Few desserts evoke the nostalgia and warmth of a home-cooked meal quite like strawberry-rhubarb pie. Its unique combination of sweetness from ripe strawberries and the tartness of rhubarb creates a flavor profile that is both refreshing and indulgent. This delightful pie has earned its place as a beloved classic in kitchens across America, often gracing tables during spring and summer gatherings, picnics, and holiday celebrations. The allure of strawberry-rhubarb pie lies not only in its vibrant taste but also in its rich history and the cherished memories it creates.
As the seasons shift, so too do the ingredients available to us. Strawberry-rhubarb pie perfectly encapsulates this seasonal shift, showcasing the first fruits of summer alongside the hardy rhubarb that heralds the arrival of warmer days. This pie is a celebration of agriculture’s bounty, a dish that invites friends and family to come together and share in its deliciousness. With its flaky crust and a luscious filling that bursts with flavor, making a strawberry-rhubarb pie at home is a rewarding experience that is sure to impress.
In this article, we will explore the origins of this iconic pie, the key ingredients that make it shine, and provide you with a step-by-step guide to crafting the perfect pie crust and filling. Get ready to dive into the world of strawberry-rhubarb pie and discover how to create this sweet-tart delight in your own kitchen.
The History of Strawberry-Rhubarb Pie
The origins of rhubarb can be traced back thousands of years to Asia, where it was initially cultivated for its medicinal properties. It wasn’t until the 18th century that rhubarb made its way to North America, where it quickly became popular among settlers. The tart stalks of rhubarb were often used in pies and jams, showcasing their versatility in sweet and savory dishes alike.
Strawberry-rhubarb pie, specifically, evolved as a way to combine the two ingredients into a harmonious dessert. Rhubarb’s tartness is beautifully complemented by the natural sweetness of strawberries, resulting in a balanced filling that has captivated taste buds for generations. Traditionally made in the spring when both strawberries and rhubarb are in season, this pie became a staple in American households, particularly in the Midwest, where both ingredients thrived.
This pie is more than just a dessert; it holds cultural significance in American cuisine. It represents the joy of summer harvest and has become a symbol of community and togetherness. Families gather to pick fresh strawberries and rhubarb from local farms, often sharing tips and techniques for making the perfect pie. In fact, many families have their own cherished recipes passed down through generations, each with a unique twist that reflects their personal touch.
As you embark on the journey of making strawberry-rhubarb pie, you’re not just creating a dessert; you’re participating in a culinary tradition that has stood the test of time. This pie embodies the spirit of seasonal cooking and the joy of sharing delicious food with loved ones.
Understanding the Ingredients
Creating a memorable strawberry-rhubarb pie starts with understanding the ingredients that make up this delightful dessert. Each component plays a crucial role in achieving the perfect balance of flavors and textures. Below, we break down the key ingredients that are essential for crafting this beloved pie.
All-Purpose Flour
The foundation of any good pie is its crust, and all-purpose flour is the best choice for achieving that ideal texture. It contains a balanced amount of protein that helps create a tender yet sturdy crust. For those looking to experiment, consider using a blend of all-purpose flour and whole wheat flour for a nuttier flavor and additional nutritional benefits.
Unsalted Butter
When it comes to pie crusts, the quality of the butter makes a significant difference. Unsalted butter is preferred because it allows you to control the amount of salt in your recipe. Using chilled butter is essential; when incorporated into the flour, it creates pockets of fat that result in a flaky crust. Ideally, the butter should be cut into small cubes and kept in the refrigerator until you’re ready to use it, ensuring it remains cold throughout the mixing process.
Fresh Strawberries and Rhubarb
Selecting the best quality produce is vital for the success of your pie. Look for ripe strawberries that are bright red, fragrant, and firm to the touch. Avoid strawberries that are overly soft or have blemishes, as these can affect the filling’s texture. For rhubarb, choose stalks that are crisp and firm, with vibrant color. The leaves of the rhubarb plant should be discarded, as they are toxic.
Granulated Sugar
Sugar plays a crucial role in balancing the tartness of the rhubarb and enhancing the sweetness of the strawberries. The amount of sugar can be adjusted based on your personal taste and the natural sweetness of the fruit. Keep in mind that the strawberries will release some juices during baking, and the sugar will help to create a syrupy filling that is both luscious and flavorful.
Cornstarch
Cornstarch is used in the filling to thicken the juices released from the strawberries and rhubarb as they bake. This ensures that your pie has a beautifully cohesive filling rather than a soupy mess. The cornstarch will help bind the juices from the fruit together, creating a smooth and delightful texture.
Spices and Flavorings
To elevate the overall taste of your pie, consider adding a sprinkle of spices and flavorings. A dash of cinnamon adds warmth and depth, while a splash of lemon juice brightens the flavors and balances the sweetness. Vanilla extract can also enhance the taste, providing a subtle aromatic note that complements the fruit beautifully.
Crafting the Perfect Pie Crust
A great pie begins with an exceptional crust. The crust is not merely a vessel for the filling; it is a foundational element that can elevate your pie from good to extraordinary. Below is a step-by-step guide to making the perfect pie crust, ensuring your strawberry-rhubarb pie has the flaky, buttery texture it deserves.
Step 1: Gather Your Ingredients
To make a classic pie crust, you will need the following ingredients:
– 2 ½ cups all-purpose flour
– 1 teaspoon salt
– 1 tablespoon granulated sugar
– 1 cup unsalted butter, chilled and cut into cubes
– 6-8 tablespoons ice water
Step 2: Mix Dry Ingredients
In a large mixing bowl, combine the all-purpose flour, salt, and sugar. Whisk the dry ingredients together until well combined. This step ensures that the salt and sugar are evenly distributed throughout the flour, which is essential for flavor.
Step 3: Incorporate the Butter
Add the chilled butter cubes to the bowl of dry ingredients. Using a pastry cutter, fork, or your fingertips, work the butter into the flour mixture until it resembles coarse crumbs with pea-sized pieces of butter remaining. Be careful not to overwork the dough; you want to maintain those small pockets of butter for a flaky crust.
Step 4: Add Ice Water Gradually
Slowly add the ice water, one tablespoon at a time, mixing gently with a fork until the dough begins to come together. You may not need to use all the water; the goal is to achieve a dough that holds together without being wet or sticky.
Step 5: Form the Dough
Once the dough has come together, divide it into two equal halves. Shape each half into a disk, wrap them in plastic wrap, and refrigerate for at least one hour. Chilling the dough helps relax the gluten, resulting in a tender pie crust.
Step 6: Roll Out the Dough
After chilling, remove one disk of dough from the refrigerator and let it sit at room temperature for about 5 minutes. This will make it easier to roll out. On a lightly floured surface, roll the dough into a circle about 12 inches in diameter and about 1/8 inch thick.
Tips for Achieving the Right Texture
– Keep everything cold: Chilled butter and ice water are key to a flaky crust.
– Avoid overworking the dough: Handle it as little as possible to maintain tenderness.
– Use a light touch: When rolling the dough, apply gentle pressure and turn frequently for an even thickness.
Variations on the Crust
For those with dietary restrictions or preferences, consider experimenting with gluten-free flour blends or using alternative fats, such as coconut oil or lard, to create a unique crust that suits your needs. Each variation can bring its own character to the pie, allowing you to customize your dessert while still celebrating the classic flavors of strawberry-rhubarb.
By following these steps and tips, you will be well on your way to crafting a pie crust that is not only delicious but also perfectly complements the sweet-tart filling that awaits. In the next section, we will delve into preparing the strawberry-rhubarb filling and achieving that delightful balance of flavors that makes this pie a true delight.

Step-by-Step Instructions for Preparing the Filling
To create the perfect strawberry-rhubarb filling, begin by preparing your fresh ingredients. Start with 2 cups of strawberries, hulled and sliced, and 2 cups of rhubarb, trimmed and cut into small pieces. Combine these fruits in a large mixing bowl.
Next, it is essential to coat the fruits evenly with sugar and cornstarch. Add 1 to 1.5 cups of granulated sugar, depending on the sweetness of the strawberries, and 1/4 cup of cornstarch to the bowl. The cornstarch will help thicken the filling as it bakes, ensuring a perfectly set pie. Using a gentle folding motion, mix the fruits with the sugar and cornstarch. Avoid mashing the strawberries and rhubarb, as you want to maintain their structure for a delightful texture in every bite.
Once combined, set the mixture aside for about 15 to 30 minutes. This resting period allows the strawberries and rhubarb to release their natural juices, creating a delightful syrup that will enhance the flavor of your pie.
Adjusting Sweetness: How to Modify Sugar Based on Fruit Ripeness
Sweetness is a crucial component of any fruit pie, and the ripeness of your strawberries and rhubarb plays a significant role in determining how much sugar you should use. If your strawberries are exceptionally sweet, you may want to reduce the sugar to 1 cup. Conversely, if your rhubarb is particularly tart, you might find that you need to add a bit more sugar to balance the flavors.
A good rule of thumb is to taste a piece of each fruit before you start. From there, adjust the sugar accordingly. Remember, you can always add sugar, but it’s challenging to remove it once mixed into the filling.
Assembling the Strawberry-Rhubarb Pie
With your filling prepared, it’s time to assemble your pie. First, preheat your oven to 425°F (220°C) to ensure it reaches the ideal baking temperature as you work on your pie.
Rolling Out the Dough: Best Practices for Even Thickness
Take your chilled pie crust dough from the refrigerator. Dust your work surface with flour to prevent sticking, and roll out the dough using a rolling pin. Aim for an even thickness of about 1/8 inch. To ensure uniformity, start from the center and work your way outwards, rotating the dough occasionally to maintain a round shape.
If the dough becomes too warm and sticky, place it back in the refrigerator for 10-15 minutes before resuming. Once rolled out, carefully transfer the dough into a 9-inch pie dish by folding it in half and then placing it in the dish. Unfold it gently, pressing it into the bottom and sides.
Filling Techniques: Tips for Even Distribution of Filling
Pour the strawberry-rhubarb mixture into the prepared pie crust. Use a spatula to distribute the filling evenly, ensuring that the strawberries and rhubarb are well spread out. This helps to create an even texture throughout the pie.
Crimping and Sealing the Pie Edges for a Professional Look
To seal the pie, you can use a variety of crimping techniques. A simple method is to use your thumb and index finger to pinch the edges, creating a beautiful wave pattern. Alternatively, you can use a fork to press down on the edges for a classic look. Make sure the pie is well sealed to prevent any filling from bubbling over during baking.
Creative Topping Ideas: Lattice Designs vs. Full Crusts
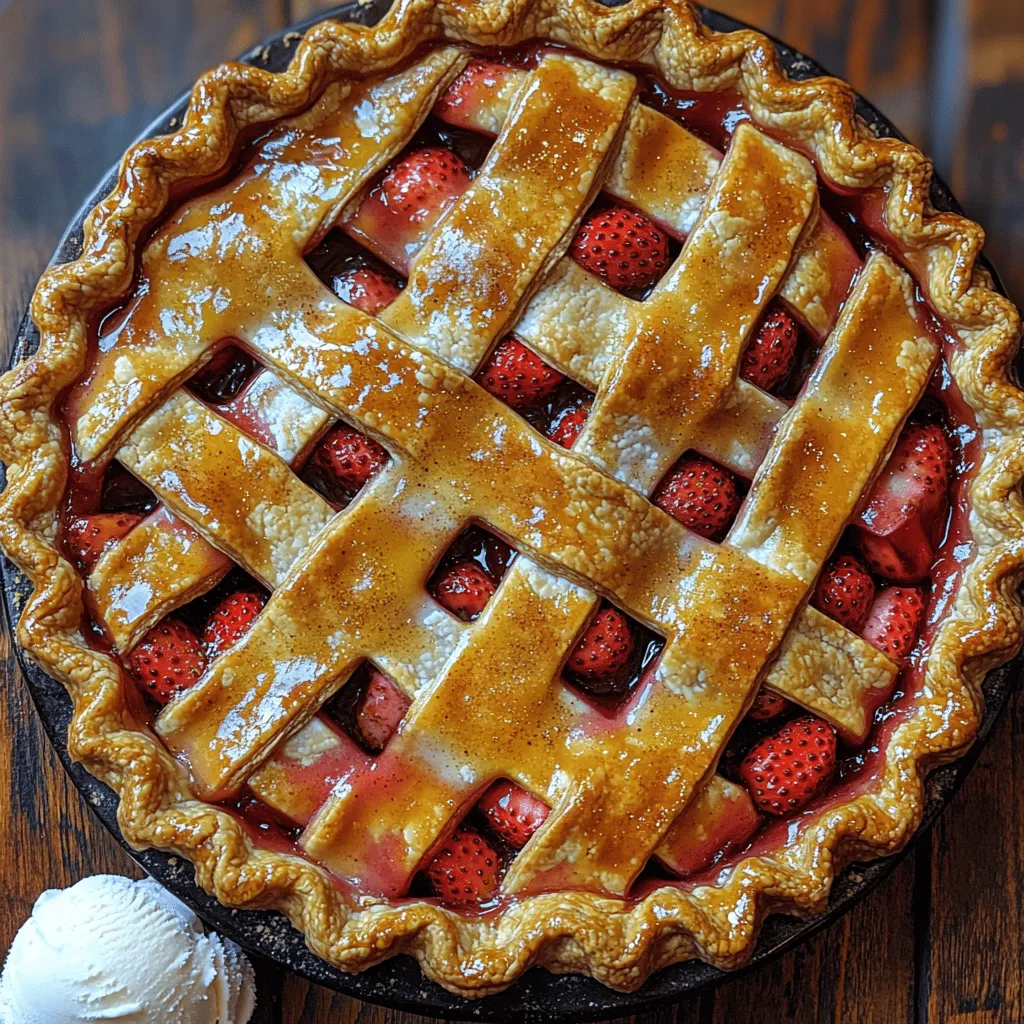
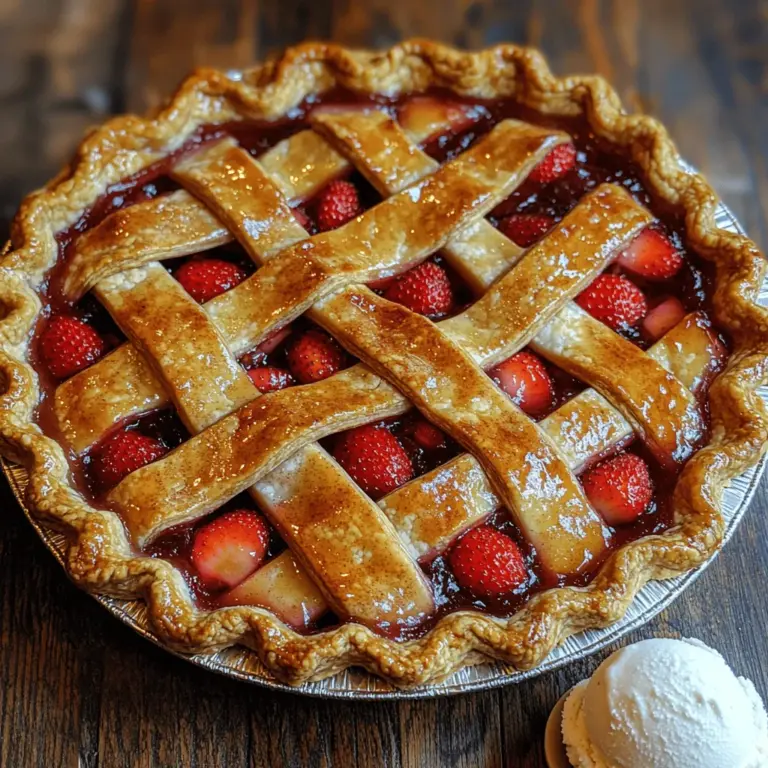
Now that your pie is filled and sealed, consider how you want to top it. A classic full crust is always a safe choice, but a lattice design can elevate your pie’s aesthetic appeal. To create a lattice, roll out a second disk of pie dough and cut it into strips. Arrange the strips over the filling, weaving them to create a crisscross pattern.
Regardless of your choice, remember to cut a few slits in the top crust if you opt for a full crust. This allows steam to escape while baking, preventing the pie from becoming soggy.
Adding the Finishing Touches
Importance of the Egg Wash: Achieving a Golden, Glossy Crust
An egg wash is essential for achieving a golden, glossy finish on your pie crust. It not only enhances the visual appeal but also adds a protective layer that helps to create a crisp crust. An egg wash typically consists of one beaten egg mixed with a tablespoon of water.
Step-by-Step Guide to Preparing and Applying the Egg Wash
1. In a small bowl, whisk together 1 egg and 1 tablespoon of water until well combined.
2. Using a pastry brush, gently apply the egg wash over the crust, making sure to cover all visible surfaces without over-saturating the dough.
3. For an added touch, sprinkle a bit of sugar over the top for extra sweetness and texture.
Optional Garnishes: Suggestions for Adding Textures and Visual Appeal
For additional garnish, consider adding a sprinkle of cinnamon or nutmeg to the top of the crust before baking. This not only enhances the flavor but also adds a lovely aroma as it bakes. Another option is to incorporate decorative cutouts from the excess dough, such as small leaves or hearts, and place them on top of the lattice for added charm.
Baking the Pie to Perfection
Setting the Right Temperature and Timing for Baking
Place your assembled pie into the preheated oven and bake at 425°F (220°C) for 15 minutes. After this initial bake, reduce the temperature to 350°F (175°C) and continue baking for an additional 30 to 40 minutes. This two-step process allows the crust to become golden brown while ensuring the filling cooks through without burning the edges.
How to Know When the Pie is Perfectly Baked: Visual and Tactile Cues
You’ll know your pie is ready when the crust is a beautiful golden brown, and the filling is bubbly and thickened. If you gently shake the pie and notice any liquid jiggling in the center, it may need a few more minutes in the oven. Always keep an eye on the crust edges, as they can brown more quickly than the rest of the pie.
Preventing Over-Browning: Techniques for Protecting Crust Edges
If you notice that the edges of your crust are browning too quickly, cover them with strips of aluminum foil. This will shield the edges while allowing the center of the pie to continue baking.
Cooling and Serving Suggestions
Importance of Cooling Time for Pie Filling to Set
Once your pie is done baking, it’s crucial to let it cool for at least 2 hours before slicing. This cooling period allows the filling to set properly, making it easier to cut clean slices without the fruit spilling out.
Tips on Slicing and Serving: Best Temperature for Enjoyment
For the best flavor and texture, serve your strawberry-rhubarb pie at room temperature or slightly warmed. Use a sharp knife to cut the pie, and for an extra touch, serve it with a dollop of whipped cream or a scoop of vanilla ice cream to complement the tangy filling.
Pairing Ideas: Suggestions for Ice Cream and Whipped Cream Accompaniments
A rich vanilla ice cream is a classic pairing, offering a creamy contrast to the tartness of the pie. If you prefer a lighter option, freshly whipped cream with a hint of vanilla can enhance the overall experience. For an adventurous twist, consider pairing with a scoop of ginger or lemon sorbet for a refreshing contrast.
Conclusion
Creating a strawberry-rhubarb pie is not just about following a recipe; it’s about the joy of baking and the memories made in the kitchen. This delightful dessert has a unique way of bringing people together, whether it’s at family gatherings, holiday celebrations, or casual get-togethers with friends.
Encouraging experimentation with this recipe can yield exciting results. Consider swapping out strawberries for blueberries or adding a dash of almond extract for a new flavor profile. Each variation can become a cherished family tradition, making each baking adventure special. So gather your ingredients, roll up your sleeves, and enjoy the sweet-tart delight of your homemade strawberry-rhubarb pie!

