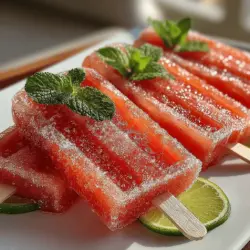
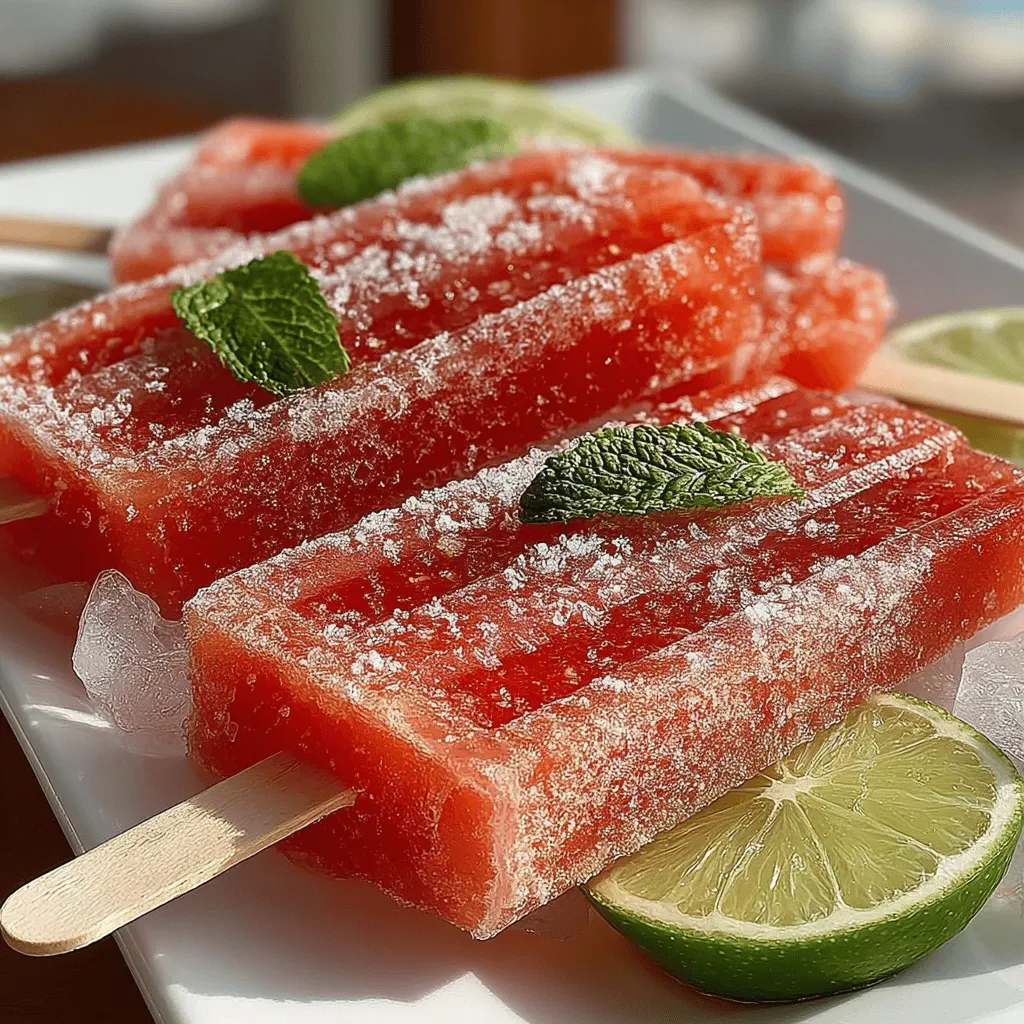
Refreshing Watermelon Bliss Pops: A Summertime Delight
As the summer sun blazes overhead, frozen treats become a beloved staple for both children and adults seeking respite from the heat. From creamy ice creams to fruity sorbets, the options are endless, but few can rival the sheer refreshment offered by watermelon-based desserts. Among these delights, Watermelon Bliss Pops stand out as a healthy, hydrating, and invigorating choice, perfect for those hot summer days.
These delightful popsicles are not just a simple treat; they are a celebration of summer’s bounty, showcasing one of the season’s most iconic fruits. Watermelon Bliss Pops are not only easy to make but also incredibly versatile, appealing to a range of dietary preferences. Whether you’re vegan, gluten-free, or simply looking for a guilt-free indulgence, these pops can be tailored to fit your needs. With their vibrant color and irresistible flavor, they are sure to be a hit at summer barbecues, pool parties, or just as a refreshing snack on a lazy afternoon.
Understanding the Ingredients
To create the perfect Watermelon Bliss Pops, it’s essential to understand the key ingredients that contribute to their delightful taste and health benefits. Each component is chosen not just for flavor but also for the nutritional advantages they bring to the table.
Watermelon serves as the star ingredient, providing a juicy base for the pops. Known for its high water content—over 90%—watermelon is an excellent choice for hydration during hot weather. This fruit is not only refreshing but also packed with essential vitamins like A and C, as well as antioxidants such as lycopene, which has been linked to various health benefits, including heart health and cancer prevention.
Another important ingredient is honey or maple syrup, which acts as a natural sweetener. These alternatives to refined sugar not only enhance the flavor of the pops but also come with their own set of health benefits. Honey, for instance, is known for its antimicrobial properties and can soothe sore throats, while maple syrup is rich in antioxidants and minerals like zinc and manganese. The choice between these sweeteners allows for customization based on personal taste and dietary restrictions.
To elevate the flavor profile, lime juice is added. This citrusy ingredient not only brightens the taste of the pops but also offers numerous health benefits, including vitamin C and antioxidants. Lime juice can aid digestion and enhance the absorption of iron, making it a valuable addition to this refreshing treat.
For those wanting to take their Watermelon Bliss Pops to the next level, coconut water can be included for a tropical twist. Packed with electrolytes, coconut water is a fantastic way to stay hydrated, especially during the summer months. Its natural sweetness complements the watermelon perfectly, creating a balanced and delicious treat.
Lastly, garnishes like fresh mint leaves can be incorporated for an additional layer of flavor. Mint is not only refreshing but also offers digestive benefits and can help promote relaxation. The bright green leaves add a pop of color and an aromatic quality that enhances the overall experience of enjoying these popsicles.
Preparation Steps for Watermelon Bliss Pops
Now that we have an understanding of the ingredients, it’s time to dive into the preparation of Watermelon Bliss Pops. The process is straightforward and can be completed in just a few simple steps, making it an ideal activity for families or individuals looking to whip up a quick summer treat.
Step 1: Preparing the Watermelon
Begin by selecting a ripe, seedless watermelon for the best texture and flavor. A seedless variety will ensure that your pops have a smooth consistency without the distraction of seeds. Cut the watermelon into manageable chunks, removing the rind and any seeds if necessary. The flesh should be bright red and juicy, indicating that it is ripe and ready to blend.
Step 2: Texture Options: Blending vs. Pulsing
Once your watermelon is prepared, you have the option to either blend or pulse the watermelon chunks. If you prefer a smooth, creamy texture for your pops, using a blender is the way to go. Blend the watermelon until it reaches a liquid state, ensuring there are no chunks. For a more textured pop with small bits of watermelon, you can use a food processor and pulse the fruit just a few times. This choice adds a delightful chewiness to the final product, giving it a unique twist.
Step 3: Mixing the Ingredients
After achieving your desired watermelon texture, it’s time to mix in the other ingredients. If you’re using honey or maple syrup, drizzle it into the blended watermelon, followed by a splash of fresh lime juice. For those incorporating coconut water, add it at this stage as well. Blend or stir again until all the ingredients are fully combined. Taste the mixture and adjust the sweetness by adding more honey or syrup if desired. This step allows you to customize the flavor to suit your preferences perfectly.
Step 4: Pouring into Molds
Once you have your watermelon mixture ready, it’s time to pour it into popsicle molds. Make sure to leave a little space at the top of each mold to allow for expansion during the freezing process. This will prevent the mixture from overflowing as it freezes. If you’re feeling creative, consider adding a few fresh mint leaves to the molds before pouring in the mixture. This not only adds visual appeal but also infuses the pops with a subtle minty flavor.
Step 5: Inserting Sticks
After filling your molds, insert popsicle sticks into the center of each one. To ensure that the sticks remain centered and upright while the pops freeze, you can use a small piece of aluminum foil. Simply cut a piece large enough to cover the top of the mold, make small slits for the sticks, and place it over the mold before placing it in the freezer. This clever technique will keep your sticks in place and ensure perfectly shaped popsicles.
With these initial steps, you are well on your way to creating your own batch of Watermelon Bliss Pops. The combination of refreshing ingredients and simple preparation makes these pops not only delicious but also a fun and engaging project to share with family and friends. As they freeze to perfection, you can look forward to enjoying a vibrant, summertime treat that celebrates the flavors of the season.
Alternative Methods for Molds Without Built-in Sticks
If you don’t have traditional popsicle molds with built-in sticks, there’s no need to worry! There are several alternative methods to ensure your Watermelon Bliss Pops come out perfectly without compromising on fun and flavor.
Using Paper Cups
One of the simplest alternatives is to use small paper cups. Fill the cups with your watermelon mixture and insert wooden sticks or plastic spoons once the mixture has started to freeze, typically after about 1-2 hours. This method is not only effective but also allows for easy serving directly from the cup.
Ice Cube Trays
Another creative option is using ice cube trays. Pour the watermelon mixture into the trays and freeze. Once frozen, you can pop them out as smaller, bite-sized treats. This is perfect for a quick snack and can be served in bowls with fresh fruit on the side.
Silicone Molds
Silicone molds are versatile and can be used for popsicles as well. They are flexible, making it easy to remove the pops without additional liquid. Simply fill the mold and insert sticks after a short freeze.
Freezing and Serving the Pops
Ideal Freezing Times and Conditions for Best Results
For the best results, freeze your Watermelon Bliss Pops for at least 6-8 hours, or until they are completely solid. This duration ensures that they hold their shape and have a smooth, refreshing texture. It’s also best to place your pops in the coldest part of your freezer.
Techniques for Easy Unmolding
To unmold your pops easily, you can run warm water over the outside of the molds for a few seconds. The heat will slightly thaw the outer edges, making it easier to pull the pops out without breaking them.
Using Warm Water to Loosen Pops from Molds
If your pops are stubborn and won’t release from the molds, dip the bottom of the mold in warm water for about 10-15 seconds. This method gently warms the exterior, loosening the pops for a smooth release.
Presentation Ideas for Serving
When serving your Watermelon Bliss Pops, consider creative presentation techniques to impress your guests. Use a decorative plate or platter, and arrange the pops in a standing position by placing them in a glass filled with ice. Garnishing with fresh mint or a sprinkle of lime zest can elevate the visual appeal and add a burst of flavor.
Storage and Shelf Life of Watermelon Bliss Pops
Best Practices for Storing Pops in the Freezer
To ensure your Watermelon Bliss Pops remain fresh and flavorful, store them in an airtight container or sealable freezer bag. If using a container, place parchment paper between layers to prevent sticking. This also helps in maintaining the pops’ texture and prevents freezer burn.
Expected Shelf Life and Tips for Maintaining Texture and Flavor
When stored properly, Watermelon Bliss Pops can last in the freezer for up to 2 months. However, for the best flavor and texture, it’s recommended to consume them within the first month. To maintain their quality, avoid leaving them out at room temperature for extended periods, as this can lead to melting and refreezing, which affects texture.
Nutritional Value and Benefits
Breakdown of the Nutritional Content Per Serving
Each Watermelon Bliss Pop is a low-calorie treat packed with nutrients. On average, one pop contains approximately 30-50 calories, making it a guilt-free indulgence. The primary ingredients—watermelon and coconut water—contribute vitamins A and C, potassium, and electrolytes.
Health Benefits of Each Main Ingredient
Watermelon is not only hydrating but also contains antioxidants such as lycopene, which supports heart health and may reduce inflammation. Coconut water is rich in electrolytes, making it an excellent choice for hydration, especially during hot summer days.
Hydration Benefits from Watermelon and Coconut Water
Both watermelon and coconut water are excellent sources of hydration. Watermelon is composed of about 92% water, making it a natural thirst quencher. Coconut water contains essential electrolytes like potassium and sodium, which can help replenish lost fluids after exercise or on hot days.
Natural Sugars vs. Refined Sugars in Sweeteners
The recipe calls for natural sweeteners such as honey or agave syrup. These natural sugars are healthier alternatives to refined sugars, providing energy without the same level of blood sugar spikes. Opting for these sweeteners enhances the pops’ flavor while keeping them healthier.
Low-Calorie and Vegan-Friendly Aspects of the Recipe
Watermelon Bliss Pops are not only low in calories but also vegan-friendly, making them suitable for a wide audience. With no dairy or animal products, these pops are a refreshing choice for anyone looking to enjoy a sweet treat without compromising their dietary preferences.
Creative Variations and Customizations
Suggestions for Flavor Variations
While the Watermelon Bliss Pops are delicious as is, there are numerous ways to customize the flavor. Consider adding a splash of lime juice for a zesty twist or a hint of vanilla extract for added depth.
Adding Different Fruits (e.g., Strawberries, Kiwi)
Incorporating other fruits can create delightful flavor combinations. For instance, blending watermelon with strawberries results in a refreshing berry burst, while kiwi adds a tangy flavor and vibrant color.
Incorporating Herbs or Spices (e.g., Basil, Ginger)
For a unique twist, experiment with herbs or spices. Fresh basil can add a fragrant note, while ginger provides a spicy kick that complements the sweetness of watermelon. Just a small amount can transform the flavor profile of your pops.
Alternative Sweeteners and Their Effects on Flavor and Health
If you’re looking to adjust the sweetness level, consider using alternative sweeteners like stevia or monk fruit. These options provide sweetness without the calories, although they may alter the overall flavor slightly.
Using Yogurt or Dairy Alternatives for Creamier Pops
For a creamier texture, consider blending in yogurt or a dairy alternative such as coconut yogurt. This variation adds a rich flavor and creaminess, turning your pops into a more indulgent treat.
Conclusion
Making Watermelon Bliss Pops is a simple and enjoyable way to beat the heat while indulging in a refreshing treat. This recipe not only highlights the natural sweetness of watermelon and coconut water but also encourages creativity in the kitchen.
Feel free to experiment with various flavors and ingredients, tailoring the pops to your taste preferences. Whether you’re enjoying them by the pool, at a picnic, or as a sweet end to a summer meal, these pops are sure to bring joy and refreshment. So, gather your ingredients, get creative, and enjoy the delightful experience of homemade Watermelon Bliss Pops!