Introduction
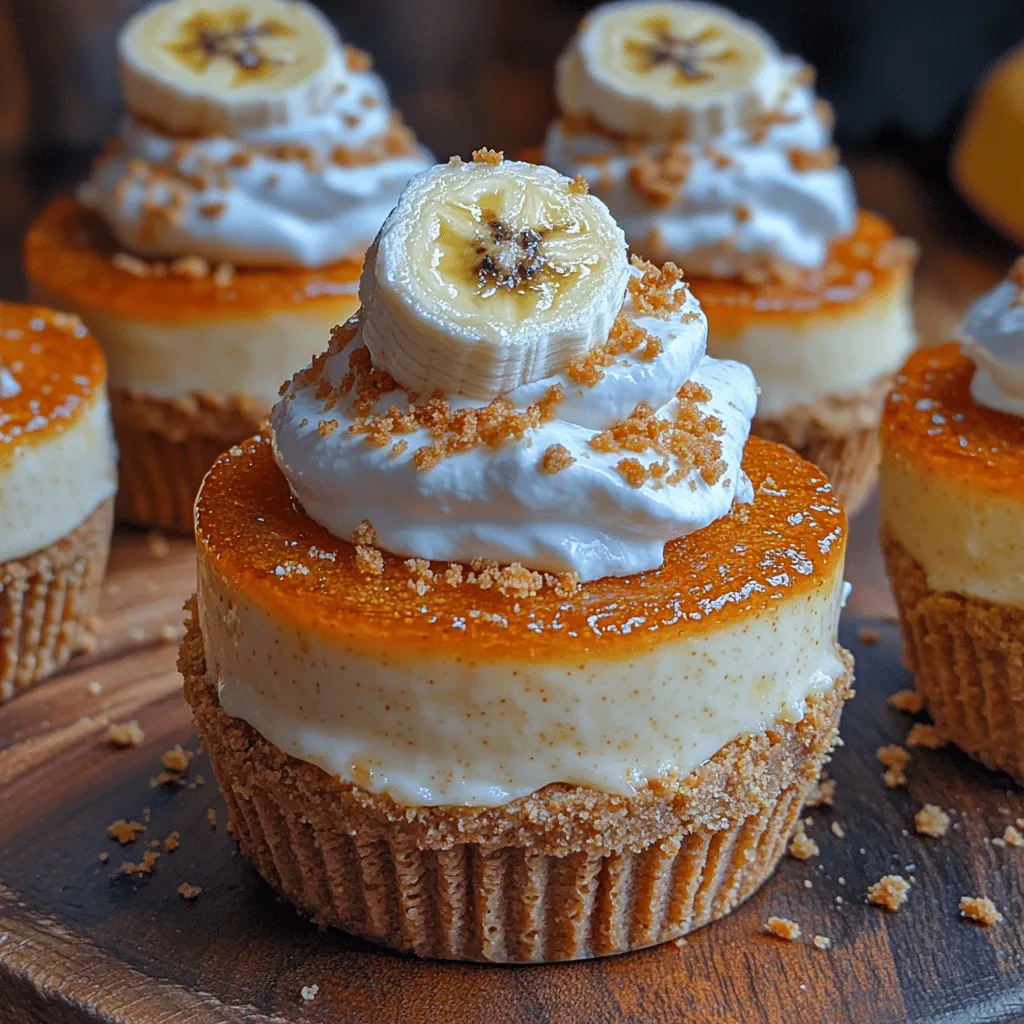
If you’re looking for a crowd-pleasing dessert that beautifully marries nostalgia with innovation, mini banana pudding cheesecakes are an excellent choice. This delightful treat captures the essence of traditional banana pudding while elevating it with the rich, creamy texture of cheesecake. With each bite, you experience the velvety smoothness of cream cheese, the sweetness of ripe bananas, and the satisfying crunch of a golden Nilla wafer crust. These mini cheesecakes are not only visually appealing but also offer a burst of flavor that can enchant any dessert lover.
Their versatility makes them perfect for any occasion, whether you’re hosting a casual get-together, celebrating a birthday, or bringing a sweet touch to a holiday feast. The individual portions are ideal for serving guests, allowing everyone to enjoy their own little slice of heaven without the mess of a traditional cake. Plus, their bite-sized nature means you can indulge without the guilt, making them a favorite for both kids and adults alike.
Understanding the Ingredients
To create the perfect mini banana pudding cheesecakes, it’s essential to understand the role of each ingredient. The three key components that make this dessert extraordinary are the crust, the cheesecake filling, and the ripe bananas. Each element contributes to the overall flavor and texture, resulting in a harmonious dessert that captivates the senses.
The Nostalgic Crust: Nilla Wafers
At the heart of these mini cheesecakes lies the crust made from Nilla wafers. These iconic cookies are not only beloved for their sweet vanilla flavor but also for their delightful crunch. Their role in this recipe is crucial, as they provide a sturdy base that holds the cheesecake filling while adding texture to the overall dessert. The nostalgic connection many people have with Nilla wafers, often associated with childhood desserts, adds an emotional layer to this treat.
When crushed and combined with butter, these wafers create a crumbly mixture that, once baked, transforms into a golden crust. This crust not only enhances the flavor of the cheesecake but also serves as a perfect contrast to the creamy filling, ensuring that every bite has a satisfying crunch.
Cream Cheese: The Heart of the Filling
The filling is where the magic truly happens, and cream cheese is the star of the show. Its rich, creamy texture makes it the ideal base for cheesecakes, providing a luscious mouthfeel that pairs perfectly with the other ingredients. Cream cheese has a slightly tangy flavor that balances the sweetness of the bananas and adds depth to the overall profile of the dessert.
To achieve the perfect consistency, it’s important to beat the cream cheese until it is smooth and free of lumps. This process is vital for creating a creamy filling that will set beautifully in the oven. Additionally, cream cheese offers a great canvas for flavoring, allowing the natural sweetness of ripe bananas to shine through.
Ripe Bananas: Nature’s Sweetener
Ripe bananas are the final key ingredient that brings this dessert to life. Their natural sweetness and distinct flavor enhance the cream cheese filling, turning what could be an ordinary cheesecake into a tropical delight. When bananas are perfectly ripe—just past the point of being too firm—they achieve an ideal level of sweetness and softness, making them easy to incorporate into the filling.
In this recipe, bananas not only add flavor but also contribute to the texture of the cheesecake. When mashed and mixed into the cream cheese, they create a smooth and creamy filling that is rich in banana flavor. This combination of cream cheese and bananas creates a delightful harmony that elevates the mini cheesecakes from simple to extraordinary.
Step-by-Step Preparation
Now that we’ve covered the essential ingredients, let’s dive into the step-by-step preparation of these mini banana pudding cheesecakes. By following these detailed instructions, you’ll be well on your way to creating a dessert that your friends and family will rave about.
Preparing the Crust
1. Crushing the Nilla Wafers: Begin by placing the Nilla wafers in a food processor. Pulse them until they form fine crumbs. If you don’t have a food processor, you can place the wafers in a zip-top bag and crush them using a rolling pin.
2. Mixing with Butter: Transfer the crushed wafers to a mixing bowl and add melted butter. The butter not only helps bind the crumbs together but also adds a rich flavor. Stir the mixture until all the crumbs are evenly coated with butter.
3. Pressing into the Pan: Prepare a muffin tin or a mini cheesecake pan by lining it with cupcake liners or greasing it lightly. Using a tablespoon, portion out the crumb mixture into each cup. Press the mixture firmly into the bottom of each cup using the back of a spoon or your fingers. Aim for an even layer that covers the bottom completely.
4. Baking the Crust: Preheat your oven to 350°F (175°C). Once the oven is hot, place the muffin tin in and bake the crusts for about 8-10 minutes, or until they are golden brown. Keep an eye on them to avoid burning; the perfect crust should be just lightly toasted, enhancing the flavor without overpowering the other components.
Making the Cheesecake Filling
1. Preparing the Cream Cheese: While the crust is cooling, take the cream cheese out of the refrigerator to allow it to soften. This step is crucial for achieving a smooth filling. In a large mixing bowl, beat the softened cream cheese with an electric mixer on medium speed until it’s creamy and free of lumps.
2. Incorporating Eggs: Gradually add in the sugar and continue beating until well combined. Next, add the eggs one at a time, mixing on low speed. This slow incorporation is essential to avoid overmixing, which can lead to cracks in the cheesecake. Make sure each egg is fully blended before adding the next.
3. Adding Bananas: Once the eggs are well combined, fold in the mashed ripe bananas. The bananas should be fully mashed to ensure they blend smoothly into the filling. This step not only enhances the flavor but also contributes to the creamy texture of the cheesecake.
Filling the Cheesecakes
1. Portioning the Filling: Using a ladle or a measuring cup, carefully pour the cheesecake filling over the pre-baked crusts. Fill each cup until it is nearly full, but leave a little room at the top for the cheesecakes to rise slightly during baking.
2. Eliminating Air Bubbles: After filling each cup, gently tap the muffin tin on the counter. This technique helps release any air bubbles trapped in the filling, ensuring a smooth finish. Air bubbles can create unsightly holes in the final product, so this step is important for presentation.
Baking the Cheesecakes
1. Baking Instructions: Place the filled muffin tin in the preheated oven and bake for approximately 15-20 minutes, or until the edges are set and the centers have a slight jiggle. It’s important not to overbake the cheesecakes, as they will continue to firm up while cooling.
2. Cooling Process: Once they’re done baking, remove the cheesecakes from the oven and allow them to cool in the pan for about 10 minutes. Afterward, transfer them to a wire rack to cool completely. This cooling step is crucial for preventing condensation from forming on the surface of the cheesecakes, which could lead to a soggy texture.
By following these detailed steps, you’ll create mini banana pudding cheesecakes that are not only delicious but also visually stunning. The combination of the creamy filling, the crunchy crust, and the sweet banana flavor results in a dessert that is sure to impress your guests.

Baking Process and Determining Doneness
Once you have carefully poured your banana pudding cheesecake batter into the prepared crusts, it’s time to bake them to perfection. Preheat your oven to 325°F (163°C) and place the cheesecakes on the center rack. The baking process typically takes around 20 to 25 minutes, but keep a close eye on them as they bake.
To determine doneness, look for a slight jiggle in the center of each cheesecake. They should be set around the edges but still have a gentle quiver in the middle. Overbaking can lead to a dry texture, so it’s crucial to remove them from the oven while they still appear slightly undercooked. The cheesecakes will continue to firm up as they cool, ensuring a creamy and rich consistency.
Cooling Method in the Oven
One of the secrets to achieving perfect mini cheesecakes without cracks is the cooling method. After baking, turn off the oven and crack the door open about an inch. Let the cheesecakes cool in the oven for about 30 minutes. This gradual cooling helps prevent sudden temperature changes that can lead to cracks in the cheesecake surface.
Once the cheesecakes have cooled slightly, transfer them to a wire rack and allow them to cool to room temperature. Avoiding abrupt temperature shifts is essential for maintaining the beautiful texture and appearance of your mini banana pudding cheesecakes.
Chilling the Cheesecakes
Chilling is a crucial step in the cheesecake-making process, as it allows flavors to meld and the texture to set properly. After the cheesecakes have cooled to room temperature, cover them with plastic wrap and refrigerate them for at least 4 hours. However, for optimal results, consider letting them chill overnight.
Overnight chilling enhances the flavor and provides a firmer texture that makes serving easier. If you’re short on time, a minimum of 4 hours will work, but the cheesecakes will taste best after an extended chilling period. This time allows the banana flavor to deepen and the cream cheese to become perfectly creamy.
Creating the Perfect Topping
Whipping the Cream
The topping is what sets these mini banana pudding cheesecakes apart, adding a light and airy finish that complements the dense cheesecake. To whip the cream to soft peaks, start with a chilled mixing bowl and beaters. Pour one cup of heavy whipping cream into the bowl along with 2 tablespoons of powdered sugar.
Begin mixing on low speed to avoid splattering, then gradually increase to medium-high speed. Watch closely for soft peaks to form: this is when the cream holds its shape but still has a slight droop when you lift the beaters. Be careful not to over-whip, as this can turn your cream into butter. The powdered sugar adds just the right amount of sweetness and helps stabilize the whipped cream, ensuring it holds its shape when piped onto the cheesecakes.
Garnishing
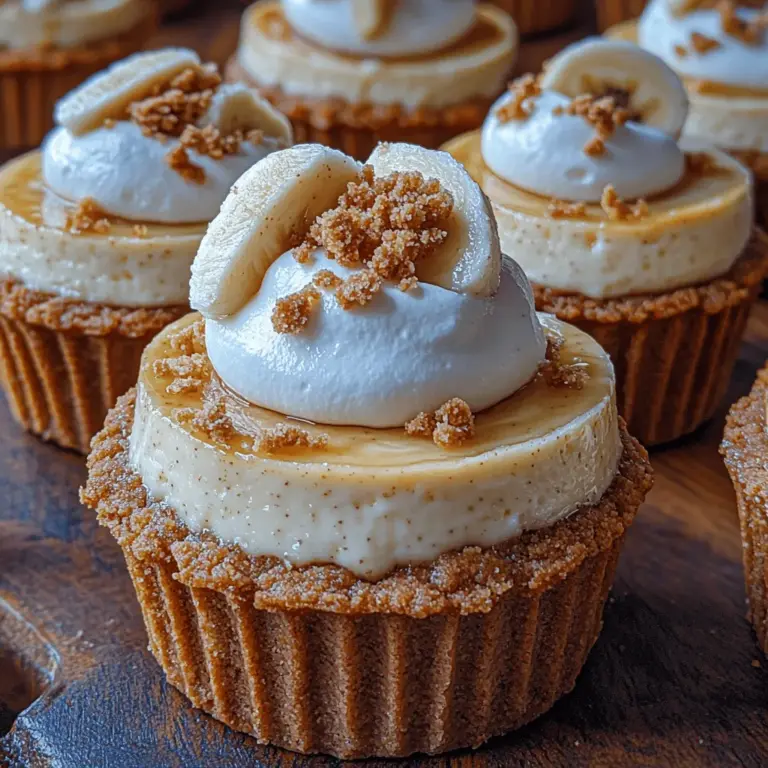
Presentation is key when it comes to dessert, especially for a recipe as delightful as mini banana pudding cheesecakes. Consider garnishing each cheesecake with a slice of fresh banana and a sprinkle of crushed Nilla wafers for added texture and flavor. The banana slices add a fresh, fruity touch, while the crushed wafers evoke the classic flavors of banana pudding.
For an extra touch, consider drizzling a bit of caramel or chocolate sauce over the top. This not only enhances the visual appeal but also adds an extra layer of flavor that complements the banana and cream cheese beautifully. Remember, a well-presented dessert can elevate the entire dining experience.
Serving Suggestions and Pairings
When it comes to serving your mini banana pudding cheesecakes, portion control is essential. Each cheesecake is perfect as an individual serving, making them ideal for gatherings, parties, or casual family dinners. Consider placing them on a decorative platter, with a few fresh banana slices and crushed Nilla wafers scattered around for a cohesive look.
For an enhanced tasting experience, think about pairing these cheesecakes with beverages that complement their flavors. A cup of freshly brewed coffee or a rich espresso provides a lovely contrast to the sweetness of the cheesecake. For those who prefer something a little more indulgent, a dessert wine, such as a Moscato or late-harvest Riesling, pairs wonderfully with the banana and cream cheese flavors, creating a delightful balance.
Nutritional Insights
While mini banana pudding cheesecakes are a delightful indulgence, it’s important to be mindful of their nutritional content. Each cheesecake typically contains around 250-300 calories, depending on the specific ingredients used. This includes a balance of carbohydrates, fats, and proteins, making them a satisfying treat when enjoyed in moderation.
The use of fresh bananas not only enhances flavor but also adds nutritional benefits, including potassium and dietary fiber. When serving these cheesecakes, be mindful of portion sizes to enjoy without guilt. A little indulgence can go a long way in satisfying your sweet tooth while still allowing you to maintain a balanced diet.
Conclusion
Making and enjoying mini banana pudding cheesecakes is a delightful experience that brings a taste of nostalgia to any occasion. Their creamy texture, rich banana flavor, and light whipped cream topping create a perfect dessert that is sure to impress. Whether you’re celebrating a special event or simply enjoying a sweet treat at home, these cheesecakes are a fantastic choice.
Encourage your friends and family to join in the fun of baking these treats, and don’t hesitate to experiment with variations or personal touches. From adding a hint of cinnamon to the crust to incorporating chocolate chips into the cheesecake batter, there are countless ways to make this recipe your own. So gather your ingredients, follow the steps, and enjoy the delicious results of your homemade mini banana pudding cheesecakes.

