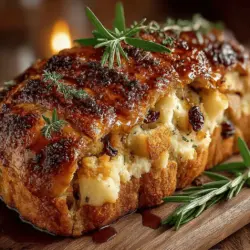
Maple-Glazed Turkey with Apple Stuffing: A Festive Delight
Turkey has long been a centerpiece of festive meals, especially during Thanksgiving and holiday gatherings. This majestic bird represents not only a culinary tradition but also a time for family and friends to come together in celebration. The act of roasting a turkey has become synonymous with warmth, gratitude, and the spirit of sharing. As we look forward to these cherished occasions, one recipe that elevates the traditional turkey experience is the Maple-Glazed Turkey with Apple Stuffing.
This recipe beautifully combines the rich, savory flavors of turkey with a sweet maple glaze, creating an irresistible contrast that tantalizes the taste buds. The addition of apple stuffing introduces a delightful aroma and comforting texture, making it a perfect complement to the turkey. The combination of flavors—sweet, savory, and aromatic—ensures a memorable dining experience that will leave guests reminiscing about the meal long after the last bite.
In this article, we will delve into the preparation of this show-stopping dish, exploring the ingredients that make it special and guiding you through the initial steps to create a perfectly glazed turkey and flavorful stuffing.
Understanding the Ingredients
The Turkey: The Star of the Show
When it comes to selecting a turkey, the size and quality are paramount. For this recipe, a turkey weighing between 12 to 14 pounds is ideal. This size not only provides ample servings for a gathering but also allows for even cooking, resulting in tender and juicy meat. Choosing a high-quality turkey, whether organic or free-range, ensures that you are starting with the best possible flavor and texture.
From a nutritional standpoint, turkey is a fantastic source of lean protein, essential for muscle growth and repair. It is also rich in vitamins and minerals, including B vitamins, selenium, and phosphorus, contributing to overall health. As a low-fat meat option, turkey allows for a satisfying meal without excessive calories.
The Maple Glaze: Sweet and Savory
At the heart of this recipe is the maple glaze, which infuses the turkey with a unique sweetness that perfectly balances the savory elements. The glaze typically consists of pure maple syrup and butter, both of which play a crucial role in enhancing flavor and retaining moisture throughout the cooking process.
– Maple Syrup: This natural sweetener adds depth to the dish, bringing a distinct flavor that pairs beautifully with the roasted turkey. It also caramelizes during cooking, creating a glossy, mouthwatering finish.
– Butter: Adding butter to the glaze not only contributes richness but also helps to achieve that coveted golden-brown skin. The fat in butter allows the glaze to adhere more effectively to the turkey, ensuring every bite is bursting with flavor.
To elevate the glaze further, fresh herbs such as thyme and rosemary are integrated into the mixture. These herbs not only enhance the turkey’s taste but also offer health benefits, including anti-inflammatory properties and antioxidants. A sprinkle of salt and pepper is essential for bringing out the natural flavors of the turkey and glaze, ensuring a well-seasoned dish.
The Apple Stuffing: A Perfect Pairing
The stuffing is where creativity shines, and the apple stuffing in this recipe adds a delightful twist to a classic dish. Selecting the right bread is crucial for achieving the perfect texture. Sourdough and whole wheat breads are excellent choices—sourdough offers a tangy flavor and chewy texture, while whole wheat adds a nutty taste and additional fiber.
Fresh produce is the backbone of any stuffing, and in this case, apples, onions, and celery contribute both flavor and moisture. The apples not only provide sweetness but also a refreshing crunch that contrasts nicely with the soft bread. Onions and celery add aromatic depth, creating a savory foundation for the stuffing.
To further enhance the flavor profile, spices such as cinnamon and nutmeg are included, adding warmth and complexity. These spices are not just for taste; they also bring health benefits, such as anti-inflammatory properties and digestive support. A handful of dried cranberries can be added for a pop of color and additional sweetness, making the stuffing not only delicious but visually appealing.
Preparation Steps for the Maple-Glazed Turkey
Now that we understand the ingredients that make up this festive dish, it’s time to dive into the preparation steps for the Maple-Glazed Turkey.
Step 1: Preparing the Turkey
The first step to preparing your turkey is to ensure it is completely thawed. If you are using a frozen turkey, plan ahead, as it can take several days in the refrigerator to defrost. Once thawed, remove the giblets and neck from the cavity, and rinse the turkey under cold water. Pat it dry with paper towels to ensure the seasoning adheres well.
Step 2: Preheat the Oven
Preheating your oven is crucial for achieving even cooking. Set your oven to 325°F (163°C) to ensure the turkey roasts to perfection. An adequately preheated oven will help create a crispy skin while keeping the meat moist.
Step 3: Seasoning the Turkey
Once your turkey is prepped and the oven is ready, it’s time to season the bird. Generously sprinkle salt and pepper inside the cavity and on the skin. This simple seasoning is essential for enhancing the turkey’s natural flavors.
Step 4: Glazing the Turkey
Creating the maple glaze is the next exciting step. In a small saucepan, combine pure maple syrup, melted butter, and finely chopped herbs. Heat the mixture gently until it is warm and well-combined. As you prepare to glaze the turkey, you can use a brush or ladle to apply the glaze evenly over the skin. For an extra layer of flavor, carefully lift the skin around the breast and apply some of the glaze directly to the meat beneath.
Step 5: Adding Moisture
To ensure the turkey remains moist while roasting, pour chicken broth into the bottom of the roasting pan. This will create steam in the oven, keeping the turkey juicy and tender throughout the cooking process. Place the turkey breast side up on a rack in the roasting pan, making sure it’s elevated above the broth.
With these initial steps complete, your Maple-Glazed Turkey is well on its way to becoming a centerpiece for your next holiday gathering. The combination of the sweet, sticky glaze and the aromatic apple stuffing promises a delightful meal that will impress your guests and create lasting memories around the table. Stay tuned for the next part of the article, where we will dive into crafting the delicious apple stuffing that complements this stunning turkey.
Step-by-Step Guide to Making the Apple Stuffing
Creating the apple stuffing for your maple-glazed turkey is a delightful way to introduce seasonal flavors into your holiday meal. The combination of apples, herbs, and bread creates a stuffing that is not only flavorful but also complements the rich taste of turkey beautifully.
Sautéing Aromatics
Begin by preparing your aromatics, which are crucial for building a flavor foundation in your stuffing. In a large skillet, melt 4 tablespoons of unsalted butter over medium heat. Add 1 cup of finely chopped onions and 1 cup of diced celery. Sauté these ingredients for about 5-7 minutes, or until the onions become translucent and the celery softens. This step is important because it enhances the natural sweetness of the onions and the earthiness of the celery, adding depth to the overall flavor of the stuffing.
Combining Ingredients for the Stuffing
Once your aromatics are ready, it’s time to combine them with the other stuffing ingredients. In a large mixing bowl, add 8 cups of cubed bread (preferably stale or toasted for optimal absorption), 2 cups of diced apples (such as Granny Smith or Honeycrisp for a nice balance of tartness and sweetness), 1 cup of dried cranberries, and 1 tablespoon of fresh thyme leaves. Pour the sautéed onion and celery mixture over the top, followed by 1-2 cups of low-sodium chicken broth, depending on how moist you prefer your stuffing. Mix everything gently until the bread is evenly coated and moist, but avoid over-mixing to maintain some texture.
Tips for Achieving the Right Consistency
Achieving the right consistency is essential for the perfect stuffing. The bread should be moist but not soggy. Start with 1 cup of broth and gradually add more if needed. A good rule of thumb is to check the mixture with your hands; it should hold together when squeezed but should not be overly wet. If you find that the mixture is too dry, add additional broth a little at a time until you reach your desired consistency.
Stuffing the Turkey
With your apple stuffing prepared, it’s time to stuff the turkey. This is a key moment in the preparation process, so attention to detail is essential.
Best Practices for Stuffing the Turkey
To begin, ensure your turkey is fully thawed and cleaned, with the giblets removed from the cavity. When stuffing, use a spoon or your hands to gently fill the cavity with the apple stuffing. It is crucial to pack the stuffing lightly; overpacking can lead to uneven cooking and a longer roasting time. Aim for a filling that is snug but not overly tight, which allows the stuffing to expand as it cooks.
Securing the Cavity
After stuffing, you need to secure the turkey cavity to prevent any stuffing from spilling out during roasting. You can use kitchen twine to tie the legs together, which will help keep the stuffing in place. Additionally, you can tuck the wing tips under the turkey to avoid over-browning.
Roasting the Turkey to Perfection
Now it’s time to roast your beautifully prepared turkey. This is where the magic happens, and following these detailed instructions will help you achieve a perfectly cooked bird.
Detailed Roasting Instructions
Preheat your oven to 325°F (163°C). Place your stuffed turkey on a roasting rack in a large roasting pan. Brush the skin generously with the maple glaze you prepared earlier, ensuring an even coating across the surface. This glaze will not only add flavor but also contribute to a beautiful caramelized finish.
Importance of Basting
Basting is an essential step to enhance both flavor and moisture throughout the roasting process. Every 30-45 minutes, use a baster or a ladle to spoon the drippings over the turkey. This not only helps keep the meat moist but also allows the flavors to deepen as the turkey cooks.
Timing and Temperature Considerations
A general guideline for roasting a turkey is about 13-15 minutes per pound. For a 12-pound turkey, this means approximately 2.5 to 3 hours of roasting time. However, the best way to ensure doneness is by using a meat thermometer. Insert it into the thickest part of the thigh, ensuring it doesn’t touch the bone. The turkey is safe to eat when it reaches an internal temperature of 165°F (74°C).
Techniques for Browning the Skin
To achieve that beautifully browned and caramelized skin, you can increase the oven temperature to 375°F (190°C) during the last 30 minutes of roasting. Keep a close eye on the turkey to prevent burning, and continue basting to ensure the glaze creates a shiny, delicious crust.
Checking for Doneness
Once the estimated roasting time has passed, it’s time to check if your turkey is ready.
Guidelines for Ensuring the Turkey is Fully Cooked
In addition to checking the internal temperature, observe the turkey’s skin color. It should be golden brown and the juices should run clear when the thigh is pierced with a fork. If the juices are pink, the turkey needs more time to cook.
Importance of Internal Temperature
Using a meat thermometer is the most reliable method to ensure your turkey is fully cooked. Insert the thermometer into the thickest part of the thigh and ensure it reads at least 165°F (74°C). Don’t forget to check the stuffing as well; it should also reach a minimum temperature of 165°F (74°C) to ensure safety.
Tips for Verifying Doneness
If you don’t have a meat thermometer, there are other ways to check for doneness. Wiggle the drumstick; if it moves easily, it’s likely done. Additionally, you can pierce the thigh with a sharp knife; if the juices run clear, the turkey is ready to be removed from the oven.
Resting and Serving the Turkey
After roasting, it’s crucial to let your turkey rest. This step is often overlooked but is essential for a juicy final product.
Explanation of the Resting Period
Allow the turkey to rest for at least 20-30 minutes before carving. This resting period allows the juices to redistribute throughout the meat, resulting in a more succulent bite. Cover the turkey loosely with aluminum foil to keep it warm without steaming the skin.
Benefits of Resting
Resting not only improves juiciness but also makes carving much easier. When the turkey is too hot, the juices can escape quickly, leading to dry slices. By allowing it to rest, you ensure that every slice is tender and flavorful.
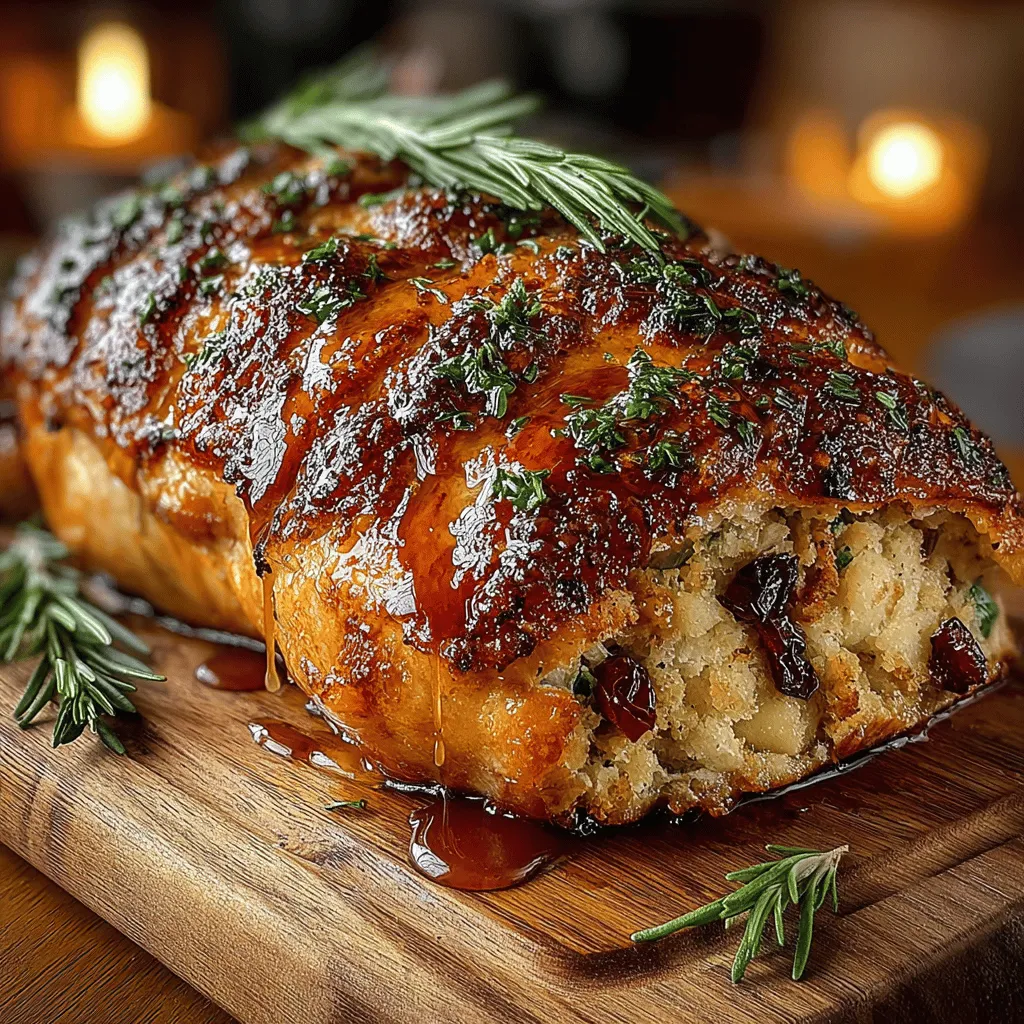
Presentation Tips
When it comes to serving, presentation is key. Carve the turkey on a large platter, arranging the slices attractively. Consider using a sharp carving knife for clean cuts. Garnish with fresh herbs such as rosemary or thyme, and arrange the apple stuffing around the turkey for a beautiful display.
Ideas for Garnishing and Plating
For an added touch, consider garnishing with seasonal fruits like slices of apple or pear, which tie in beautifully with the stuffing. A sprinkle of chopped parsley can add a pop of color and freshness to your presentation.
Importance of Serving with Drippings
Don’t forget to serve your turkey with the delicious drippings from the roasting pan. This adds a depth of flavor that enhances the entire meal. You can strain the drippings and serve them as a sauce or gravy alongside your turkey and stuffing.
Conclusion
The maple-glazed turkey with apple stuffing is more than just a dish; it’s a centerpiece that brings warmth and joy to any festive gathering. The sweet and savory combination of the maple glaze combined with the aromatic apple stuffing creates a memorable dining experience that your guests will cherish.
As you prepare this dish, take the time to savor the process—each step is an opportunity to create something special. The love and care you put into the cooking will shine through in the flavors, making your meal not just a feast for the palate but also a celebration of togetherness. Enjoy this culinary adventure and the delightful memories it will bring to your holiday table.