Introduction
The irresistible combination of chocolate and peanut butter has long captivated taste buds around the world. From cookies to cakes, this duo has become a beloved staple in dessert recipes, known for its rich, creamy, and delectably indulgent flavor. Among the many creations that feature these two iconic ingredients, fudge stands out as a particularly delightful treat. Whether enjoyed during festive gatherings, given as a gift during the holidays, or savored as a personal reward after a long day, fudge is synonymous with comfort and indulgence.
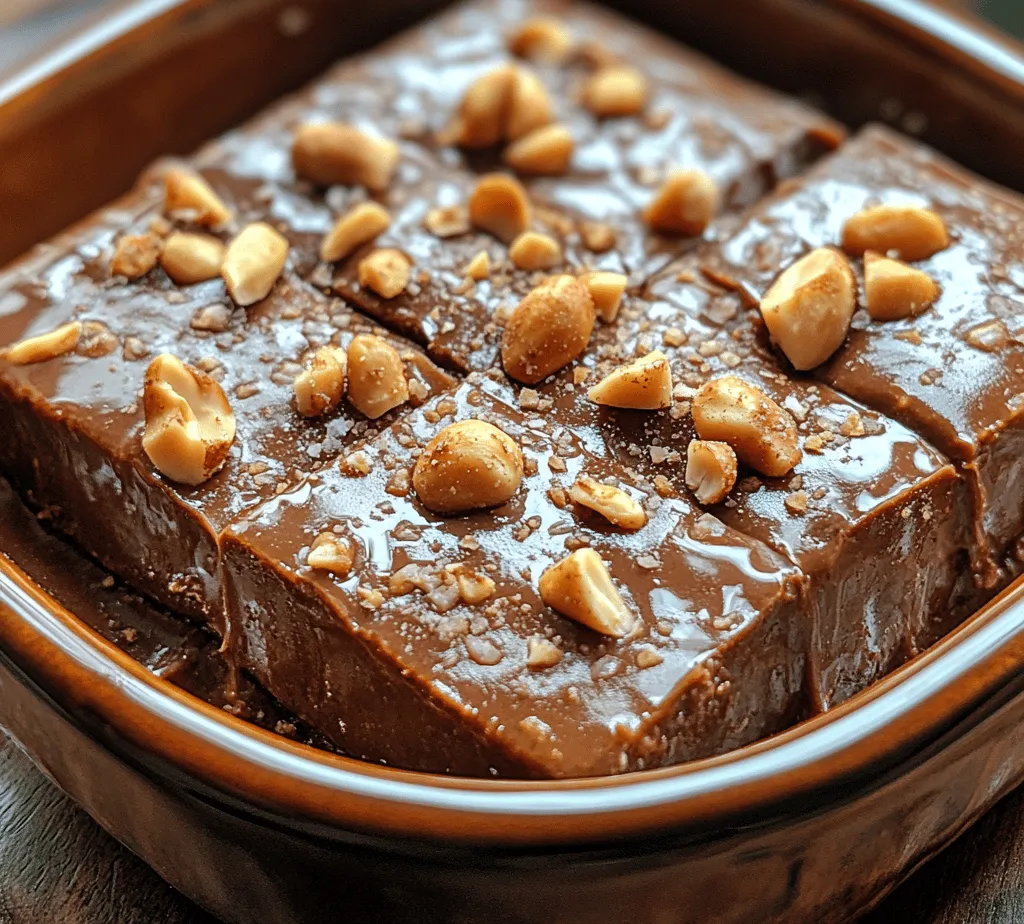
Today, we’re excited to share a recipe that takes this classic flavor combination to new heights: Decadent Chocolate Peanut Butter Fudge. This recipe is not only incredibly easy to follow but also yields a rich, creamy, and satisfying treat that will please chocolate and peanut butter lovers alike. Perfect for both seasoned bakers and those new to the kitchen, this fudge requires minimal ingredients and can be made in a matter of minutes. The result is a luscious dessert that you’ll want to make again and again.
Understanding the Ingredients
To make the best Decadent Chocolate Peanut Butter Fudge, it’s essential to understand the role of each ingredient. Let’s delve into what makes this fudge so special.
Semi-Sweet Chocolate Chips
The star of our fudge recipe is, of course, the chocolate. Semi-sweet chocolate chips provide a perfect balance of sweetness and cocoa flavor, contributing to the fudge’s overall richness. When melted, semi-sweet chocolate creates a smooth and glossy texture that is crucial for achieving that decadent finish.
When choosing chocolate chips, look for high-quality brands that have a high cocoa content. Popular options include Ghirardelli, Nestlé Toll House, and Guittard. These brands are known for their melting properties and flavor, ensuring that your fudge will turn out deliciously every time. Avoid using chocolate chips labeled as “baking chocolate” or any product that contains a waxy coating, as these can affect the texture and flavor of your fudge.
Creamy Peanut Butter
Next up is the creamy peanut butter, which is vital for achieving that smooth and silky fudge texture. Creamy peanut butter blends seamlessly into the melted chocolate, creating a harmonious flavor profile that is both nutty and indulgent.
When selecting peanut butter for this recipe, opt for a product that is creamy without any added sugars or stabilizers. Natural peanut butter is a great choice, but it’s important to note that it can sometimes separate, leading to an oilier texture. If you choose natural peanut butter, be sure to stir it well before measuring. On the other hand, processed peanut butter varieties (like those from Jif or Skippy) provide a more consistent and creamy texture, making them a reliable option for fudge.
Sweetened Condensed Milk
Sweetened condensed milk is another key ingredient in our fudge recipe, contributing both creaminess and sweetness. This thick, syrupy milk is made from evaporating most of the water from regular milk and adding sugar, resulting in a rich and velvety texture that is perfect for desserts.
In addition to enhancing the fudge’s sweetness, sweetened condensed milk helps to create a smooth consistency that holds everything together. It acts as a binding agent, ensuring that your fudge doesn’t crumble once set. When selecting sweetened condensed milk, make sure to choose a high-quality brand, as this will impact the overall taste of your fudge.
Vanilla Extract and Salt
To elevate the flavor of our fudge further, we’ll include a splash of vanilla extract. Vanilla is a classic flavor enhancer that brightens the overall taste profile of your dessert. Just a teaspoon of pure vanilla extract can make a significant difference, adding depth and complexity to the sweetness of the fudge.
Additionally, a pinch of salt is crucial for balancing the sweetness of the chocolate and peanut butter. Salt enhances flavors and helps prevent the fudge from becoming overwhelmingly sweet. Use fine sea salt for the best results, as it dissolves easily and distributes evenly throughout the mixture.
Powdered Sugar (Optional)
While the sweetened condensed milk provides ample sweetness, some may prefer to add a bit of powdered sugar to the mix for extra sweetness and texture. This is entirely optional, and you can adjust the amount based on your personal taste. If you decide to include it, be sure to sift the powdered sugar before adding it to the mixture to avoid clumps and ensure a smooth fudge.
Toppings: Chopped Peanuts and Sea Salt
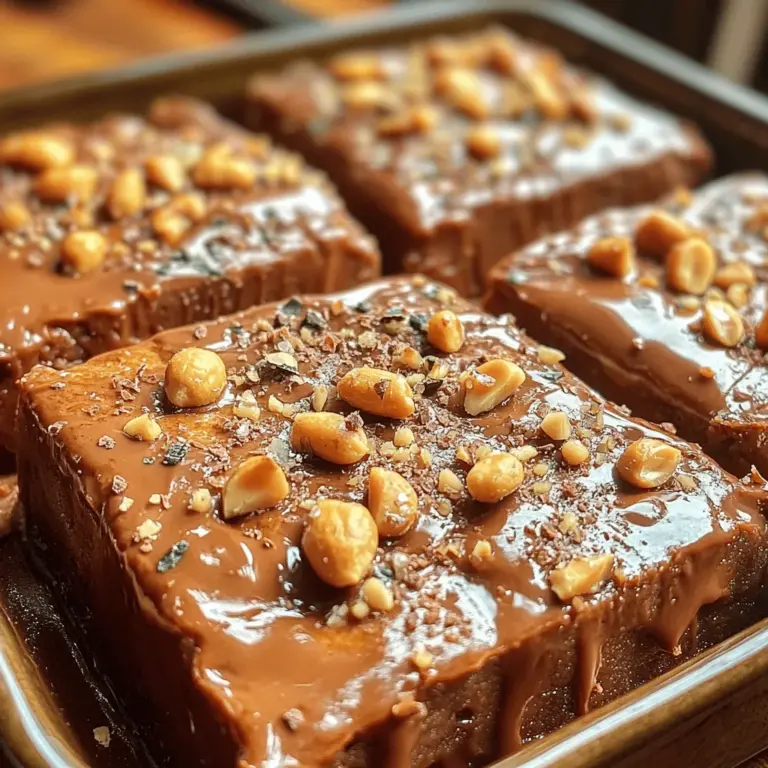
Finally, let’s talk about toppings. While our fudge is delicious on its own, adding toppings can enhance both its texture and presentation. Chopped peanuts provide a delightful crunch that contrasts with the creamy fudge, while a sprinkle of flaky sea salt adds a gourmet touch and intensifies the flavors. These toppings not only make the fudge look more enticing but also elevate the overall tasting experience.
Step-by-Step Process of Making Chocolate Peanut Butter Fudge
Now that we’ve covered the essential ingredients, let’s move on to the step-by-step process of making this decadent chocolate peanut butter fudge.
Preparing the Dish
Before you get started with the actual fudge-making process, it’s crucial to prepare your baking dish properly. Begin by selecting an 8-inch square baking dish or an equivalent size that suits your preferences. Lining the dish with parchment paper is highly recommended, as it aids in both removing the fudge easily and ensuring that it doesn’t stick to the sides.
To line the dish, cut a piece of parchment paper large enough to cover the bottom and sides of the dish, allowing some overhang for easy lifting later. Lightly grease the parchment paper with cooking spray or a small amount of butter to prevent sticking. This little step will save you time and frustration when it comes time to cut and serve your fudge.
Melting the Chocolate and Peanut Butter
Once your dish is prepared, it’s time to melt the chocolate and peanut butter together. In a medium-sized microwave-safe bowl, combine the semi-sweet chocolate chips and creamy peanut butter. Microwave the mixture in 30-second intervals, stirring between each interval to ensure even melting and prevent the chocolate from burning.
Begin by microwaving for 30 seconds, then remove the bowl and stir. If the chocolate is not fully melted, return it to the microwave for another 30 seconds. Continue this process until the mixture is smooth and fully melted. This method is preferable to melting over direct heat, as it helps maintain the integrity of the chocolate without risking scorching.
Incorporating Sweetened Condensed Milk
After your chocolate and peanut butter mixture is smooth, it’s time to add in the sweetened condensed milk. Pour the sweetened condensed milk into the melted chocolate-peanut butter mixture, stirring until everything is well combined. The mixture will thicken slightly, creating a rich and creamy fudge batter.
At this point, you can also add in the vanilla extract and a pinch of salt. Stir well to ensure that all the flavors are evenly distributed throughout the fudge mixture. If you choose to include powdered sugar for extra sweetness, sift it in gradually, mixing thoroughly to avoid lumps.
Pouring the Mixture into the Prepared Dish
With your fudge batter ready, it’s time to pour it into the prepared baking dish. Use a spatula to scrape every last bit of the mixture from the bowl and into the dish, spreading it evenly to create a smooth surface. Gently tap the dish on the counter to remove any air bubbles and ensure an even texture.
Once the mixture is evenly distributed, you can add your toppings. Sprinkle chopped peanuts across the top of the fudge, pressing them gently into the surface. If you’re using flaky sea salt, sprinkle it over the top now for that gourmet touch.
Setting the Fudge
Now, it’s time for the fudge to set. Place the baking dish in the refrigerator for at least 2 hours or until the fudge is firm to the touch. The cool temperature will help the fudge solidify properly, ensuring that it holds its shape when cut into squares.
Once set, remove the fudge from the refrigerator and use the overhanging parchment paper to lift it out of the dish. Transfer it to a cutting board and slice it into squares or rectangles, depending on your preference.
With these steps, you’re well on your way to creating a batch of Decadent Chocolate Peanut Butter Fudge that is sure to impress friends and family alike. Stay tuned for the next part of this article, where we’ll dive deeper into essential tips for achieving the best results and answer some common questions about fudge-making.

Melting the Chocolate
To create the perfect Decadent Chocolate Peanut Butter Fudge, the first step is melting the chocolate. Properly melting chocolate is essential to achieving a creamy texture that blends beautifully with peanut butter. Here’s how to do it without burning:
1. Choose the Right Method: You can melt chocolate using a double boiler or in the microwave. The double boiler method is preferred since it offers greater control over the heat. If you choose the microwave, use a microwave-safe bowl.
2. Low Heat is Key: Always melt chocolate over low heat. If using a double boiler, bring water to a simmer, not a boil, to gently heat the chocolate. For the microwave, heat in short bursts of 20-30 seconds, stirring in between to prevent overheating.
3. Watch for Clumps: Stir the chocolate continuously as it begins to melt. This not only helps distribute the heat evenly but also ensures a smooth consistency. If you notice any clumps, continue stirring until they dissolve completely.
4. Remove from Heat at the Right Time: It’s crucial to take the chocolate off the heat before it is fully melted. Residual heat will continue to melt the chocolate, giving you a silky-smooth texture without the risk of burning.
By following these tips, you’ll ensure that your chocolate melts perfectly, laying a strong foundation for the rest of your fudge.
Incorporating Peanut Butter
Once your chocolate is melted and smooth, the next step is to incorporate the peanut butter. This step is critical, as it not only adds flavor but also ensures that your mixture has a cohesive and creamy consistency.
1. Choose the Right Peanut Butter: Use a creamy peanut butter for the best results. Natural peanut butter can be used, but make sure to stir it well to combine the oils before adding it to the chocolate.
2. Mixing Technique: Add the peanut butter to the melted chocolate while it’s still warm. This warmth helps the peanut butter melt into the chocolate more easily.
3. Continuous Stirring: Stir the mixture continuously until the peanut butter is fully incorporated. This will help achieve a smooth and even texture. Avoid the temptation to rush this step; thorough mixing is essential for a well-blended fudge.
4. Taste Check: Once mixed, taste the fudge mixture. If you desire a richer peanut flavor, feel free to add an extra spoonful of peanut butter at this stage, but be careful not to add too much, as it can alter the consistency.
Adding Optional Ingredients
For those who want to elevate their fudge, incorporating powdered sugar can add sweetness and improve the texture. Here’s how to do it effectively:
1. Sifting Powdered Sugar: Before adding powdered sugar to the chocolate-peanut butter mixture, sift it to remove lumps. This ensures a smooth incorporation into the fudge.
2. Gradual Addition: Slowly sprinkle in the powdered sugar while stirring continuously. This gradual approach allows the sugar to dissolve evenly, preventing clumps from forming.
3. Texture Impact: Adding powdered sugar will not only sweeten the fudge but also provide a slightly firmer texture once it sets. If you prefer a softer fudge, you can reduce the amount of sugar or skip it altogether.
4. Experiment with Other Ingredients: You can also consider adding a pinch of salt to enhance the flavor or a splash of vanilla extract for an aromatic touch.
Pouring and Setting the Fudge
Now that your chocolate and peanut butter mixture is ready, it’s time to pour it into a prepared pan to set.
1. Prepare Your Pan: Line an 8×8-inch baking dish with parchment paper, leaving some overhang for easy removal later. This will prevent the fudge from sticking to the pan.
2. Pouring the Mixture: Carefully pour the fudge mixture into the lined pan. Use a spatula to spread it evenly, ensuring that it reaches all corners of the pan.
3. Tapping Out Air Bubbles: After spreading the mixture, gently tap the pan on the counter. This helps release any trapped air bubbles and ensures a smooth surface.
4. Setting Time: Allow the fudge to cool at room temperature for about 30 minutes, then transfer it to the refrigerator. Let it set for at least 2 hours or until firm. The fridge helps the fudge to solidify quickly.
Cooling and Serving
Once your fudge has set, it’s time to cut and serve this delicious treat.
1. Cutting the Fudge: Use a sharp knife to cut the fudge into squares. For cleaner cuts, warm the knife under hot water, then dry it before slicing. This will prevent any sticking and ensure smooth edges.
2. Serving Suggestions: Serve the fudge as is, or dress it up by drizzling melted chocolate or caramel sauce on top. You can also sprinkle chopped nuts or sea salt for added texture and flavor.
3. Presentation: Arrange the fudge squares on a decorative platter or in individual cupcake liners for a more polished presentation at parties.
Tips for Perfect Fudge
Creating the perfect fudge might take a few attempts, especially if you’re new to candy-making. Here are some common mistakes to avoid:
1. Not Stirring Enough: Incomplete mixing can lead to an uneven texture. Make sure to mix until completely smooth.
2. Using the Wrong Type of Chocolate: Stick to high-quality chocolate that’s specifically designed for melting, such as chocolate chips or bars labeled as melting chocolate. Avoid using chocolate that contains added ingredients like stabilizers.
3. Skipping the Tapping Step: Tapping the pan is crucial to release air bubbles. Neglecting this step can result in a fudge that has a grainy texture.
4. Experimenting with Toppings: Feel free to personalize your fudge by adding toppings like crushed pretzels, sprinkles, or other candies on top before it sets for a fun and colorful treat.
Storing and Shelf Life
Proper storage of your fudge ensures that it maintains its freshness and flavor.
1. Storage Conditions: Store the fudge in an airtight container at room temperature for up to a week. If you live in a very warm climate, it’s best to keep it in the refrigerator to prevent it from becoming too soft.
2. Freezing for Longevity: If you want to extend the shelf life, fudge can be frozen. Wrap individual squares in plastic wrap and place them in a freezer-safe bag or container. Properly stored, fudge can last up to three months in the freezer.
3. Thawing: When you’re ready to enjoy your frozen fudge, simply transfer it to the refrigerator to thaw overnight. Avoid microwaving it, as this can alter the texture.
Variations of Chocolate Peanut Butter Fudge
Get creative with your fudge by exploring various flavor combinations and ingredient swaps.
1. Alternative Nut Butters: Swap peanut butter for almond butter or cashew butter for a different flavor profile. Each nut butter brings its unique taste and texture, so feel free to experiment.
2. Dark Chocolate Option: For a richer taste, use dark chocolate instead of milk chocolate. This variation pairs beautifully with the creaminess of peanut butter.
3. Flavor Additions: You can elevate your fudge by adding spices like cinnamon or a dash of cayenne for a kick. An infusion of espresso powder can also enhance the chocolate flavor.
4. Seasonal Twists: Add peppermint extract during the holiday season for a festive touch, or incorporate crushed candy canes for a crunchy texture.
Conclusion
Making Decadent Chocolate Peanut Butter Fudge is not only easy but also immensely satisfying. The delightful combination of rich chocolate and creamy peanut butter creates a treat that appeals to both kids and adults alike. Whether you enjoy it yourself or share with family and friends, homemade fudge is sure to bring smiles and joy.
So why not gather your ingredients and start whipping up this delicious fudge? The process is straightforward, and the end result is a creamy, indulgent treat that’s perfect for any occasion. Celebrate the joy of baking and the thrill of sharing homemade goodies with loved ones, all while savoring the rich flavors that make this fudge a timeless favorite. Enjoy every bite!

