Fluffy Herb-Infused No-Knead Focaccia Bread
 Save
Save
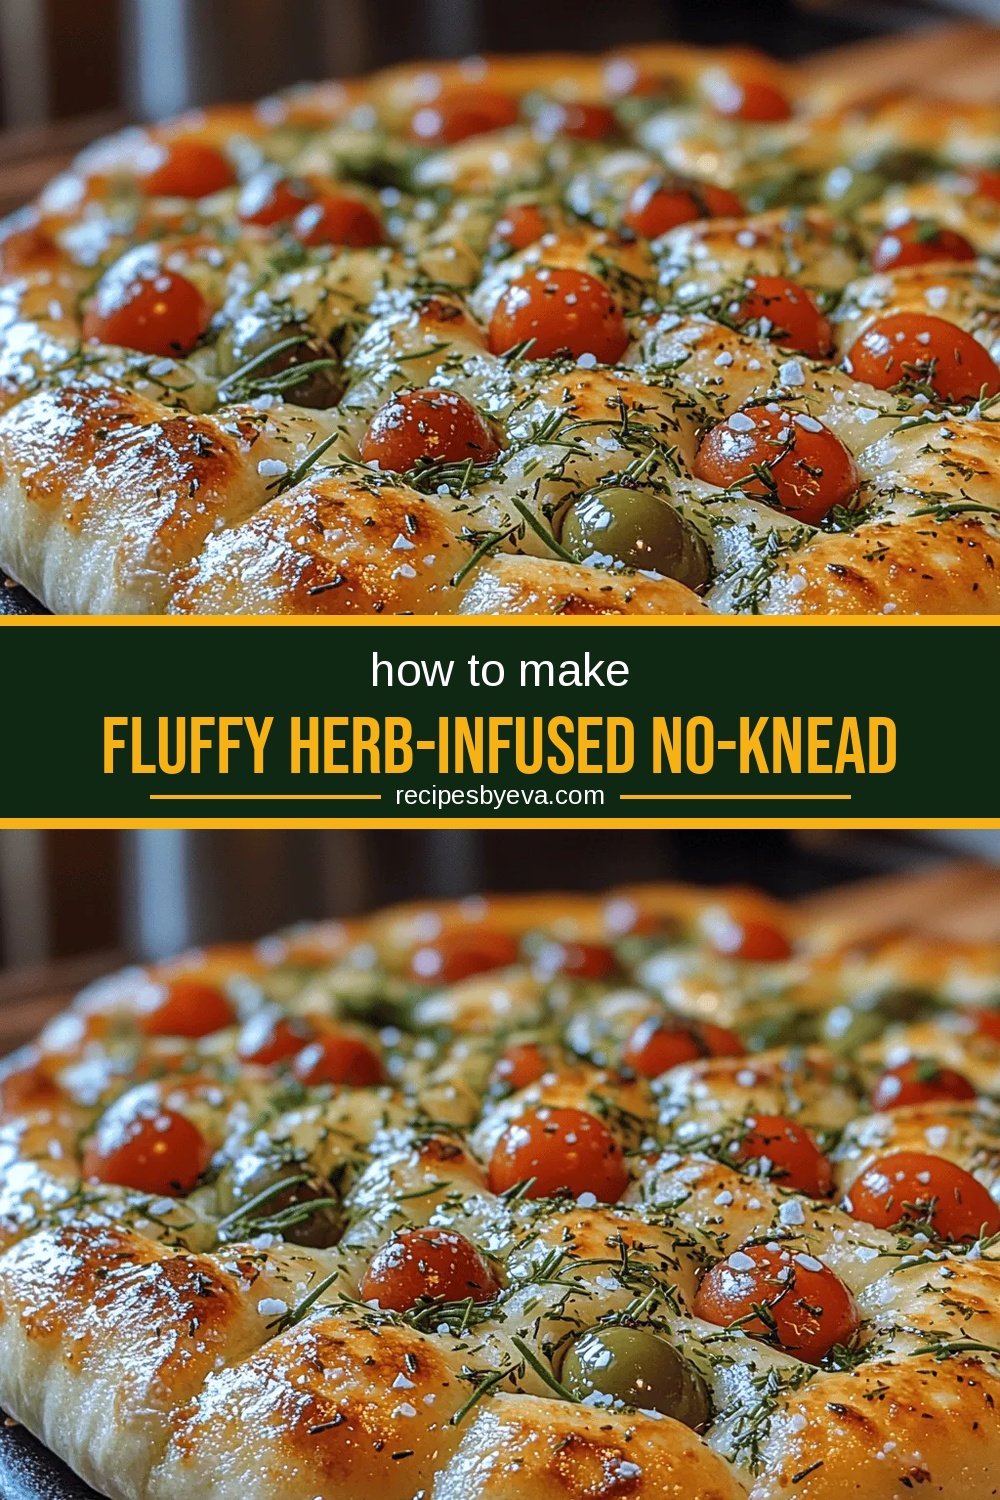
Imagine pulling a golden‑brown focaccia from the oven, its surface speckled with fragrant herbs and a light, airy crumb that practically melts in your mouth. This Fluffy Herb‑Infused No‑Knead Focaccia delivers that bakery‑level experience without the intimidation of traditional dough‑handling.
What makes it special is the magic of a high‑hydration batter that requires no kneading, yet rises into a cloud‑like interior. Fresh rosemary, thyme, and a splash of extra‑virgin olive oil give each bite a bright, herbaceous punch.
Busy families, weekend brunch lovers, and even seasoned home bakers will adore this loaf. Serve it as a side for dinner, a base for open‑faced sandwiches, or simply enjoy it warm with a drizzle of olive oil and sea salt.
The process is straightforward: mix the wet and dry components, let the dough rest and rise, stretch it into a pan, dot with herbs, and bake until the crust is crisp and the interior is pillowy. Minimal effort, maximum flavor.
Why You'll Love This Recipe
Zero‑Knead Simplicity: The high‑hydration dough develops gluten on its own, so you skip the labor‑intensive kneading step while still getting a light, airy crumb.
Herb‑Forward Flavor: Fresh rosemary, thyme, and a pinch of oregano infuse the bread with an aromatic profile that brightens any meal.
Versatile Serving: Whether you use it as a side, a sandwich base, or a snack with olive oil, this focaccia adapts to any occasion.
Impressively Rustic: A crisp, blistered crust and a tender interior give a homemade look and taste that rivals artisanal bakery loaves.
Tips & Tricks
Perfecting the Recipe
Use Bread Flour. The higher protein content creates more gluten, giving the focaccia its signature chew and airy crumb.
Temperature Control. Keep the water between 105‑110°F; too hot kills the yeast, too cool slows fermentation dramatically.
Gentle Handling. When transferring the dough, avoid deflating the bubbles—use a lightly oiled spatula and move slowly.
Steam Boost. Place a shallow pan of hot water on the lower rack while baking to promote a crisp, blistered crust.
Flavor Enhancements
Add a handful of grated Parmesan or Pecorino to the olive‑oil mixture for a salty, umami lift. A drizzle of balsamic reduction after baking introduces a sweet‑tart contrast that brightens the herb flavors.
Common Mistakes to Avoid
Do not over‑mix the batter; excessive agitation can break down the gluten network and lead to a dense loaf. Also, avoid under‑baking—an under‑cooked interior will feel gummy rather than fluffy.
Pro Tips
Cold Fermentation. After the initial 12‑hour rise, refrigerate the dough overnight for deeper flavor development and a chewier crust.
Use a Pizza Stone. Preheat a pizza stone and slide the oiled pan onto it; the stone delivers even heat for a perfectly blistered top.
Finish with Fresh Herbs. Sprinkle a few extra rosemary needles and thyme leaves right after baking for a burst of fresh aroma.
Cut with a Sharp Bench Knife. A clean, sharp blade ensures neat squares without tearing the delicate crumb.
Variations
Ingredient Swaps
Swap the rosemary and thyme for Italian seasoning, sage, or even fresh basil for a different herb profile. Replace cherry tomatoes with thinly sliced red onions or caramelized onions for a sweeter note. For a Mediterranean twist, add crumbled feta and sliced kalamata olives.
Dietary Adjustments
Use a gluten‑free flour blend that contains xanthan gum to mimic bread flour’s elasticity. Substitute olive oil with avocado oil for a neutral‑flavored, high‑smoke‑point alternative. To keep it vegan, simply omit any cheese toppings and ensure the salt is non‑animal derived.
Serving Suggestions
Serve the focaccia alongside a hearty tomato‑basil soup, or use it as a base for a grilled vegetable and mozzarella panini. Pair with a crisp white wine such as Pinot Grigio, or a light lager for a casual dinner.
Storage Info
Leftover Storage
Allow any leftovers to cool completely, then wrap the focaccia tightly in plastic wrap followed by a foil layer. Store in an airtight container in the refrigerator for up to 4 days. For longer keeping, freeze wrapped portions for up to 3 months; label with the date to track freshness.
Reheating Instructions
Reheat refrigerated slices in a 350°F (175°C) oven for 8‑10 minutes, or until the crust regains its crispness. For frozen pieces, bake at 375°F (190°C) for 12‑15 minutes, covered with foil for the first half to prevent drying. A quick splash of olive oil before reheating revives the herb‑infused flavor.
Frequently Asked Questions
Can I make the focaccia a day ahead?
What if I don’t have a cast‑iron skillet?
How do I know when the focaccia is fully baked?
Can I add cheese to the focaccia without making it soggy?
This Fluffy Herb‑Infused No‑Knead Focaccia brings bakery‑quality bread to your kitchen with minimal effort and maximum flavor. From the simple wet batter to the aromatic herb oil, every step is designed for ease and delicious results. Feel free to experiment with toppings, herbs, or dietary tweaks—making it truly your own. Slice, share, and enjoy the fragrant, airy goodness fresh out of the oven!
Fluffy Herb-Infused No-Knead Focaccia Bread
Delicious Fluffy Herb-Infused No-Knead Focaccia Bread
Ingredients
Dough
- 3 ½ cups (440 g) bread flour
- 1 ½ teaspoons instant yeast
- 1 ½ teaspoons fine sea salt
- 1 ¼ cups (300 ml) lukewarm water
Herb‑Infused Olive Oil
- ¼ cup extra‑virgin olive oil
- 2 tablespoons fresh rosemary, finely chopped
- 2 tablespoons fresh thyme leaves
Toppings & Finishing
- 1 cup cherry tomatoes, halved (optional)
- ¼ cup Kalamata olives, pitted and sliced (optional)
- Coarse sea salt for sprinkling
Instructions
First Rise (Bulk Fermentation)
- Cover & Rest. Cover the bowl tightly with plastic wrap or a damp towel. Let the batter sit at room temperature (70‑75°F) for 12‑18 hours. During this time the dough will dramatically expand, develop bubbles, and take on a honey‑like aroma. This long, slow fermentation builds flavor without any kneading.
- Check Readiness. The dough is ready when it has roughly doubled in size, looks airy, and has a spongy surface. A gentle poke should leave a small indentation that slowly springs back. If the dough hasn’t risen, give it another hour.
Baking
- Preheat Oven. While the dough rests for its final rise (about 30 minutes), preheat your oven to 450°F (230°C). A hot oven ensures the crust puffs up quickly and forms those coveted caramelized bubbles.
- Final Rise. Let the dough sit uncovered in the oiled pan for 30 minutes. It should puff up slightly and become more elastic.
- Bake. Place the pan on the middle rack and bake for 20‑25 minutes, or until the top is deep golden‑brown and the edges are crisp. The interior should sound hollow when tapped.
Similar Recipes
 Appetizers
Easy Pumpkin Curry with Coconut Milk and Veggies
Learn how to make delicious Easy Pumpkin Curry with Coconut Milk and Veggies. Easy recipe with…
 Appetizers
Air Fryer Crispy Coconut Shrimp – A Tropical Delight
Delicious Air Fryer Crispy Coconut Shrimp – A Tropical Delight
 Appetizers
Sweet & Crunchy Honey Garlic Chicken Bites
Delicious Sweet & Crunchy Honey Garlic Chicken Bites
 Appetizers
Apple Butternut Squash Casserole
Learn how to make delicious Apple Butternut Squash Casserole. Easy recipe with step-by-step instructions.
 Appetizers
Honey Garlic Glazed Meatballs for Special Occasion
Learn how to make delicious Honey Garlic Glazed Meatballs for Special Occasion. Easy recipe with step-by-step…
 Appetizers
Cheesy Mashed Potato Puffs: A Comfort Food Delight
Delicious Cheesy Mashed Potato Puffs: A Comfort Food Delight
 Appetizers
Crunchy Asian Slaw with Peanuts: A Refreshing Delight
Delicious Crunchy Asian Slaw with Peanuts: A Refreshing Delight
 Appetizers
Crunchy Ranch-Flavored Potato Wedges Recipe: A Complete Guide
Delicious Crunchy Ranch-Flavored Potato Wedges Recipe: A Complete Guide

Eva
I cook these recipes at home before they ever land here — simple ingredients, clear steps.