Indulge in Autumn with Spiced Pumpkin Maple Scones: A Delicious Recipe
 Save
Save
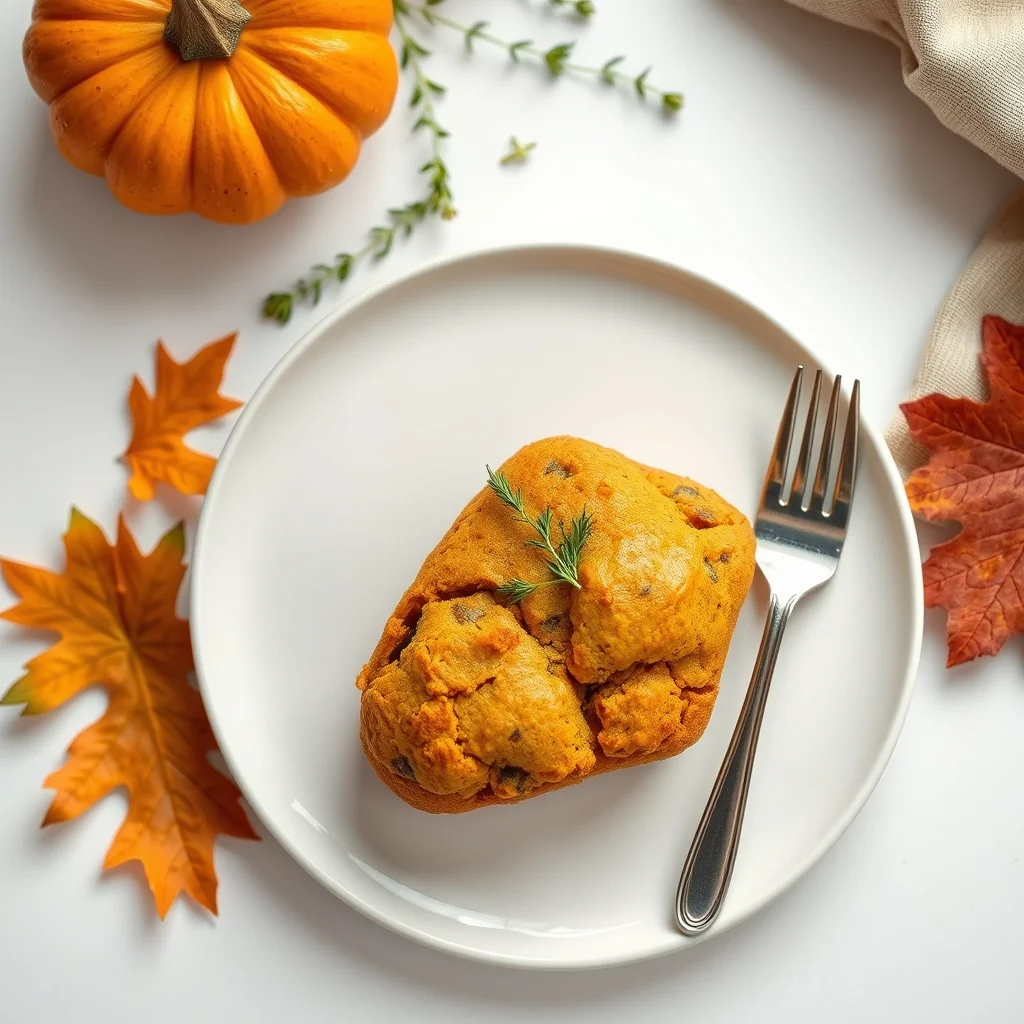
When the first chill of autumn settles in, there’s nothing quite like the scent of warm spices drifting from the oven. Our Spiced Pumpkin Maple Scones capture that cozy feeling in every bite, turning a simple tea‑time treat into a memorable dinner starter.
What makes these scones special is the marriage of silky pumpkin puree, rich maple syrup, and a blend of classic fall spices that creates a sweet‑savory harmony you won’t find in ordinary bakery fare.
Family members who love comforting flavors, friends seeking a unique side dish, and anyone craving a seasonal indulgence will adore these scones—perfect for a relaxed dinner, a festive gathering, or even a brunch‑turned‑dinner.
The process is straightforward: combine dry ingredients, whisk wet components, fold everything together, cut the dough into wedges, and bake until golden. In just under an hour you’ll have a tray of aromatic scones ready to wow your table.
Why You'll Love This Recipe
Autumnal Aromatics: The blend of cinnamon, nutmeg, ginger, and cloves creates a fragrant profile that instantly transports you to a crisp fall morning.
Maple Sweetness: Real maple syrup adds natural caramel notes without overwhelming the palate, balancing the earthiness of pumpkin.
Easy to Scale: Whether you need a single batch for a small dinner or double for a holiday spread, the recipe scales flawlessly.
Versatile Serving: Serve warm with butter, crumble over salads, or pair with roasted meats for a surprising sweet‑savory twist.
Tips & Tricks
Perfecting the Recipe
Cold Butter Technique: Keep the butter chilled until the moment you add it. Small butter chunks melt during baking, creating flaky layers.
Gentle Folding: Use a rubber spatula and turn the dough over just until ingredients are incorporated; this preserves a tender crumb.
Even Thickness: Pat the dough to a uniform 1‑inch thickness so all wedges bake evenly and achieve consistent rise.
Oven Position: Place the rack in the middle of the oven; this prevents the bottoms from browning too quickly while the tops stay pale.
Flavor Enhancements
Add a teaspoon of orange zest to the wet mix for a citrus lift, or stir in a pinch of smoked paprika for subtle depth. A drizzle of browned butter before serving elevates the nutty notes dramatically.
Common Mistakes to Avoid
Do not over‑mix the dough; doing so develops gluten and yields dense scones. Also, avoid opening the oven door during the first 15 minutes of baking, as temperature loss can cause a collapsed rise.
Pro Tips
Use a Kitchen Scale: Weighing flour and butter ensures consistency batch after batch, especially important for delicate baked goods.
Pre‑heat Baking Sheet: Placing the dough on a hot sheet gives an instant burst of steam, helping the tops set quickly and stay crisp.
Finish with Sea Salt: A light sprinkle of flaky sea salt right after baking balances the maple sweetness and adds a gourmet touch.
Store Warm: If serving a crowd, keep baked scones in a low oven (200°F) on a baking rack to retain moisture without over‑cooking.
Variations
Ingredient Swaps
Swap pumpkin for sweet potato puree for a deeper earthy flavor, or use butternut squash for a slightly sweeter profile. Replace maple syrup with honey or agave nectar if you prefer a lighter sweetness. For a nut‑free version, omit walnuts and add dried cranberries instead.
Dietary Adjustments
Use gluten‑free all‑purpose flour or almond flour for a grain‑free option, and substitute dairy butter with coconut oil for dairy‑free needs. Vegan diners can replace the egg with a flax‑egg (1 Tbsp ground flax + 3 Tbsp water) and use plant‑based milk.
Serving Suggestions
Pair the scones with a dollop of whipped ricotta or a smear of cream cheese mixed with a touch of honey. They also shine alongside a savory roasted chicken, or as a side to a hearty pumpkin soup. A simple drizzle of extra maple syrup and a sprinkle of toasted pumpkin seeds adds visual flair.
Storage Info
Leftover Storage
Allow the scones to cool completely, then place them in an airtight container or a zip‑top bag. Store in the refrigerator for up to 4 days. For longer keeping, wrap each scone in parchment and freeze; they’ll maintain quality for up to 3 months.
Reheating Instructions
Reheat frozen or refrigerated scones in a pre‑heated 350°F oven for 8‑10 minutes, or until warmed through and the edges crisp again. Microwaving works in a pinch—heat for 30‑45 seconds, then finish under a broiler for a few seconds to restore the golden crust.
Frequently Asked Questions
Can I make these scones ahead of time?
What if I don’t have fresh pumpkin puree?
How do I keep the scones from getting soggy?
Can I add a glaze or frosting?
These Spiced Pumpkin Maple Scones bring the essence of autumn straight to your dinner table with minimal effort. By following the detailed steps, using the right ingredients, and applying the pro tips, you’ll consistently produce golden, tender scones that wow every guest. Feel free to experiment with swaps, adjust for dietary needs, and pair them with your favorite mains. Enjoy the warm, comforting flavors of the season—one delicious bite at a time.
Indulge in Autumn with Spiced Pumpkin Maple Scones: A Delicious Recipe
Delicious Indulge in Autumn with Spiced Pumpkin Maple Scones: A Delicious Recipe
Ingredients
Dry Ingredients
- 2 ½ cups all‑purpose flour
- 1 ½ teaspoons baking powder
- ½ teaspoon baking soda
- ¼ teaspoon fine sea salt
- 1 ½ teaspoons ground cinnamon
- ½ teaspoon ground nutmeg
- ¼ teaspoon ground ginger
- ¼ teaspoon ground cloves
Wet Ingredients
- ¾ cup pumpkin puree (canned or fresh)
- ¼ cup pure maple syrup
- ¼ cup unsalted butter, melted and cooled
- ¼ cup whole milk
- 1 large egg, lightly beaten
- 2 tablespoons granulated sugar
Add‑Ins & Optional Toppings
- ½ cup chopped walnuts or pecans (optional)
- Extra maple syrup for drizzling (optional)
Instructions
Bringing It All Together
- Mix wet into dry. Make a well in the center of the dry mixture and pour in the wet blend. Gently fold with a spatula until just combined—over‑mixing develops gluten, which can make scones tough.
- Incorporate add‑ins. If using walnuts, fold them in now. The nuts should be evenly scattered, providing bite‑size bursts of flavor without sinking to the bottom.
- Shape the dough. Turn the dough onto a lightly floured surface, pat it into a 1‑inch thick circle. Avoid excessive handling; the dough should stay slightly sticky but manageable.
- Cut wedges. Using a sharp knife, cut the circle into 8‑12 equal wedges. Transfer each wedge to a parchment‑lined baking sheet, leaving a small gap for even browning.
Similar Recipes
 Breakfast
Cherry Bliss Cheesecake Stuffed French Toast: A Morning Indulgence
Delicious Cherry Bliss Cheesecake Stuffed French Toast: A Morning Indulgence
 Breakfast
Spicy Hatch Chili Breakfast Taquitos: The Ultimate Recipe Guide
Delicious Spicy Hatch Chili Breakfast Taquitos: The Ultimate Recipe Guide
 Breakfast
Apple Cinnamon French Toast Sticks
Delicious Apple Cinnamon French Toast Sticks
 Breakfast
Avocado Cloud Toasts – A Fluffy Delight
Delicious Avocado Cloud Toasts – A Fluffy Delight
 Breakfast
Fluffy Banana Chocolate Chip Muffins Recipe
Delicious Fluffy Banana Chocolate Chip Muffins Recipe
 Breakfast
Bavarian Bliss Pretzels: A Taste of Germany
Delicious Bavarian Bliss Pretzels: A Taste of Germany
 Breakfast
warm breakfasts with slow cooker oatmeal and seasonal citrus fruits
Start your day with warm slow cooker oatmeal and seasonal citrus fruits, get the easy recipe…
 Breakfast
Savory Eggs Benedict Casserole: A Delicious and Convenient Twist on a Classic
Delicious Savory Eggs Benedict Casserole: A Delicious and Convenient Twist on a Classic

Eva
I cook these recipes at home before they ever land here — simple ingredients, clear steps.