
In the world of quick and satisfying meals, few dishes can rival the appeal of a Crispy Chicken Wrap Fiesta. This delightful wrap combines succulent, crispy chicken with a medley of fresh vegetables and flavorful sauces, creating a meal that is not only delicious but also incredibly versatile. Whether you’re hosting a casual family dinner, preparing for a picnic, or simply craving something hearty yet easy to make, this recipe checks all the boxes. Its adaptability allows you to cater to various tastes and dietary preferences, making it a family favorite that can be customized with different sauces, veggies, or even alternative proteins.
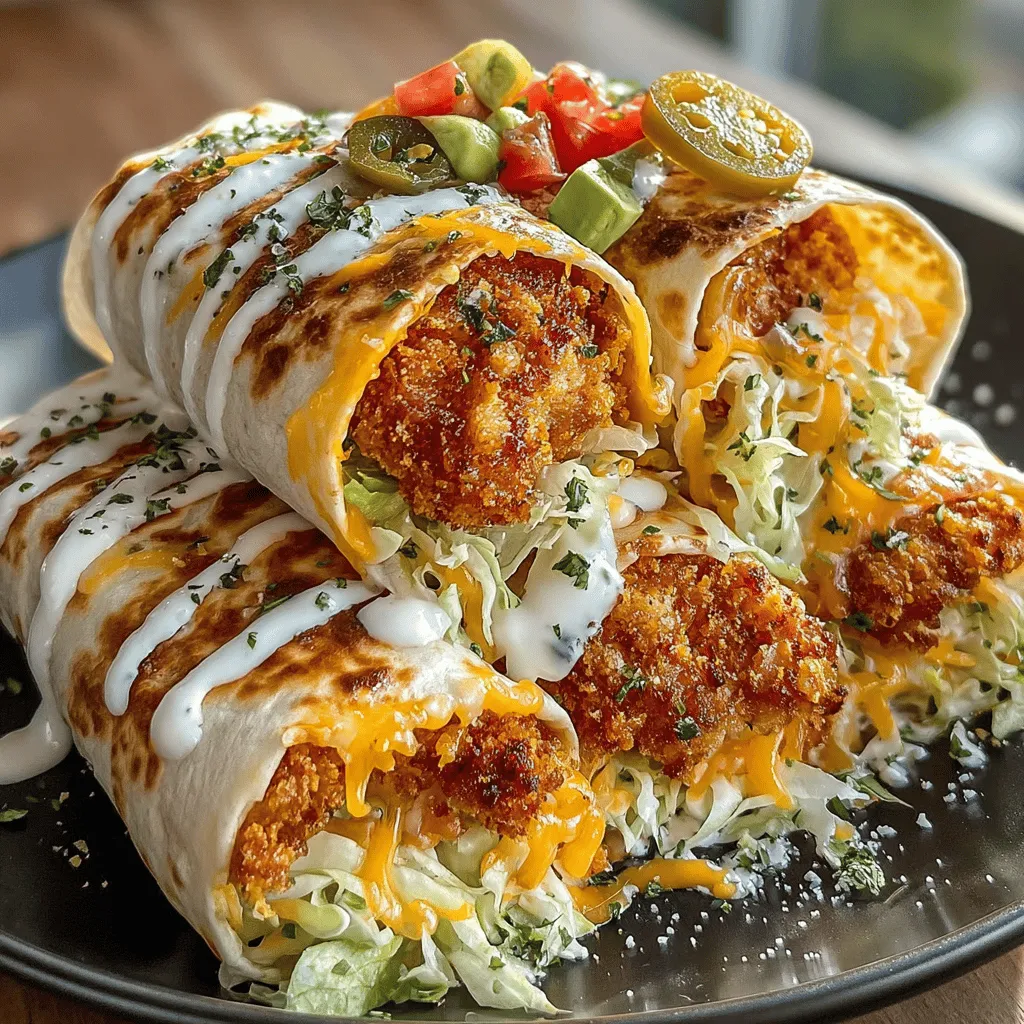
The Crispy Chicken Wrap Fiesta is more than just a dish; it’s a culinary celebration, bringing together vibrant flavors and textures that appeal to everyone. Imagine biting into a crispy, golden chicken breast enveloped in a warm tortilla, accompanied by crisp lettuce, juicy tomatoes, and a drizzle of your favorite sauce. The contrast of textures—the crunch of the chicken, the freshness of the vegetables, and the softness of the wrap—creates a symphony of flavors that is both satisfying and exciting.
Understanding the Ingredients
To create the perfect Crispy Chicken Wrap Fiesta, it’s essential to understand the key ingredients that contribute to its exceptional taste and texture.
Chicken Breasts
At the heart of this wrap is the chicken. Selecting high-quality, boneless, skinless chicken breasts is crucial for ensuring tenderness and flavor. Fresh chicken breasts not only provide a lean protein source but also serve as a blank canvas for the spices and marinades that will elevate the dish. Opting for organic or free-range chicken can enhance the flavor and nutritional value, making your wrap even more wholesome.
Buttermilk
One of the secrets to achieving juicy and flavorful chicken lies in the marinating process with buttermilk. Buttermilk is slightly acidic, which helps to tenderize the meat while infusing it with moisture and flavor. The longer the chicken marinates in buttermilk, the more pronounced the taste and tenderness will be. This step is vital, as it ensures that each bite of chicken is succulent and packed with flavor, preventing it from becoming dry during the cooking process.
Flour and Panko Breadcrumbs
The breading of the chicken is where the magic happens. A combination of all-purpose flour and panko breadcrumbs creates a perfect balance of texture. The flour helps the egg wash adhere to the chicken, providing a base layer that traps moisture and flavor. Meanwhile, panko breadcrumbs are larger and coarser than regular breadcrumbs, resulting in an extra crispy coating. This delightful crunch is what makes each bite of the wrap satisfying and adds a layer of complexity to the overall experience.
Spices and Seasonings
To ensure that the chicken is bursting with flavor, a thoughtful blend of spices and seasonings is essential. Common ingredients like paprika, garlic powder, onion powder, and cayenne pepper not only enhance the taste but also contribute to the golden-brown color of the chicken. The smokiness from the paprika, combined with the warming heat of cayenne, creates a depth of flavor that elevates the entire dish. Adjusting the spice levels allows you to cater to different palates, making it easy to create a version that suits everyone.
Fresh Vegetables and Toppings
No wrap is complete without fresh vegetables and toppings. Crisp lettuce, ripe tomatoes, and optional ingredients like avocado and jalapeños not only add nutritional value but also contribute to the overall flavor profile. Fresh toppings provide a refreshing contrast to the crispy chicken, ensuring that each bite is a delightful combination of crunch and flavor. Feel free to get creative with the toppings—consider adding shredded cheese, pickles, or even a zesty slaw for a unique twist on the classic wrap.
Marinating the Chicken
The marination process is a critical step that significantly impacts the final outcome of the Crispy Chicken Wrap. Understanding the science behind marinating can help you achieve the best results. When chicken is soaked in a marinade, the acidic components, such as buttermilk, begin to break down the proteins in the meat. This process helps tenderize the chicken, making it more enjoyable to eat.
For optimal flavor infusion, marinating the chicken for at least 30 minutes is recommended; however, for those who have the time, letting it sit for several hours or even overnight can yield even more flavorful results. The longer the chicken soaks in the buttermilk mixture, the more it absorbs the flavors, resulting in a juicier and tastier meal.
If you’re looking to experiment, you can also add herbs or spices to the marinade to create different flavor profiles. Consider adding a splash of hot sauce for a spicy kick or fresh herbs like thyme or rosemary for a more aromatic experience.
Setting Up the Breading Station
Creating an organized breading station is essential for achieving that perfect crispy coating on your chicken. Here’s how to set it up effectively:
1. Prepare the Ingredients: Start by laying out your chicken pieces, a bowl of seasoned flour, a bowl of beaten eggs, and a bowl of panko breadcrumbs. Having everything within reach will streamline the breading process and reduce mess.
2. Breading Technique: Begin by dredging each chicken piece in the seasoned flour, ensuring it is evenly coated. Shake off any excess flour, then dip it into the egg wash, allowing it to become completely covered. Finally, roll the chicken in the panko breadcrumbs, pressing gently to ensure the crumbs adhere well. This systematic approach helps to create an even coating, which is crucial for achieving that desired crunchiness.
3. Rest Before Cooking: Once breaded, let the chicken rest for about 5-10 minutes. This brief pause allows the coating to set, which helps it stay intact during cooking and enhances the crispiness.
Cooking the Chicken to Perfection
The cooking method you choose will greatly influence the final texture and flavor of your Crispy Chicken Wrap. There are several methods to consider, each with its advantages.
1. Frying: For the ultimate crispy texture, deep-frying the breaded chicken in hot oil is the way to go. Ensure the oil is preheated to around 350°F (175°C) for optimal frying. Cook the chicken in batches, being careful not to overcrowd the pan. Fry until golden brown and cooked through, about 4-5 minutes per side. This method delivers a satisfying crunch that is hard to replicate.
2. Baking: For a healthier alternative, baking the chicken is an excellent option. Preheat your oven to 425°F (220°C) and place the breaded chicken on a wire rack set over a baking sheet. This allows air to circulate around the chicken, promoting even cooking and crispiness. Bake for about 20-25 minutes or until the chicken reaches an internal temperature of 165°F (74°C).
3. Air Frying: If you’re looking for a compromise between frying and baking, consider using an air fryer. Preheat the air fryer and cook the chicken in a single layer, turning halfway through. This method produces a crispy exterior with less oil, making it a healthier choice without sacrificing flavor.
Each cooking method has its unique benefits, and the choice ultimately depends on your preference for texture and cooking time. Regardless of the method you choose, the goal is to ensure that the chicken is cooked to perfection, resulting in a delicious and satisfying wrap that will delight your family and friends.
By understanding the core ingredients and the importance of each step in the preparation process, you can create a Crispy Chicken Wrap Fiesta that not only tastes amazing but also brings joy to any meal.
Importance of Oil Temperature
When it comes to frying chicken for your Crispy Chicken Wrap Fiesta, the temperature of the oil is crucial. The ideal frying temperature is typically around 350°F to 375°F (175°C to 190°C). This temperature ensures that the chicken cooks evenly while developing a golden-brown crust. If the oil is too cold, the chicken will absorb more oil, resulting in a greasy texture instead of the desired crispiness. Conversely, too hot oil can lead to burnt exteriors and undercooked interiors.
To achieve the perfect temperature, use a kitchen thermometer for accuracy. Alternatively, drop a small piece of chicken into the oil; if it sizzles and bubbles vigorously, you’re in business! Always monitor the temperature throughout the cooking process, as adding multiple pieces of chicken can lower the oil’s temperature, affecting the final product.
Signs of Perfectly Cooked Chicken
To ensure your chicken is cooked to perfection and safe to eat, there are several key indicators to watch for. First, the chicken should reach an internal temperature of 165°F (75°C), which is the safe minimum temperature recommended by food safety guidelines. Use a meat thermometer to check the thickest part of the chicken piece, avoiding bones for an accurate reading.
Additionally, look for a golden-brown crust, a sign that the breading has crisped up nicely. The juices should run clear when the chicken is cut, and there should be no pink meat visible. Paying attention to these details will guarantee that your Crispy Chicken Wraps are not only delicious but also safe for consumption.
Assembling the Wraps
Now that your chicken is perfectly fried and ready to be enjoyed, it’s time to assemble your Crispy Chicken Wraps. The assembly process is simple yet crucial for maximizing flavor and texture. Here’s how to do it:
1. Prepare Your Ingredients: Gather all your ingredients, including fresh vegetables like lettuce, tomatoes, and avocado, as well as any sauces or dressings you plan to use.
2. Lay Out the Tortilla: Start with a large tortilla as your base. A larger tortilla allows for more filling and easier wrapping.
3. Layer the Ingredients: Begin by placing a generous amount of lettuce at the center of the tortilla. Follow this with a few slices of crispy chicken, ensuring an even distribution to avoid any bite being too chicken-heavy or light. Next, add diced tomatoes, sliced avocado, and any other desired toppings such as shredded cheese or jalapeños.
4. Add the Sauce: Drizzle your preferred sauce over the top. A homemade ranch or zesty salsa works beautifully with the crispy chicken and fresh vegetables.
5. Visual Appeal: As you layer the ingredients, aim for a colorful display. The vibrant greens, reds, and yellows not only make the wrap aesthetically pleasing but also enhance the overall eating experience. A well-presented wrap is more appetizing and encourages everyone to dig in.
The Wrapping Technique
Once your fillings are layered, the next step is to wrap your tortilla securely. The wrapping technique is essential to prevent spills and ensure each bite is clean and enjoyable. Here’s how to do it:
1. Fold in the Sides: Start by folding the left and right sides of the tortilla inward over the filling. This will help contain the ingredients.
2. Roll It Up: Begin to roll the tortilla from the bottom up, tucking in the filling as you go. The sides should remain tucked in to keep everything contained.
3. Secure the Wrap: Once fully rolled, you can secure the wrap with a toothpick or wrap it in parchment paper to hold its shape.
4. Toasting Option: For an added layer of flavor and a delightful crunch, consider toasting your wraps on a skillet or grill for a few minutes on each side. This step not only enhances the flavor but also ensures that the tortilla is warm and pliable, making it easier to handle.
Serving Suggestions
Your Crispy Chicken Wrap Fiesta is now ready to serve! Here are some creative serving ideas to elevate your meal:
– Pairing Options: Serve your wraps with sides that complement the flavors. Homemade ranch dip, creamy avocado dip, or zesty salsa can enhance the overall experience. For a more filling meal, consider pairing with sweet potato fries, a fresh garden salad, or even a side of corn on the cob.
– Adjusting Serving Sizes: If you’re hosting a gathering, cut the wraps into smaller portions for easier sharing. This way, guests can sample multiple flavors and enjoy a variety of wraps. For meal prep, consider making larger batches and storing the wraps in the refrigerator for quick lunches throughout the week.
– Presentation Ideas: Arrange the wraps on a large platter, garnished with fresh herbs or additional veggies for color. A side of dips should also be included for a visually appealing and inviting presentation.
Nutritional Information
Understanding the nutritional content of your Crispy Chicken Wrap Fiesta is essential for making informed dietary choices. Here’s a breakdown of the key nutritional components:
– Protein Content: The chicken provides a significant source of protein, which is vital for muscle growth and repair. A typical serving can contain around 25-30 grams of protein, depending on the portion size.
– Vitamins and Minerals: Fresh vegetables such as lettuce, tomatoes, and avocados are packed with essential vitamins and minerals. Leafy greens are high in vitamin K, while tomatoes offer vitamin C and antioxidants. Avocados bring healthy fats into the mix, which can help promote heart health.
Healthier Substitutions
If you’re looking to make your wraps even healthier or cater to specific dietary restrictions, consider these substitutions:
– Lean Proteins: Swap out the fried chicken for grilled chicken or turkey for a lighter option.
– Whole-Grain Tortillas: Use whole-grain or spinach tortillas to increase fiber content.
– Vegetarian Options: For a vegetarian wrap, substitute the chicken with grilled tofu or chickpeas, which provide a good source of protein and fiber.
– Low-Fat Dressings: Opt for low-fat or homemade dressings to control the calorie count while still enjoying great flavors.
Conclusion
The Crispy Chicken Wrap Fiesta is a versatile and delicious meal that can be prepared quickly and enjoyed by the whole family. With its array of flavors, textures, and colors, this recipe not only satisfies hunger but also brings joy to the table. The combination of crispy chicken, fresh vegetables, and vibrant sauces makes it a crowd-pleaser for any occasion.
Cooking is not just about following recipes; it’s about creating memories and sharing wholesome food with loved ones. We encourage you to try this recipe and make it your own by experimenting with different ingredients and flavors. Whether you’re enjoying a casual family dinner, hosting a weekend gathering, or meal prepping for a busy week, these wraps are sure to be a hit. So roll up your sleeves, gather your ingredients, and get ready to indulge in a delightful Crispy Chicken Wrap Fiesta!
